Melbourne Cup millinery in two minutes
Melbourne ladies, if you haven’t got your hat for the race that stops the nation, there’s not much you can do about it now, right? Actually, there is. Make your own in two minutes.

Yes, TWO MINUTES.
Before I explain how to do this, I have to tell you that this DIY is part of a challenge set by Vinnies. The charity recently got a large donation of millinery supplies and challenged some bloggers (including moi!) to create race-worthy headwear. Maybe you’ve already seen what Cintia and Erica have come up with? I love a DIY challenge but received the email about it while I was overseas and only got my millinery kit from Vinnies last Friday. And the spring racing carnival is nearly over! So I thought rather than try to make an elaborate creation, something super quick would be a better idea for any of you out there who desperately need a hat for the Cup (or any other race days).

All you need is an oval hat base and a long scarf. The beauty of this DIY is that it is not only cheap (especially when you find the hat base at Vinnies!) but it is infinitely customisable depending on the scarf or fabric that you use. I’ve shot two versions for this post, with this shorter scarf first.
This is really so easy I hardly need to explain it, but just in case… place the hat base on your head at your preferred angle (experiment in the mirror a bit to see what is most flattering for your face), then place the centre of the scarf at the nape of your neck and bring the ends up on either side of your head. (Use both hands unless you’re trying to take photos for a DIY blog post, as I was!)

Tie the scarf in a knot over the hat base – again, at a flattering angle.

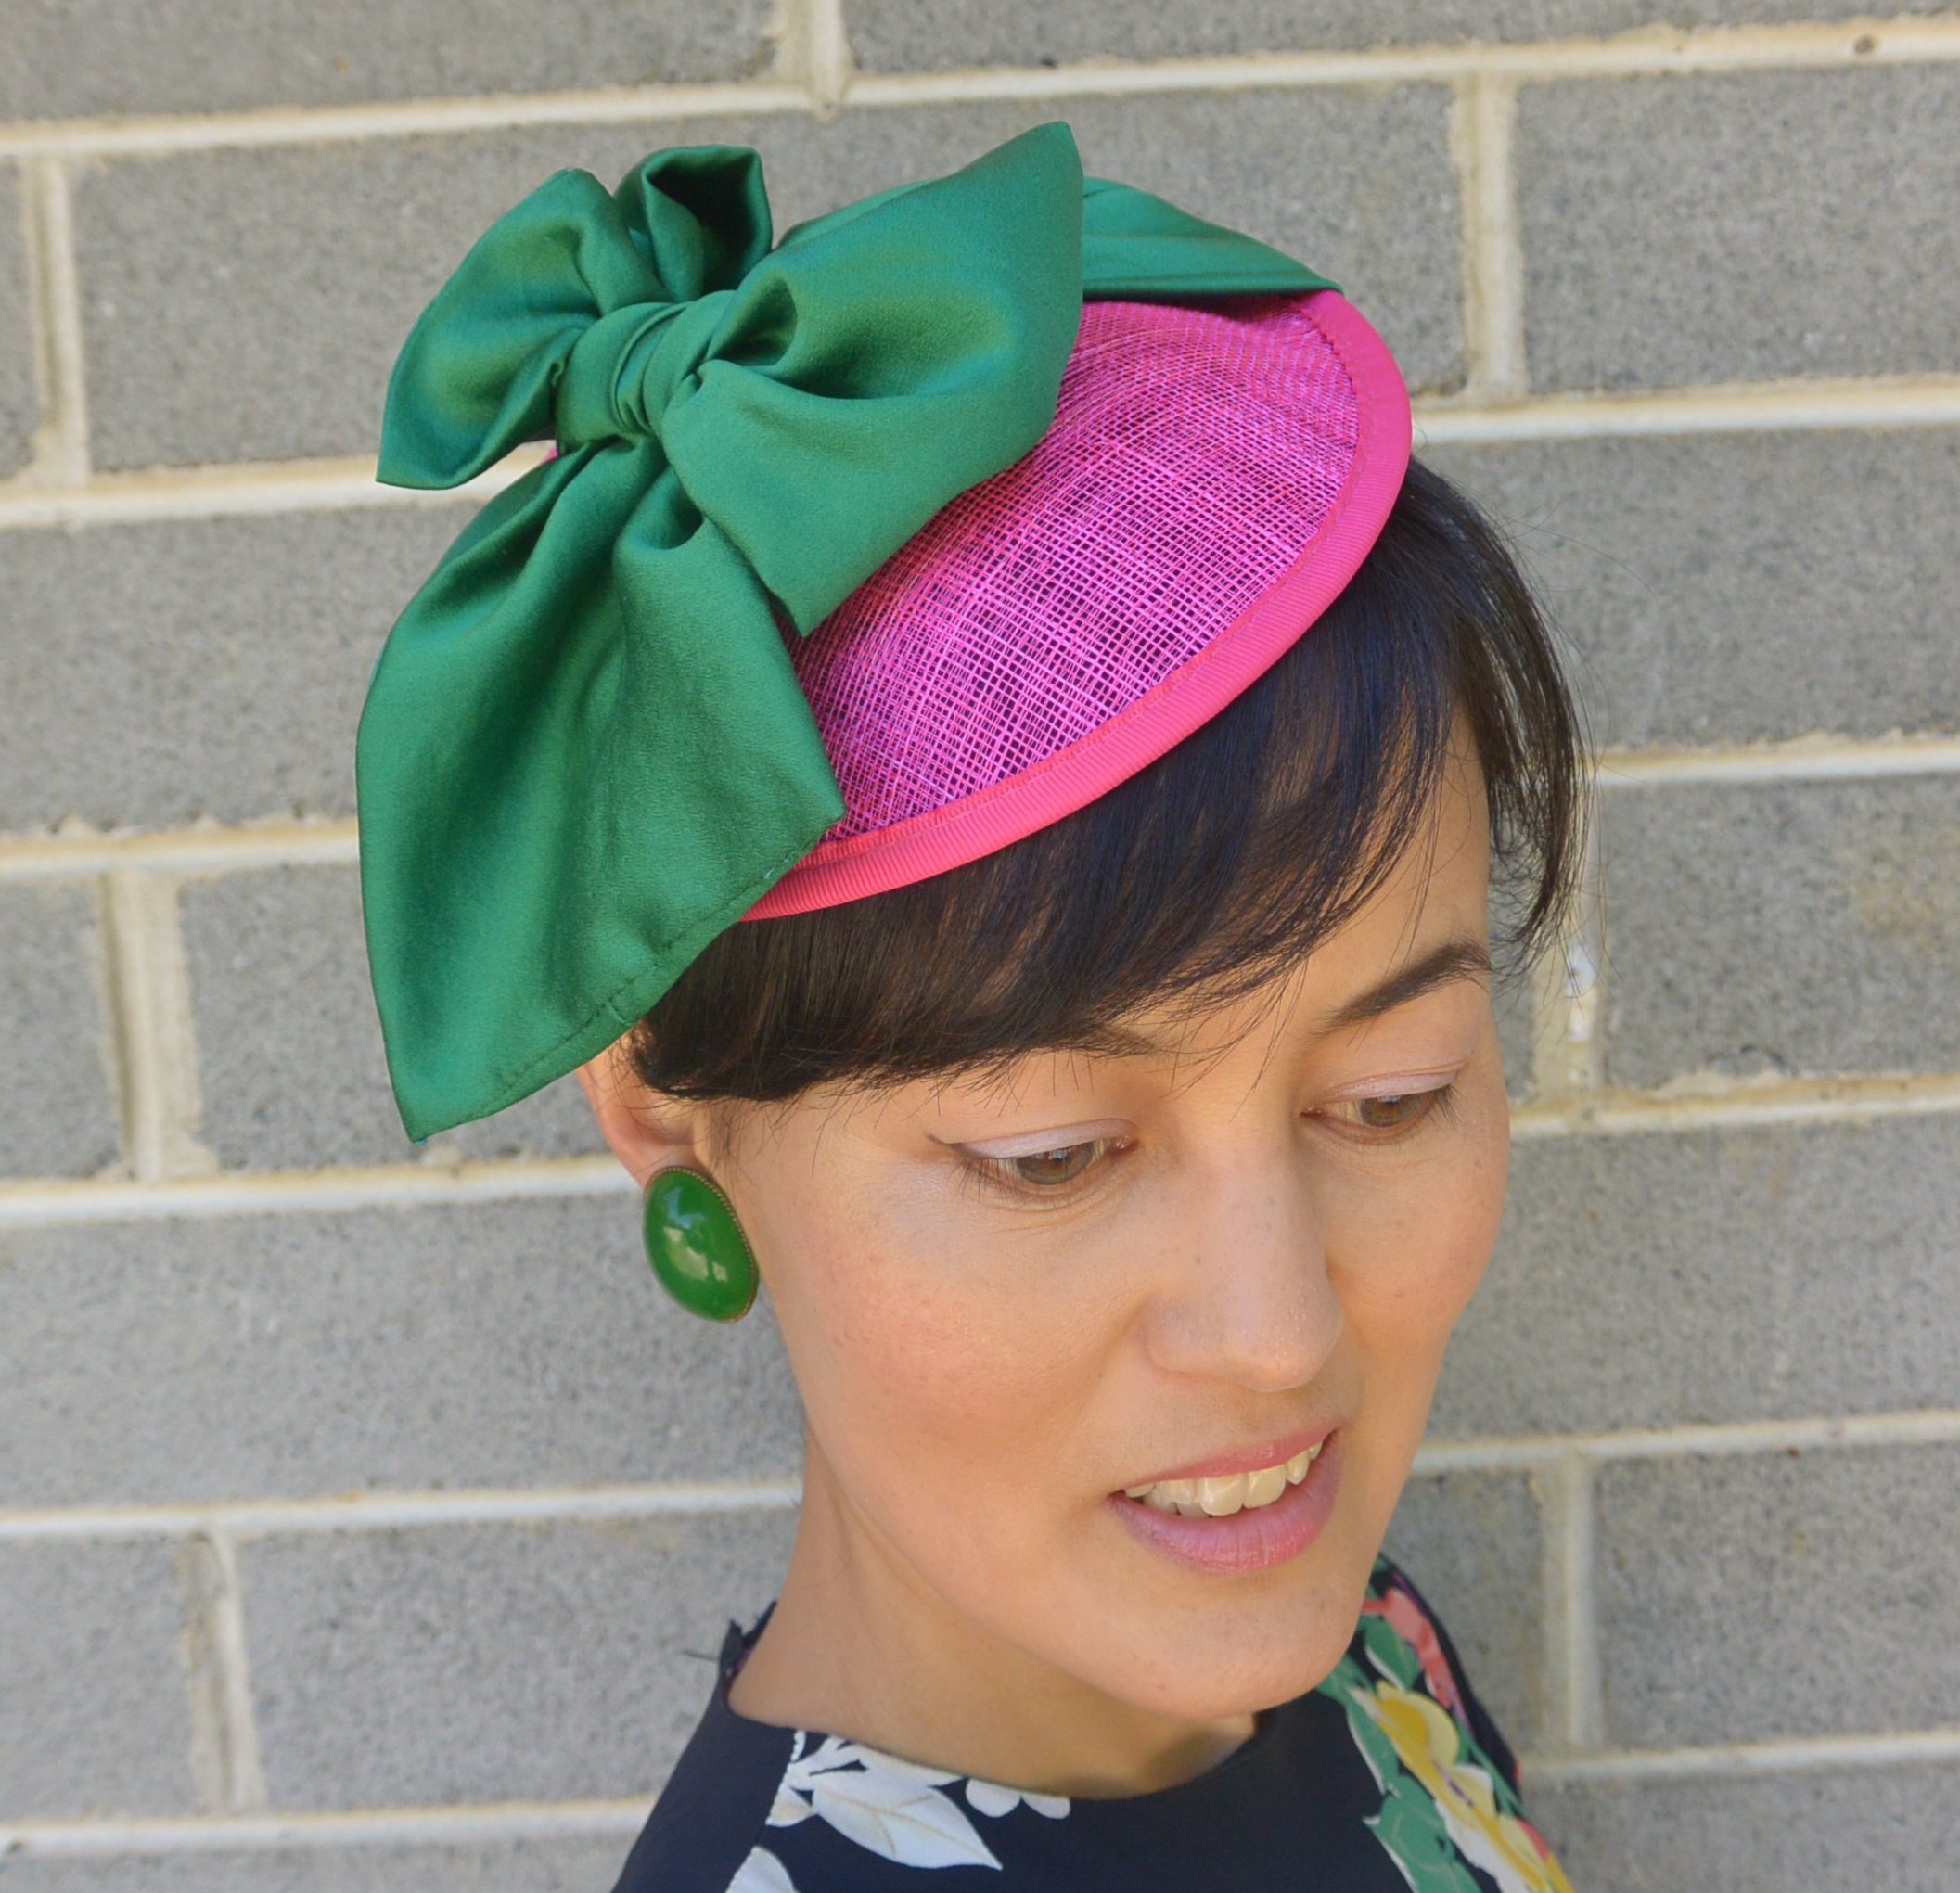
 Ta da… the complete outfit (the dress took *slightly* longer than two minutes to make, admittedly!)!


And now for round two! For this one I used a longer scarf in plain coloured silk rather than a print to achieve a more elegant look.

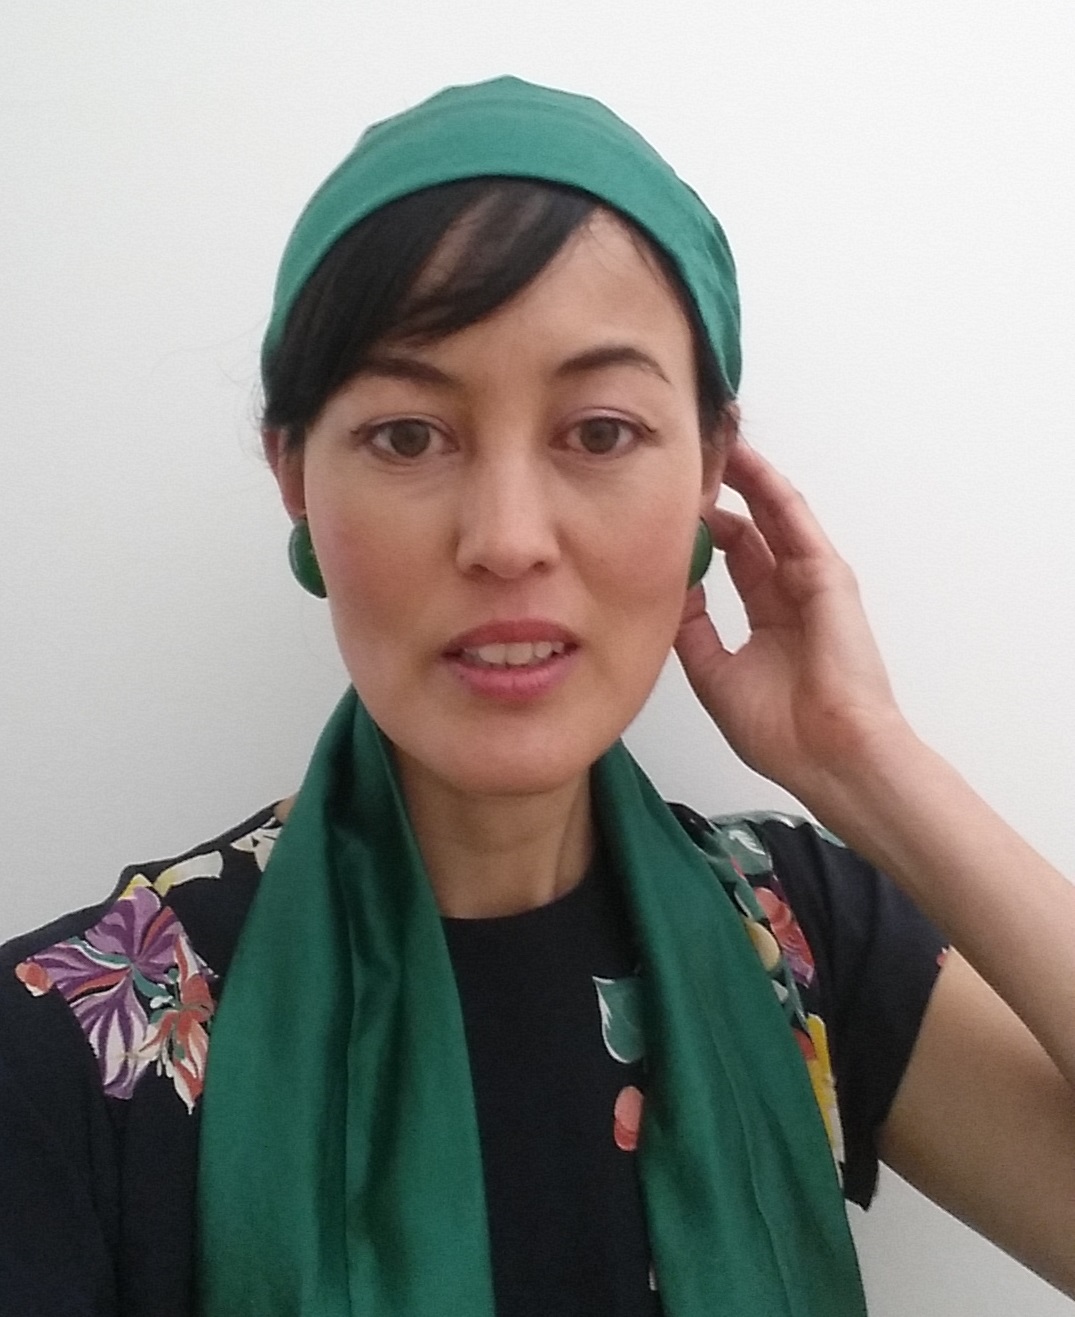
 The how-to is pretty much the same as the first look except for incorporating the longer length of fabric into the design. Firstly, place the centre of the scarf on the top of your head and tie it at the back of your neck.
Now place the hat base over the scarf (again, work out what angle works for you). Bring both sides of the scarf up and tie them together over the top of the hat base.
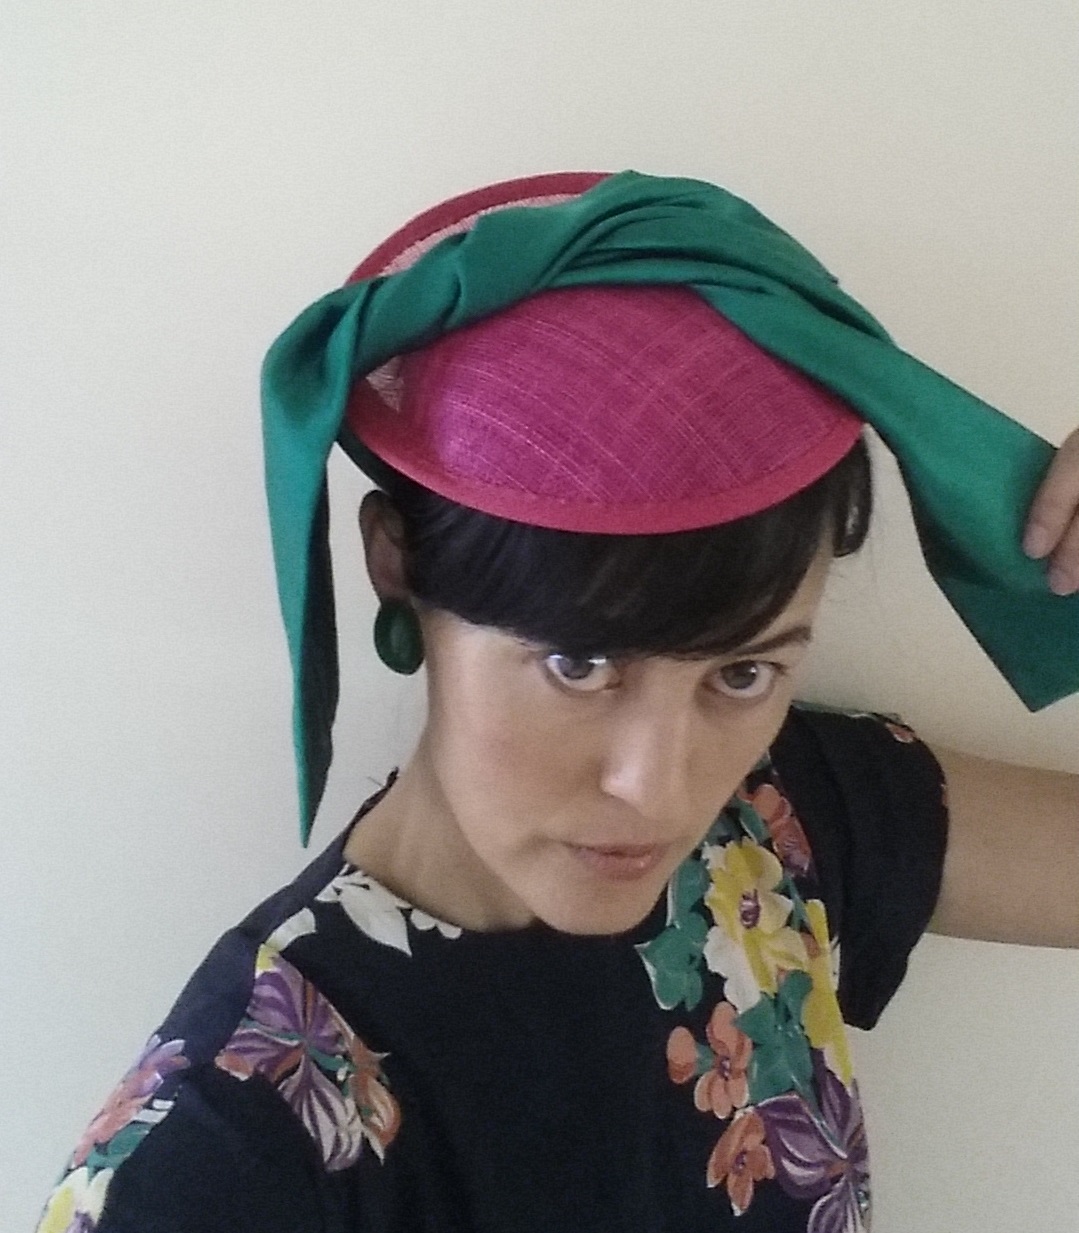 Tie the scarf into a bow on the top or side of the hat base, whichever looks better for your face shape.
You might like to secure the scarf to your head with bobby pins or if you’re really worried about the hat falling off, pin the scarf and hat base together using safety pins – or brooches for extra decoration. But it’s actually pretty stable, I managed to run around after the cat in the backyard while trying to take photos and it didn’t fall off!
I used long rectangular silk scarves for both of these looks but different fabric in different lengths would create completely new styles – if you’re blonde, black netting or tulle would look stunning tied in a blousy bow; floaty gold chiffon, either plain or embroidered in beads, would be beautiful on a brunette… and rather than rectangular scarves, you could use fabric with tapered ends or even wide ribbons for a daintier effect. Of course if you have more time you could also attach silk flowers, artificial fruit, feathers or any other kind of decoration to the hat (the hat base that I used has a kind of dip running around the back that will hold things like that). But the less you do, the more flexible the hat – you could go to every event in the carnival with a completely new look just by changing your scarf and how you tie it. Now you have no excuse not to be race ready!
This ticks all of the boxes: it’s easy, it’s cheap and it looks great.
Pingback: Melbourne Cup millinery in two minutes #2 | Style Wilderness