T-shirt tutorial 1: zip’n tuck … plus JEWELLERY NEWS!
Whew, it’s been a busy few weeks, but the translation work is winding down. Although if I followed one of my readers’ brilliant suggestions and added Pig Latin to the list of languages I can translate, I’m sure I’d be swamped with job offers.* Anyway, until I update my resume, I have a little bit of time, and I’ve finally got around to writing up the first installment of my T-shirt tutorial series.
Disclaimer before we even begin: as I did this remake in 2009, I only have one “before” pic and none to show the creation process. Get ready for a bit of reading and using your powers of imagination!
Here is how the T-shirt looked when I bought it (complete with a room full of crap, most of which is in exactly the same spot now. Nearly two years later. Sigh.).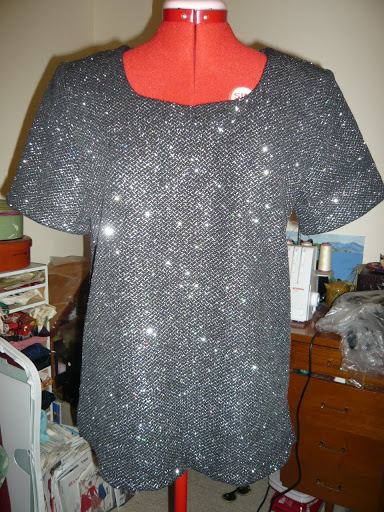
It was a few dollars from Savers but originally from Millers, where it was probably also only a few dollars, as Millers is, shall we say, a very affordable brand. It’s a brand aimed at the more mature lady, therefore the cut was pretty generous and it had shoulder pads (which I removed).
Here’s how it looks now (you can see a few more pics here too):
What you will need for this project: scissors, an open-ended zip (neckline to waist length), elastic, pins, needle and thread (preferably a sewing machine too, but you can hand stitch if necessary). Oh, and a T-shirt of course!
1. Fold the T-shirt in half exactly down the centre front (match up side seams to find the centre front). Cut down the centre. Fold over the raw edges by about 5mm-1cm to the inside and stitch into place.
2. Try T-shirt on to work out where it hits your waist, as you only need the zip to come to there. With zip done up, pin centre front edges of garment from neckline to waist on either side of zip, leaving the zip teeth visible (or if you don’t want the zip to show so much, match up the centre front edges of the T-shirt exactly so that the zip is concealed). Stitch zip into place, removing pins as you go.
3. Now that you have the zip done, put the T-shirt on inside out (a bit tricky, but doable) and do up the zip. You can now start pinning darts and tucks in the material so that it fits your body to the waist (you probably will need to make two long darts in the back and on each side of the front, and you may need to take in the side seams too. All this pinning is pretty tricky so you might need help). Don’t make any adjustments below the waist. Once you’re satisfied with the fit, take the T-shirt off and sew the darts, removing pins as you go. When all adjustments have been made, try the T-shirt on again, right way out, and check that it fits snugly.
4. Trim excess material from the hem to make the T-shirt the desired length (if you trim, you will probably need to overlock or zigzag stitch the raw edge so it doesn’t fray). I made my hem hip-length and gave the top a bit of shape by cutting it in a curve towards the base of the zip, but you don’t have to. As you have not made any adjustments below the waist, the top should flare out a little bit, like a peplum. Great for girls like me who need help to create the illusion of a waist!
5. To create a bit of a puff sleeve, trim sleeve and stitch a casing around the edge if necessary. My T-shirt’s sleeves were the right length to begin with so all I did was run elastic through the hem and stitch it in place.
6. Take photo of your stunning creation and tell us all about it!

*And then I’d have loads of funds to spend on things like Sollis jewellery, which I mentioned in the last post. Actually, you don’t even need loads of funds, because they’re offering a discount! It’s running until April 10 at www.sollisjewellery.com
To claim your discount, use the following code at the checkout: FINDERSKEEPERS
… and that’s not all, folks. Check out this blog if you feel like donating to a worthy cause AND scoring some designer jewellery. Plus, you get the thrill of an auction so you can waste time at work checking to see how your bids are going. Could do-gooding get any better?!
It looks great! I love the addition of the zip.
Icenay ostpay! Atthay irtshay isay ymay avoritefay ingthay Iyay avehay eensay onay ouryay ogblay.Writing in Pig Latin is a lot harder for me than speaking it! I really do love this shirt. Nice tutorial!
I love it! Can't believe how good it looks, from what it was! You have seamstress superpowers.Xx Claire
Glad to have met you and discovered your blog. I love that you are a bit nifty with the Janome! x
I *LOVE* your DIY outfit. It's ridiculous how much I love it! Too bad I'm swamped these next few weeks. :*( Otherwise, I would definitely dust the cobwebs off my sewing machine and try my hand at this.