T-shirt tutorial 2: triple treat
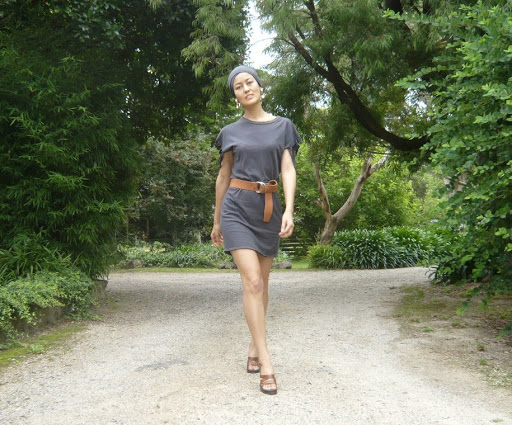
Welcome to the second T-shirt tutorial! Did you try making the one I posted about last week? No? Well this one that I modelled for you recently is even easier, and you end up with THREE items – a dress, a headband and a necklace. So if you were put off by the scary zipper feature in the first tutorial, this one might be more your cup of tea. (Can you guess how much I had to restrain myself from writing “cup of T”?)
…
OK, so now that you’ve recovered from marvelling at my brilliant play on words, you can get started! For this project, all you need is a BIG T-shirt, scissors, and maybe a needle and thread or a sewing machine. The T-shirt I used was so big, or I’m so little, that I made it into a dress, but you could easily just make a tunic or a top if the T-shirt you use is not long enough, or if you’re of more Amazonian proportions than myself.
For the dress/tunic/top:
Step 1: Try the T-shirt on and mark with a pin how long you want the sleeves to be.
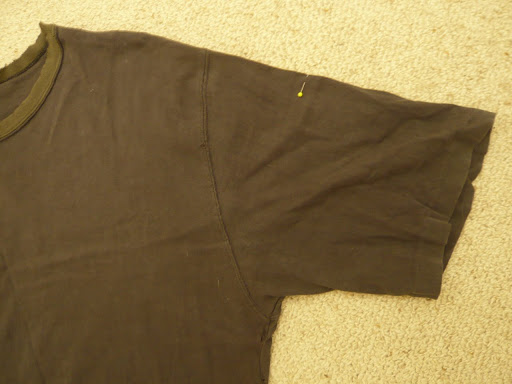
Step 2: Cut rows of about 1.5-2cm width curving from the centre of the sleeve up to the sleeve seam. It should look like this.
At this stage, decide whether you want more rows – I ended up cutting the rows I had made in half, ie made them thinner.
Step 3: When you have enough rows, cut off the remaining part of each sleeve at the seam. Stretch the fabric so that it curls in on itself a bit.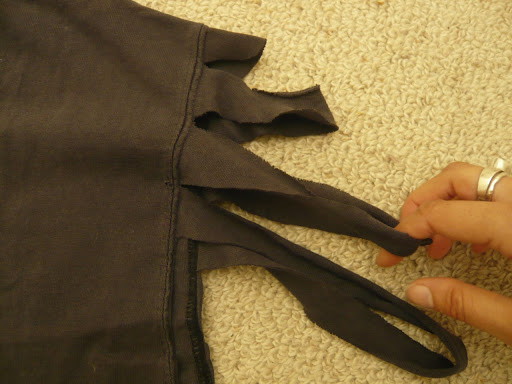
I also cut a fringe into the top semi-circle part near each shoulder seam.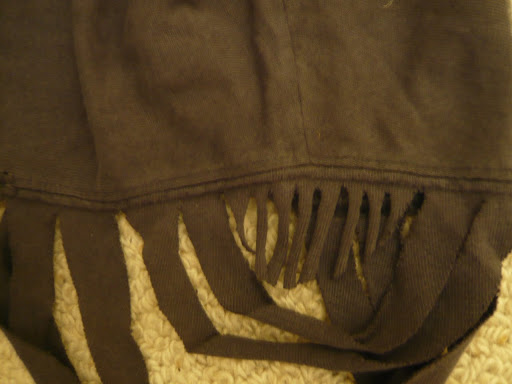
Now you’ve finished the sleeves and they should look like this.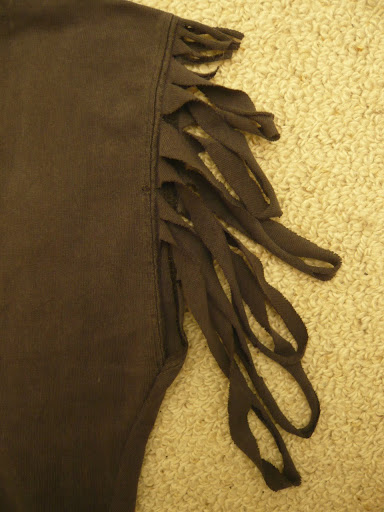
Step 4: This is optional and depends on what sort of fit you are aiming for. You can just leave the T-shirt as it is, or take it in at the side seams to make it more fitted, which is what I did, as it would have been like a tent on me otherwise (see the Step 2 photo!). I didn’t take a photo of how to take in the side seams, but all you need to do is put the T-shirt on inside out, pin each side seam so that the fit is better, sew as per the pins, and cut off the excess. Easy! Your dress/top/tunic is finished!
For the headband… I don’t even really need to tell you how to do this, it’s so self-explanatory, but just in case… I just used the leftover bottom parts of the sleeves, trimmed them, folded in the raw edges (yes, I could have hemmed them but I’m lazy), and put them onto my head.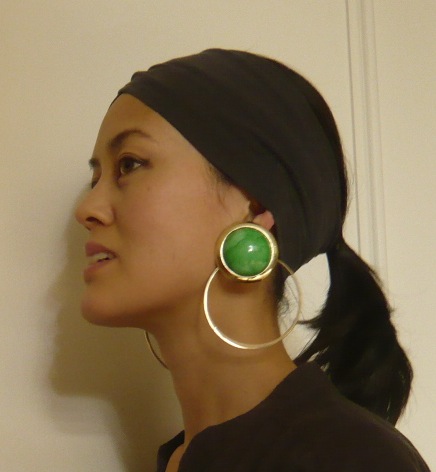
Of course the size of your head (and the size of the T-shirt sleeves) determines whether you can do this! If you can’t fit the sleevey bits on to your head, maybe you can use them as dusters? I’m sure you can come up with some way to use them!
For the necklace: I used the bits that were left over from taking in the side seams, and I also chopped a bit off the hem of the T-shirt (it was SERIOUSLY big! and I am SERIOUSLY short!).
Step 1: Cut lots of rough strips about 1.5cm wide and as long as you like. You will need two longish strips and the rest can be shorter.
Step 2: Loop the shorter strips under one of the long strips, like so.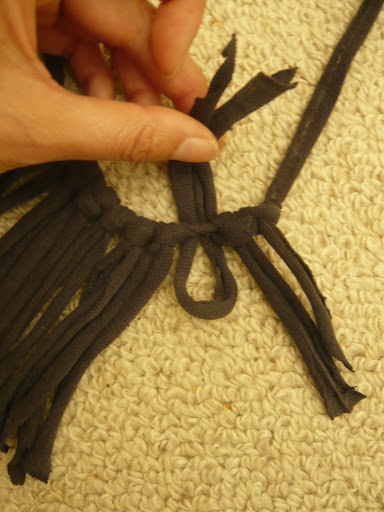
Then bring the two ends through…
…and pull to secure. Repeat until you have used all the short strips.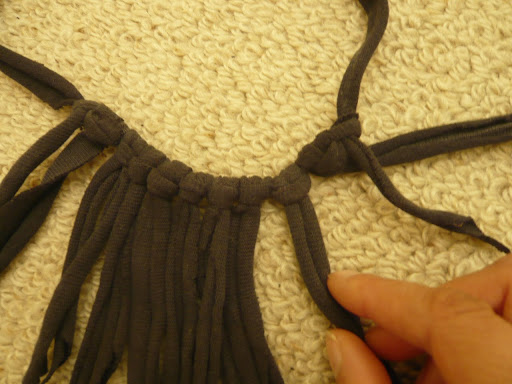
I know there is a name for this knot but can’t think of it right now. Half-hitch or something like that??
Step 4: If the long strip that you used as the necklace base was really long, you can just tie it around your neck as it is, and that’s you finished (although you probably want to neaten up the ends of the fringing). Otherwise, loop the short ends on either side of the row of fringing over another long strip using the same technique as in step 2.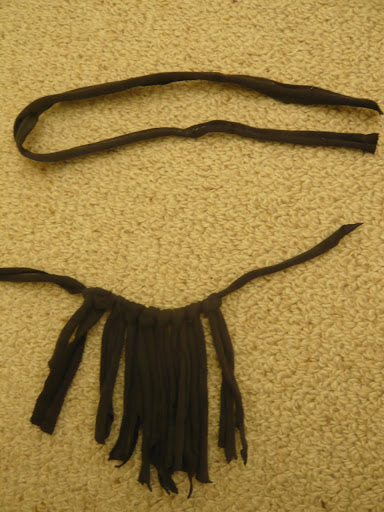
Tie the ends together, and you have a necklace, or a handbag accessory if you like.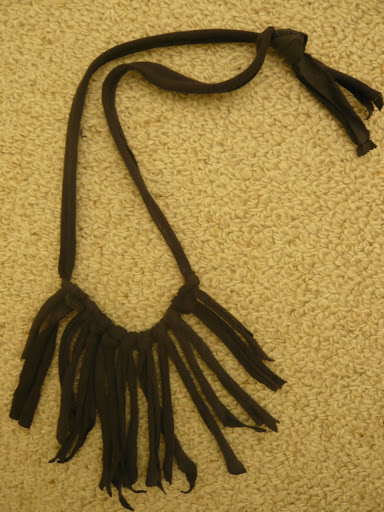
I haven’t got around to neatening up the fringing yet, but I actually don’t mind the raw look so I’ll probably leave it as is. (Isn’t it great when you can justify laziness by saying “oh, it’s meant to look that way”?)
Oh, and the little bits of scrap that you have left over? If you can’t think of another crafty way to use them up, they’re great for using as makeup remover pads.
That's one great thing about cutting up clothing: the rags that are leftover!Another great tute.
I really like the whole outfit…on you. Me? Not so much. But I will keep the necklace idea for the future-thanks!
What a great tutorial! I love reconstructing boring t-shirts into something fabulous like this. I like it so much, I ended up including it on my blog… http://darlingadventures.com/?p=574Thanks!
I wish there was a picture of you wearing them all together!