From tent dress to temptress (?!)

As regular readers of this blog would know, I’m rather partial to batik and African prints. So there was no way I was going to pass up this tent… er… dress… when I found it at Savers a few months ago. Especially as I had a voucher to use up, so I got this super expensive (ie $10, haha…) item for NOTHING.

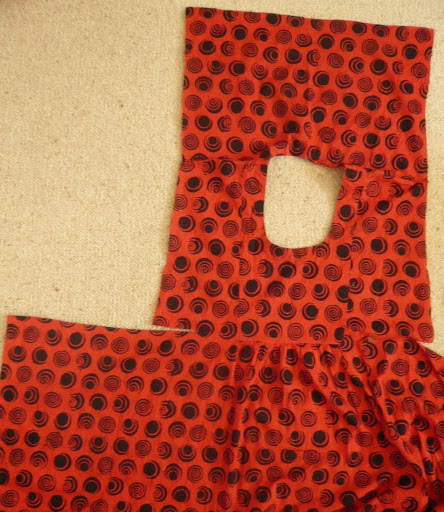
Of course, I wasn’t content to leave it like this (although considering the amount of eating I’ve been doing over the festive season, perhaps adding a tent to my wardrobe wouldn’t have been a bad idea). It was basically a long rectangle folded in half with a hole cut out for the head and a yoke inserted, some excess material taken in along the arms and stitching up each side of the body.

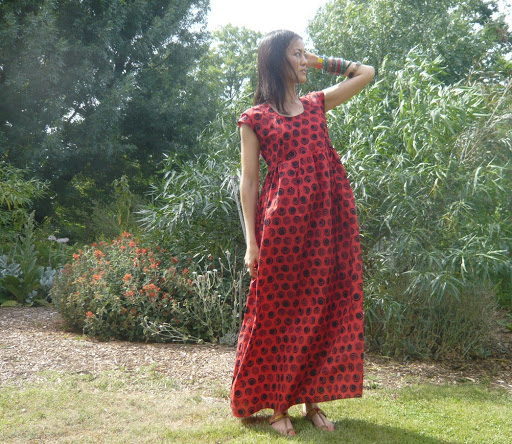
Now it looks like this:

It wasn’t too tricky, so if you have a similarly kaftan-y garment but would prefer a more fitted maxi-dress, read on!
I unpicked the side stitching, then cut off the “sleeves”. This photo shows the front of the dress – I also cut horizontally all the way in to near the yoke.

I cut off the sleeve material from the back as well, and also the lower part of the back (ie the skirt section). Here you can see the dress opened out – the top part is the bodice (the hole is for the head of course).
I then sewed the front and back bodice sections together at the sides, and sewed the material I’d cut off the lower part of the back to the sides of the front section to form the skirt. (At this point I’m wishing I had taken a photo of that step as I’m not sure it makes sense without an image. Sorry!) Then I gathered the top edge of the skirt section until it was the same size as the matching edge of the bodice, pinned them together and stitched them. Check an online tutorial if you don’t know how to gather material as it’s one of the essential elements of sewing – basically you create two parallel lines of the longest stitch your sewing machine can do, then pull the two threads and bunch up the material (make sure to pull the two threads on the same side of the material or it won’t work).
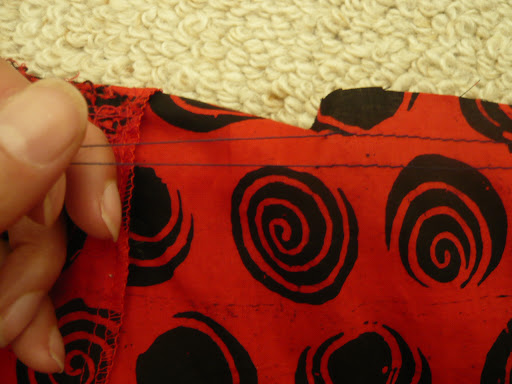
Here’s the skirt section and the bodice section pinned together.

A bit of finishing off around the armholes and taking in excess material from the centre back, and voila!
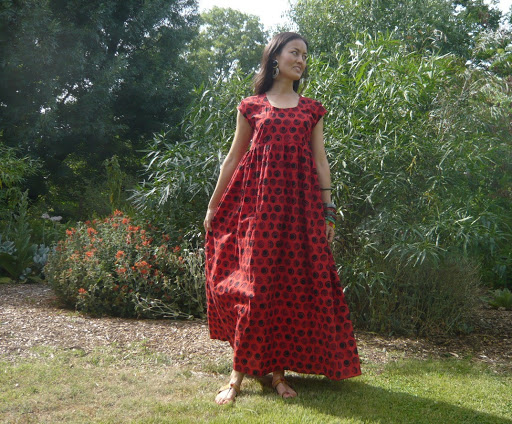
Here’s what it looks like from the back. Can you believe all that material has been gathered in to be the same size as the bodice?

Still roomy, but a lot less tent-like, yes? You could also try making a maxi (or a mini if you prefer!) similar to this by chopping off a T-shirt and attaching a skirt made from a rectangle of other material – sew the two short ends together, then gather the long ends and attach it to the T-shirt edge.
プリント大好きな私ですが、Saversでこのワンピース(というか、テント?!)を見つけた時にやっぱり一目惚れしちゃいました。形があまりないからリメークにぴったり!と。どう作り変えたかというと:「袖」のところを切りはずし、前と後ろの横を縫い合わせてボディスの部分を作りました。そしてスカート部分の生地にギャザーを入れて、上の部分に縫い合わせたら、完成!Tシャツと好きな生地でも同じようなワンピースを作りたければ、Tシャツを胸下ぐらいで切り、生地をチューブ状態にして、ギャザーを入れてTシャツに縫い合わせる。スカート部分の生地のプリント、長さ、ボリュームなどでいろんなバリエーションができるから、季節やシチュエーションに合わせて作れますよ!
What a transformation! It looks incredible now – perfect for relaxing on a Summer evening.
Just been catching up on your blog and really enjoyed reading your posts. I love the transformation of the tent dress to maxi dress. The fabric is wonderful and you have done a great job.
Pingback: Vinnies #NewYearNewStyle Challenge | Style Wilderness