Boro’d time
Don’t I look young in this picture?
That’s because it is from three years ago. Yes, back in 2016 I started altering this child’s kimono* that I brought back from Tokyo some time in the past 12 years. This gives you some idea of how long it takes me to get around to doing things sometimes. Aggh.
Anyway, I loved the hand-dyed, hand-sewn, much-worn boro-ness of this garment which is why I bought it for just a few dollars, but I needed to do something about the existing holes, the holes that were about to happen, and the general state of disrepair.

It was lined with non-matching pieces of fabric as you can see in this photo.
I have nothing against non-matching fabrics and making do with what you have to hand, but they were pretty grimy and gross after what I presume was years of wear, so I removed the lining, unpicking bits and pieces of the main body of the kimono as I went (I removed the collar section as it was quite thick and also I didn’t want the kimono to look like one – apart from gaping sleeves, the neckline is a defining feature of kimono and other Japanese traditional garments). It was interesting to see the difference in colour and handle when I opened out sections that had been concealed inside seams – the bottom right section of the sleeve is a lot darker and stiffer than the rest because it had been sewn into a seam to create a tapering to the wrist.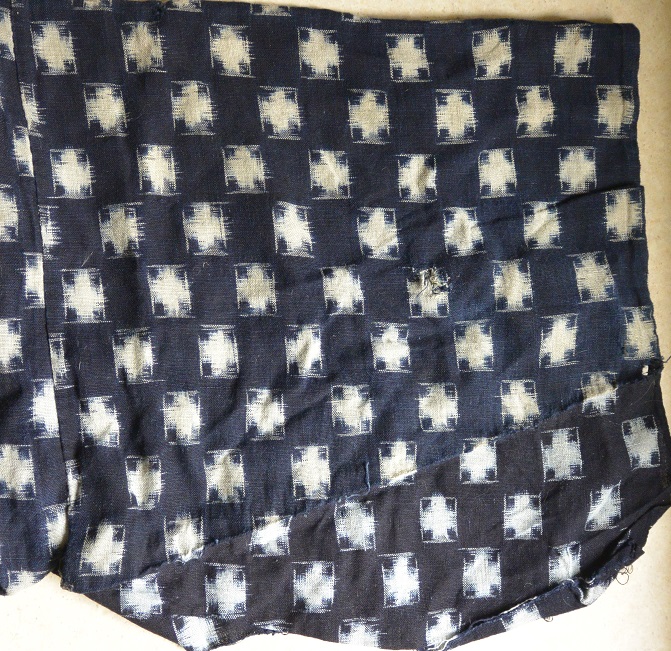
I washed the body of the kimono and then left it for a year or so, it seems. Last year a renewed burst of motivation got me to the point where I had cut out fabric to exactly match the kimono and make what was to become a reversible jacket, but somehow I never actually sewed it all together; plus, I was still handstitching over holes in the kimono. And yes, the stitches are meant to show like that… admittedly it’s probably not the best example of sashiko stitching you’ve ever seen!

(Don’t tell any particularly orthodox menders out there, but I stabilised some of the particularly fragile parts of the fabric by ironing interfacing over them and then stitching over the top. Sacrilege!)
Finally, a few weeks ago, I managed to sew the kimono and its twin together… and here’s what it looks like now:
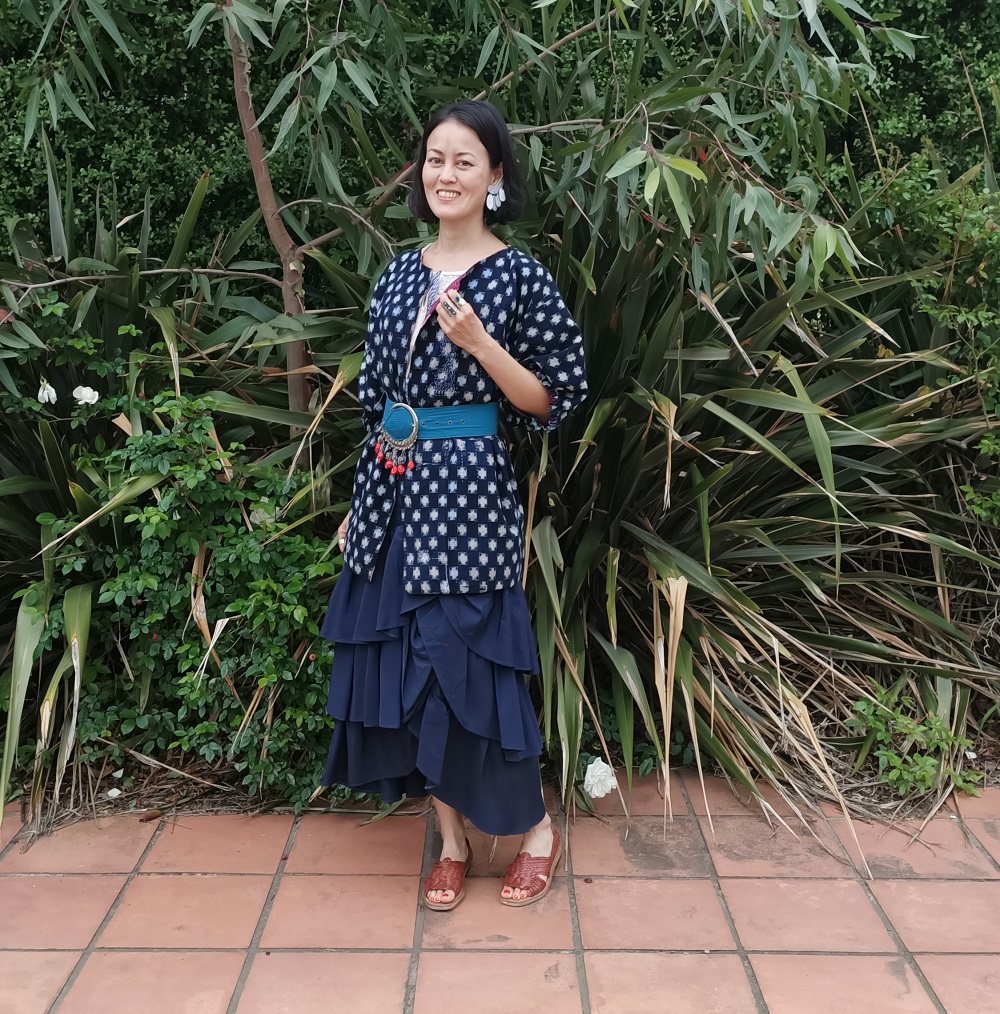
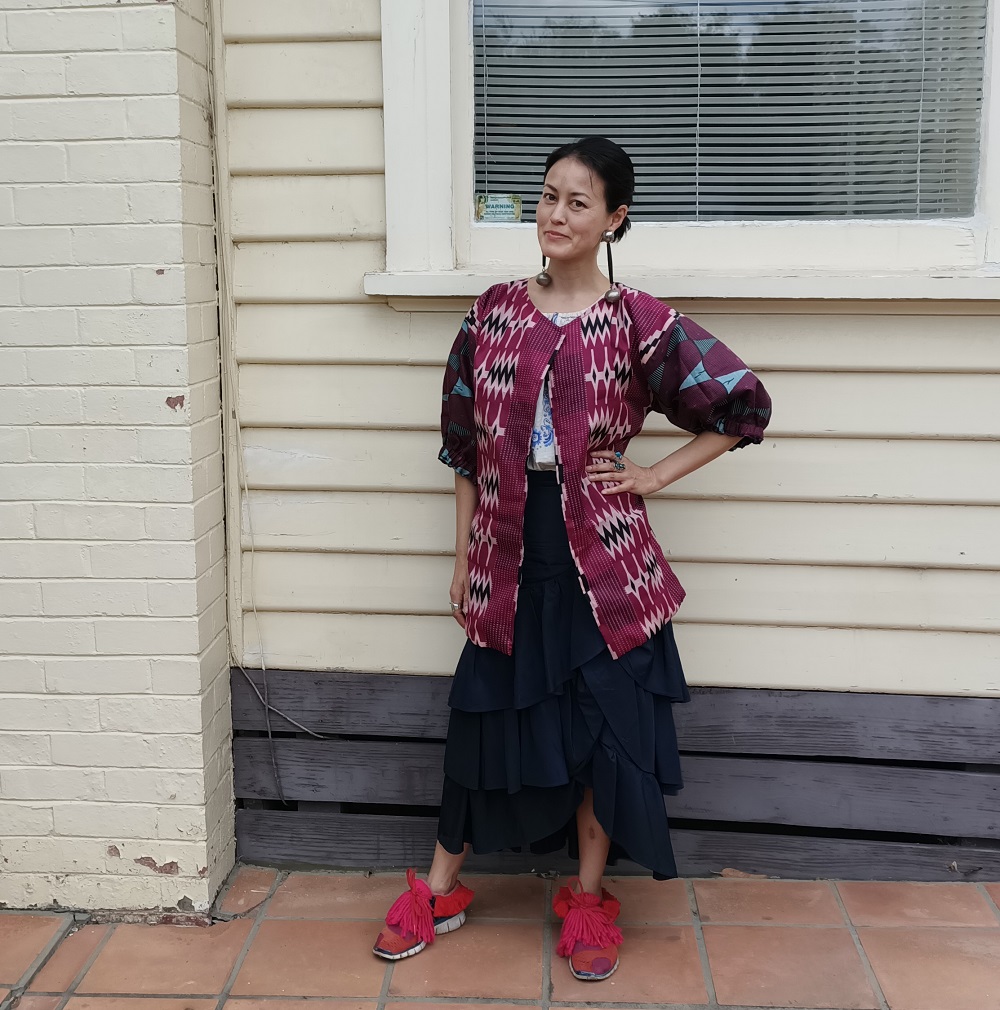
The sleeves were quite short to start with so to give them more shape and take away the kimono look, I made casings and created elastic cuffs. The fabric for the reverse side of the kimono is a fairly lightweight African batik and I love how the patterns all work together if I want them to – if the collar isn’t turned back then you don’t even see that there are two different fabrics in the one garment.

It’s a handy piece to throw on over the top of an outfit in mildish weather, and the two different patterns mean it will go (or clash, as is my wont) with pretty much everything else in my wardrobe. Well worth the three-plus years it took me to make!!
*Despite living in Japan for nine years and translating two entire books about kimono I can’t say definitively that this is what this garment would be called in Japanese. I think it might have been worn by a child in a rural area as it was so patched and worn and the sleeves were tapered rather than hanging, meaning they would have made doing manual labour easier. It definitely wasn’t a ceremonial garment or something only worn for special occasions! So it’s similar to a kimono but maybe would be called noragi (peasant or farm wear) in Japanese. For the purposes of this post, I’ll refer to it as a kimono.