Pom pom power
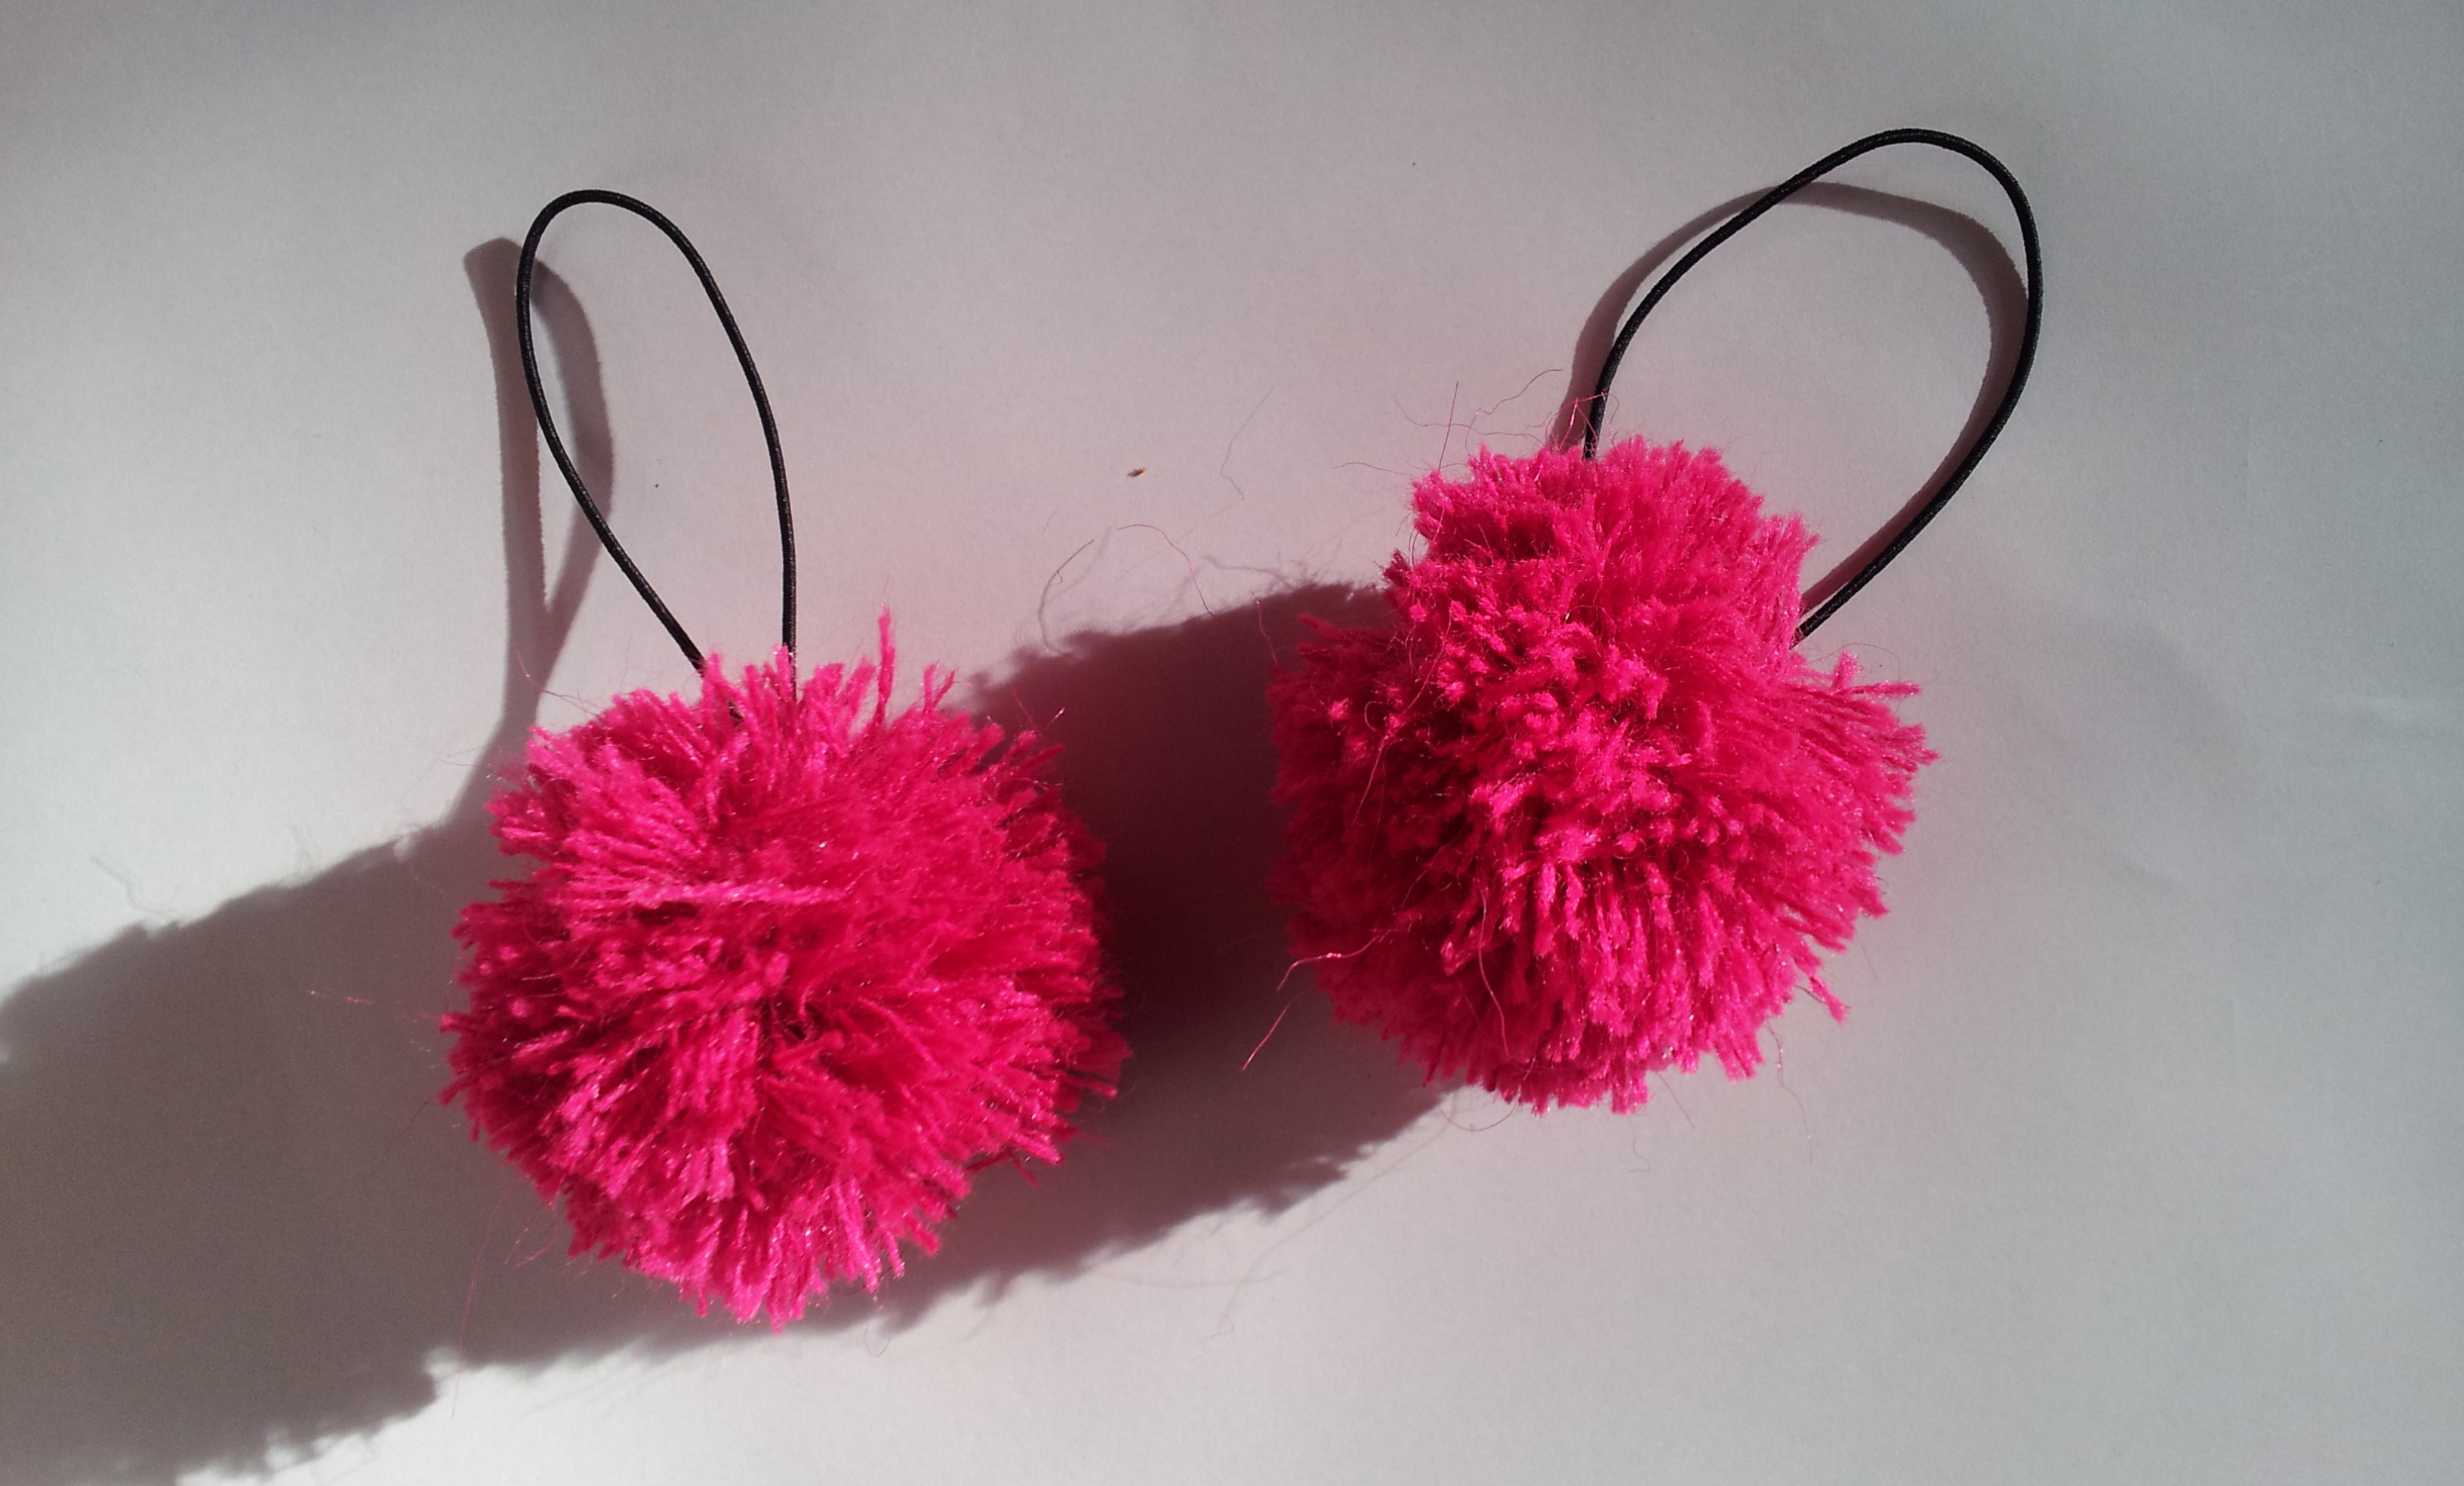
As you’re probably aware, I have something of a penchant for pom poms. Pink ones especially. 
I’m often thinking of ways I can use them, and as a fan of using accessories to give garments, shoes, bags and so on a (temporary) facelift (or footlift?) this DIY is the perfect solution to add more pom poms to my life. Pom poms and hat elastic. That’s all!


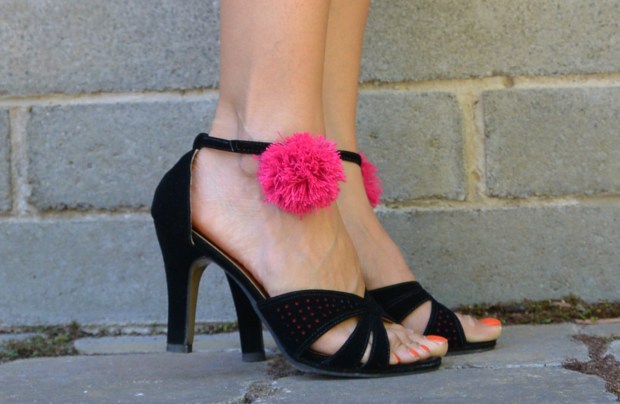
Pretty versatile, hey? I could have also shown you photos of them attached to the strap of a bag or to belt loops on jeans, wound around a headband, worn as earrings, threaded through zips on boots, used as a keyring and so on and so on. But I know you are a creative lot and most likely have plenty of your own ideas as to how you can incorporate more pom poms into your everyday outfits.
If you don’t know how to make a pom pom it’s probably best just to find a YouTube video or a how-to in a craft book, but I took a few shots while I was making these just in case.
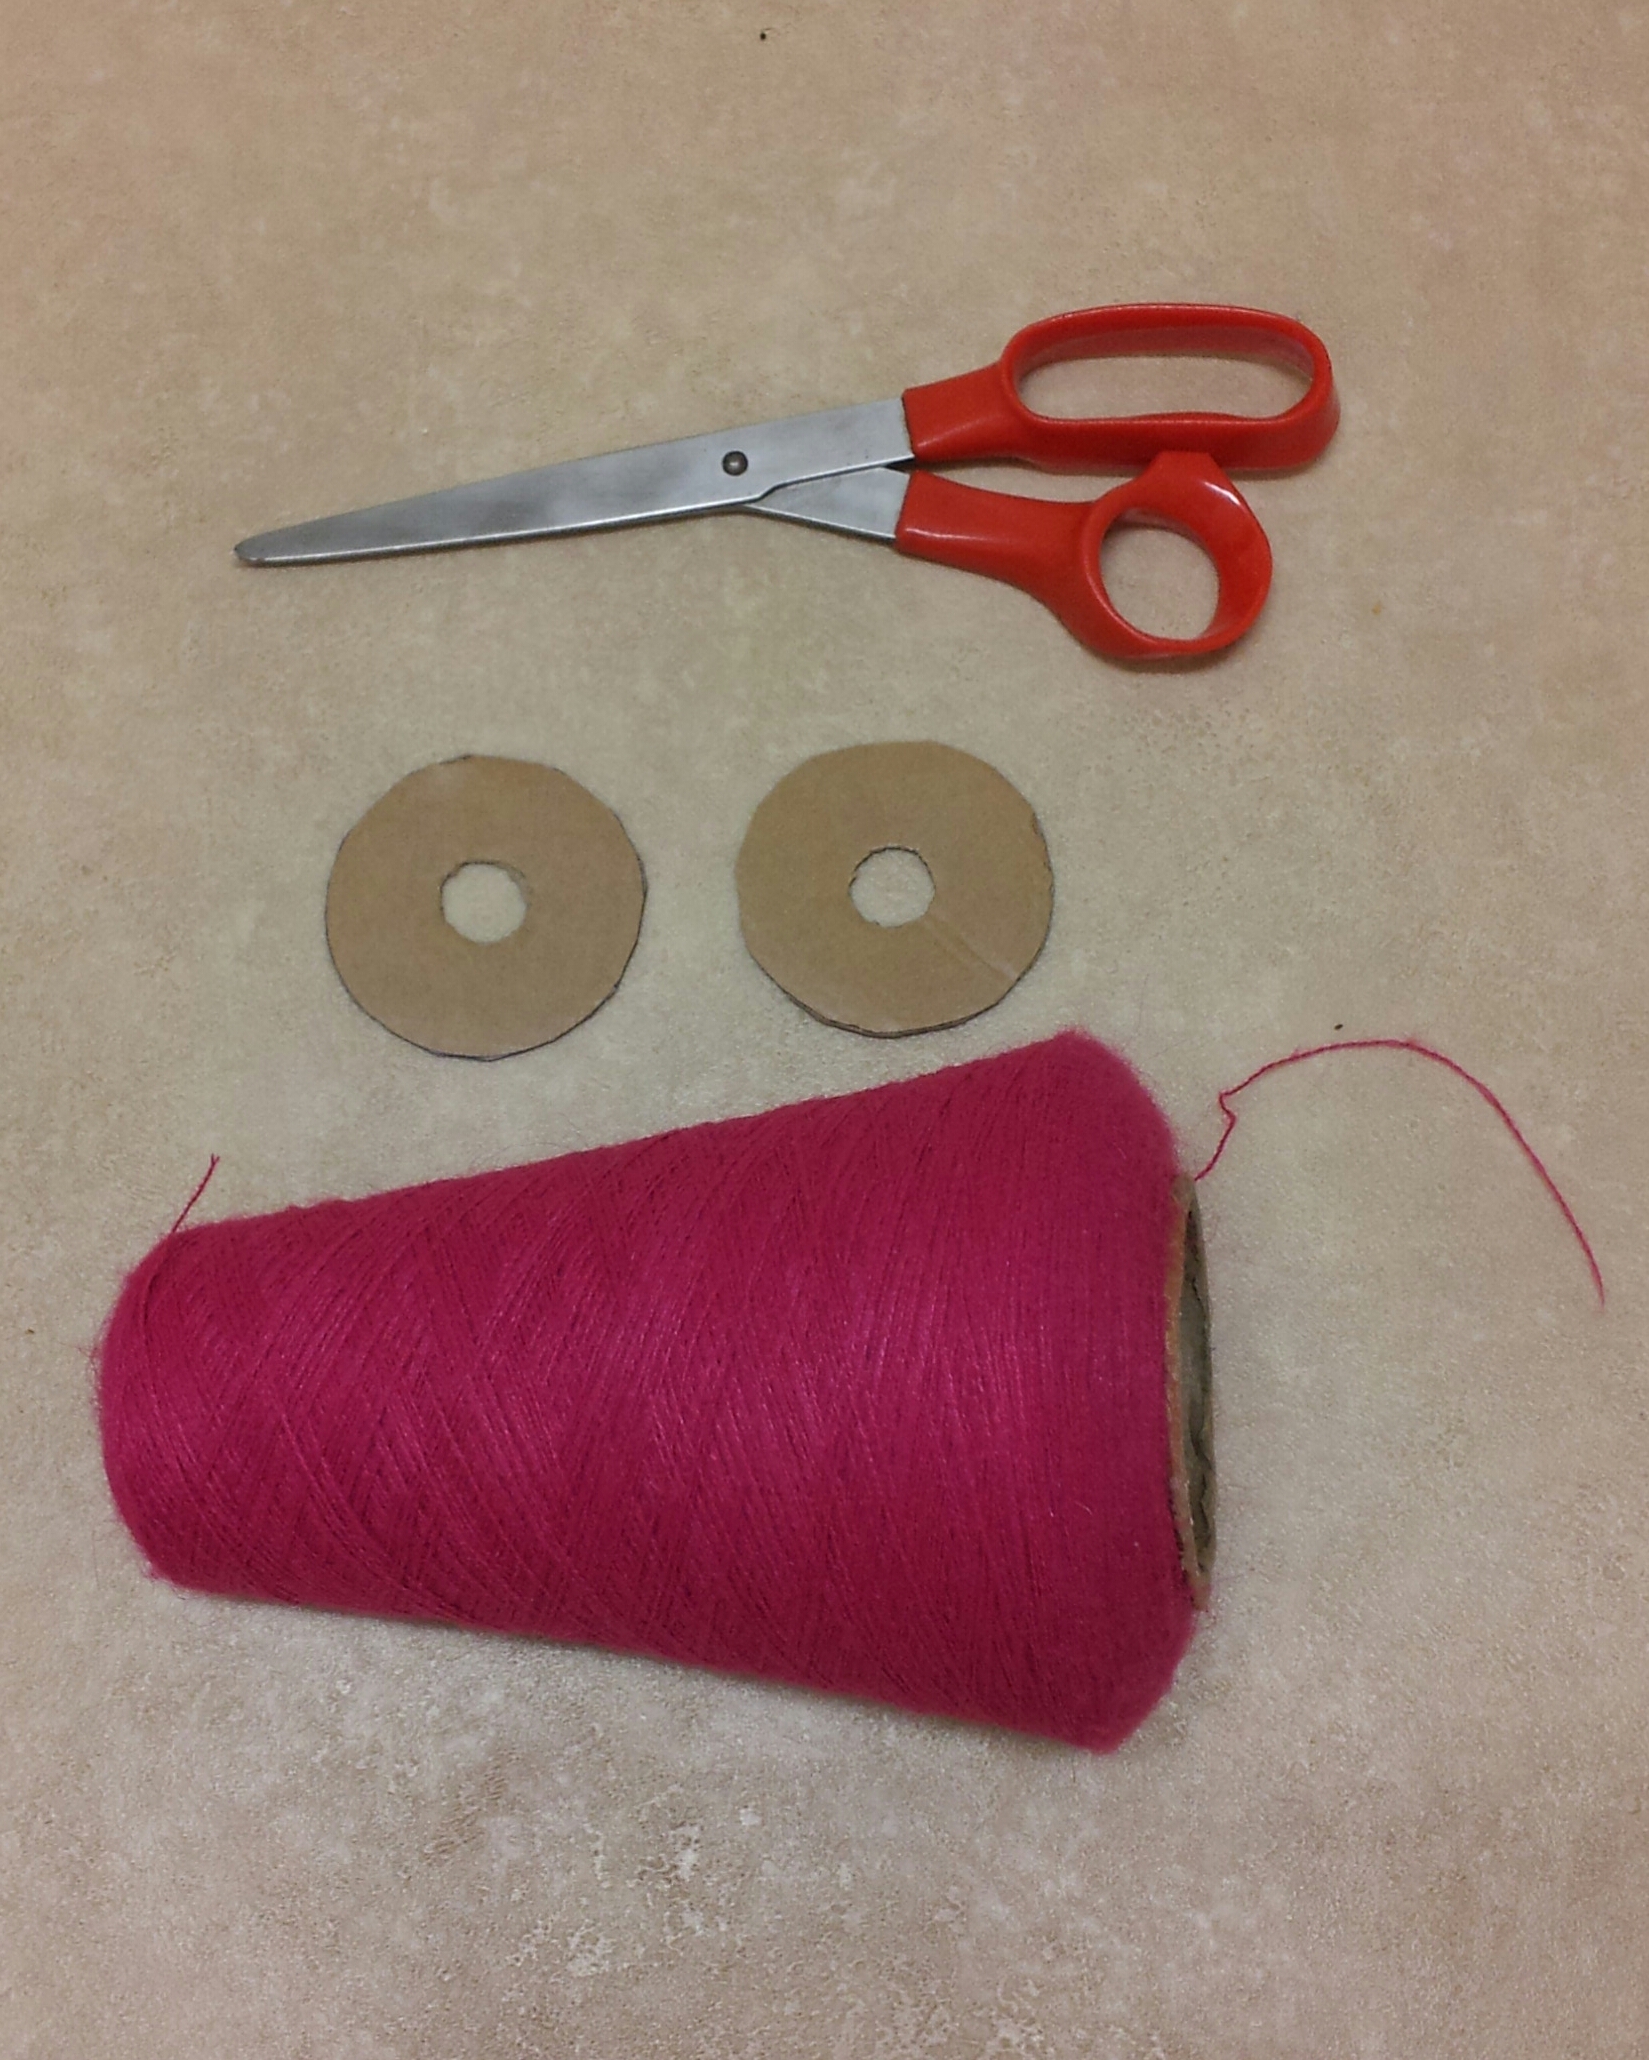
You will need sharp scissors (nail scissors might be a better bet than these ones), two identical donut-shaped pieces of sturdy cardboard the size you want the pom pom to be, and of course some kind of yarn. I found this massive cone of acrylic thread at an op shop years ago and have been trying to work my way through it ever since.
Place the cardboard donuts together and wind the yarn around and around through the hole. (Of course I couldn’t get the cone through the hole so I had to cut lengths of yarn and pass them through instead. It doesn’t matter if you have loose ends because you will be trimming the pom pom into a neat shape when it’s finished anyway).
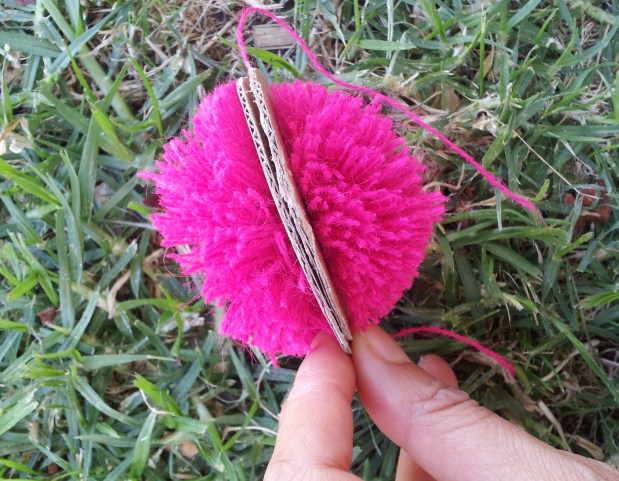
Once you have a nice fat looking donut (this might take a while so pom pom making is a great activity to do while watching TV, sitting around outside etc), snip the edge of the pom pom so the scissors get through to the cardboard, and cut all around the donut between the two pieces of cardboard.

The donut should look like this. Be careful not to let bits of yarn fall out from inside the hole!

Now cut a length of yarn and wind it around in between the two pieces of cardboard firmly, tying it several times.
When the pom pom yarn is securely fastened, remove the two pieces of cardboard and your pom pom is finished and you can trim off the sticky-outy bits to give it a nice round shape!

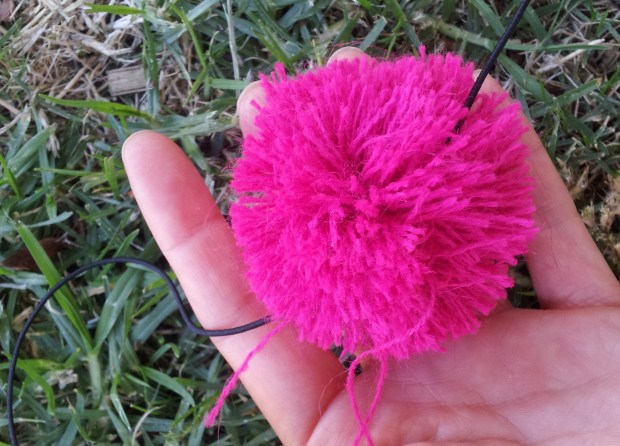
However, if you want to put them onto a loop of elastic like I did, cut a length of hat elastic and incorporate it into the pom pom after you remove the cardboard. Place it against the pom pom and wind more yarn around the centre to keep the elastic secure.

Then tie the ends of the elastic together and hide them in the middle of the pom pom. Of course you can put as many pom poms onto the elastic as you like, it doesn’t have to be just one.
Super simple! And if you’re not into wearing them, you could make pom pom bunting to decorate a room or for an outdoor party! Or make a chain of pom poms to decorate a mirror or photo frame. So much cute, so little time!
Pingback: Flamenco fix-up | Style Wilderness
Pingback: Red + recycling = Melbourne Cup magic | Style Wilderness