Who says weddings are expensive?
No, no… not MY wedding! Ha! I’m talking about OTHER PEOPLE’S ceremonies and how pricey it can be attending them because of the costs involved in getting a new outfit and so on. As pricey as $3.
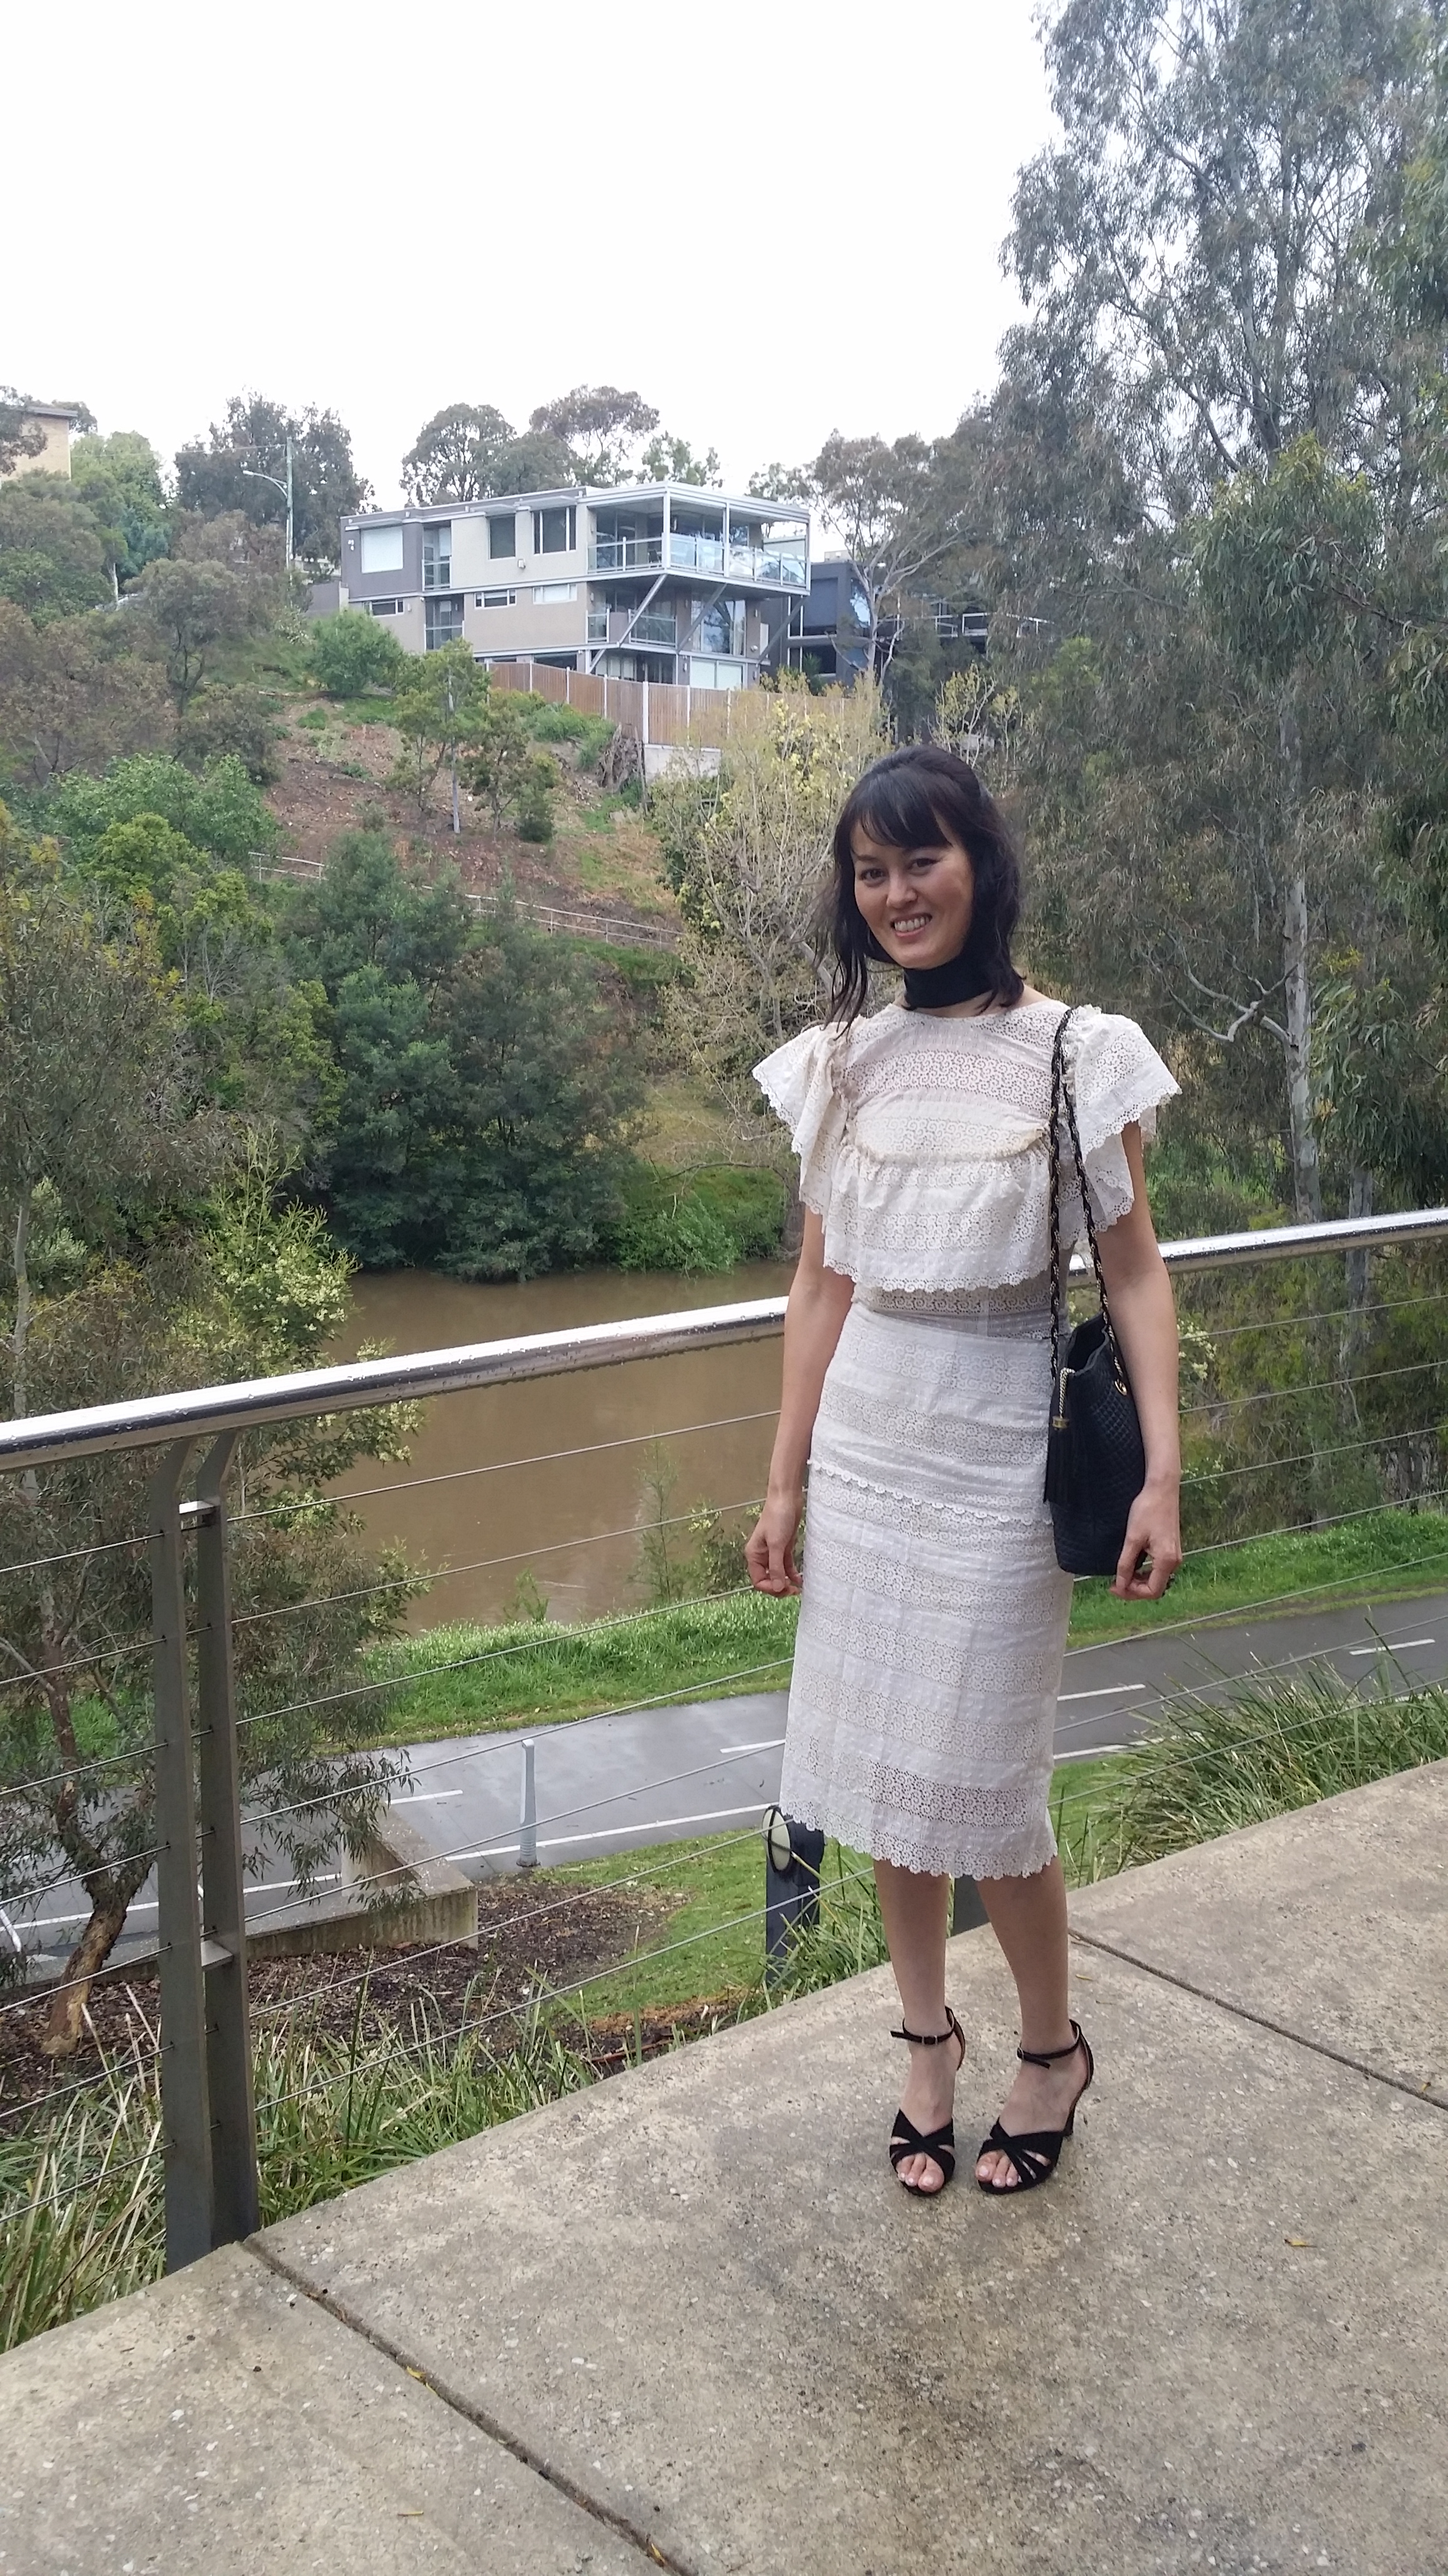
Yep, that’s how much this skirt and blouse cost. Admittedly, with the bag (vintage Bally, $8 at a Tokyo flea market), the shoes (maybe $5, from Vinnies), the earrings (which you can hardly see but probably were about $2) and the ribbon around my neck (free, most likely rescued from some fancy packaging) this total outfit is closer to $20, but even I think that’s quite reasonable.
As with many of my projects, this outfit has been some years in the making – about six, actually. This is what the original dress looked like when I bought it at the Trash and Treasure market in Wantirna in June 2010 (accompanying blog post with mucked-up formatting here).

There were rust stains and holes in several places on the dress and it was a bit tight around the waistline, so some time ago I unpicked it, leaving only the bodice relatively untouched.
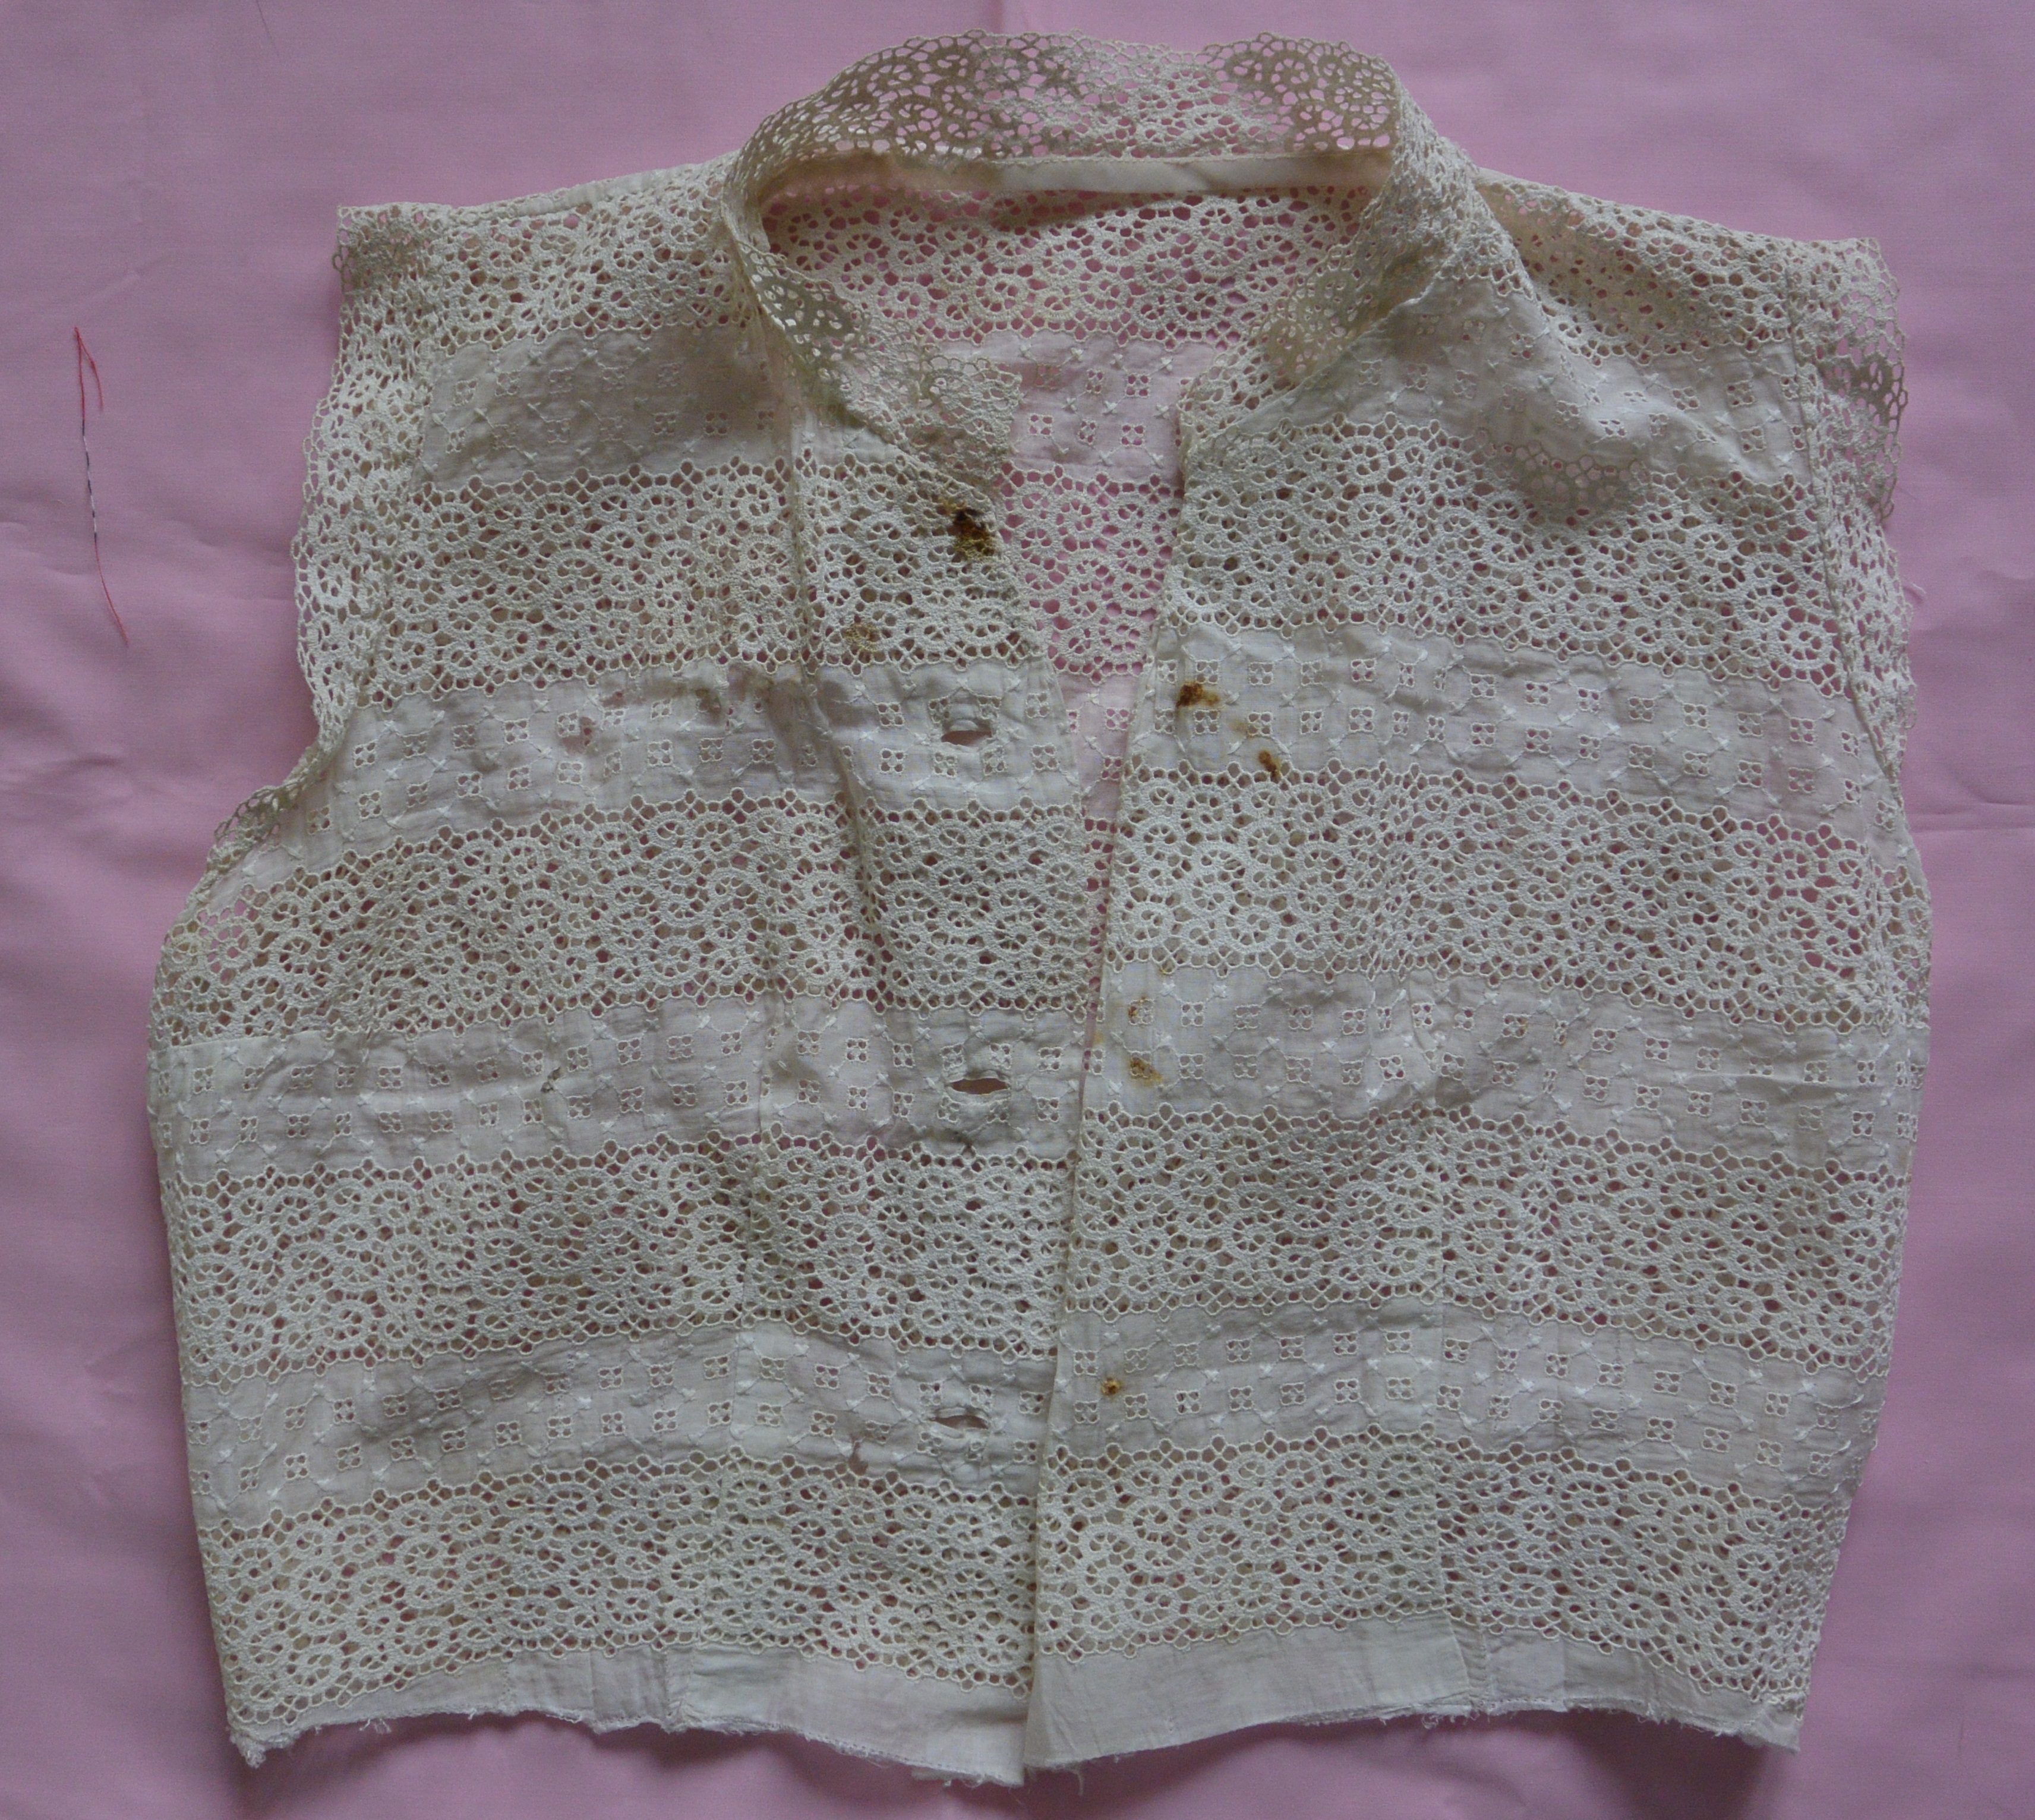
The front of the bodice, with rust stains quite visible from the metal-backed buttons (which I removed).

The back, with holes (apart from the lace, I mean!) halfway down.
Having had ample time (ie six years) to remake it, I decided a few days before a friend’s planned spring wedding in a park that I must wear something kind of lacy, sunshiny and Victorian (Picnic at Hanging Rock in the Fitzroy Gardens, if you will) and I could finally put this dress to use. Naturally, I was still sewing it a few minutes before I left the house, and it also turned out to be one of the coldest October days on record, with torrential rain, hail and gale force winds thrown in just to keep things interesting.
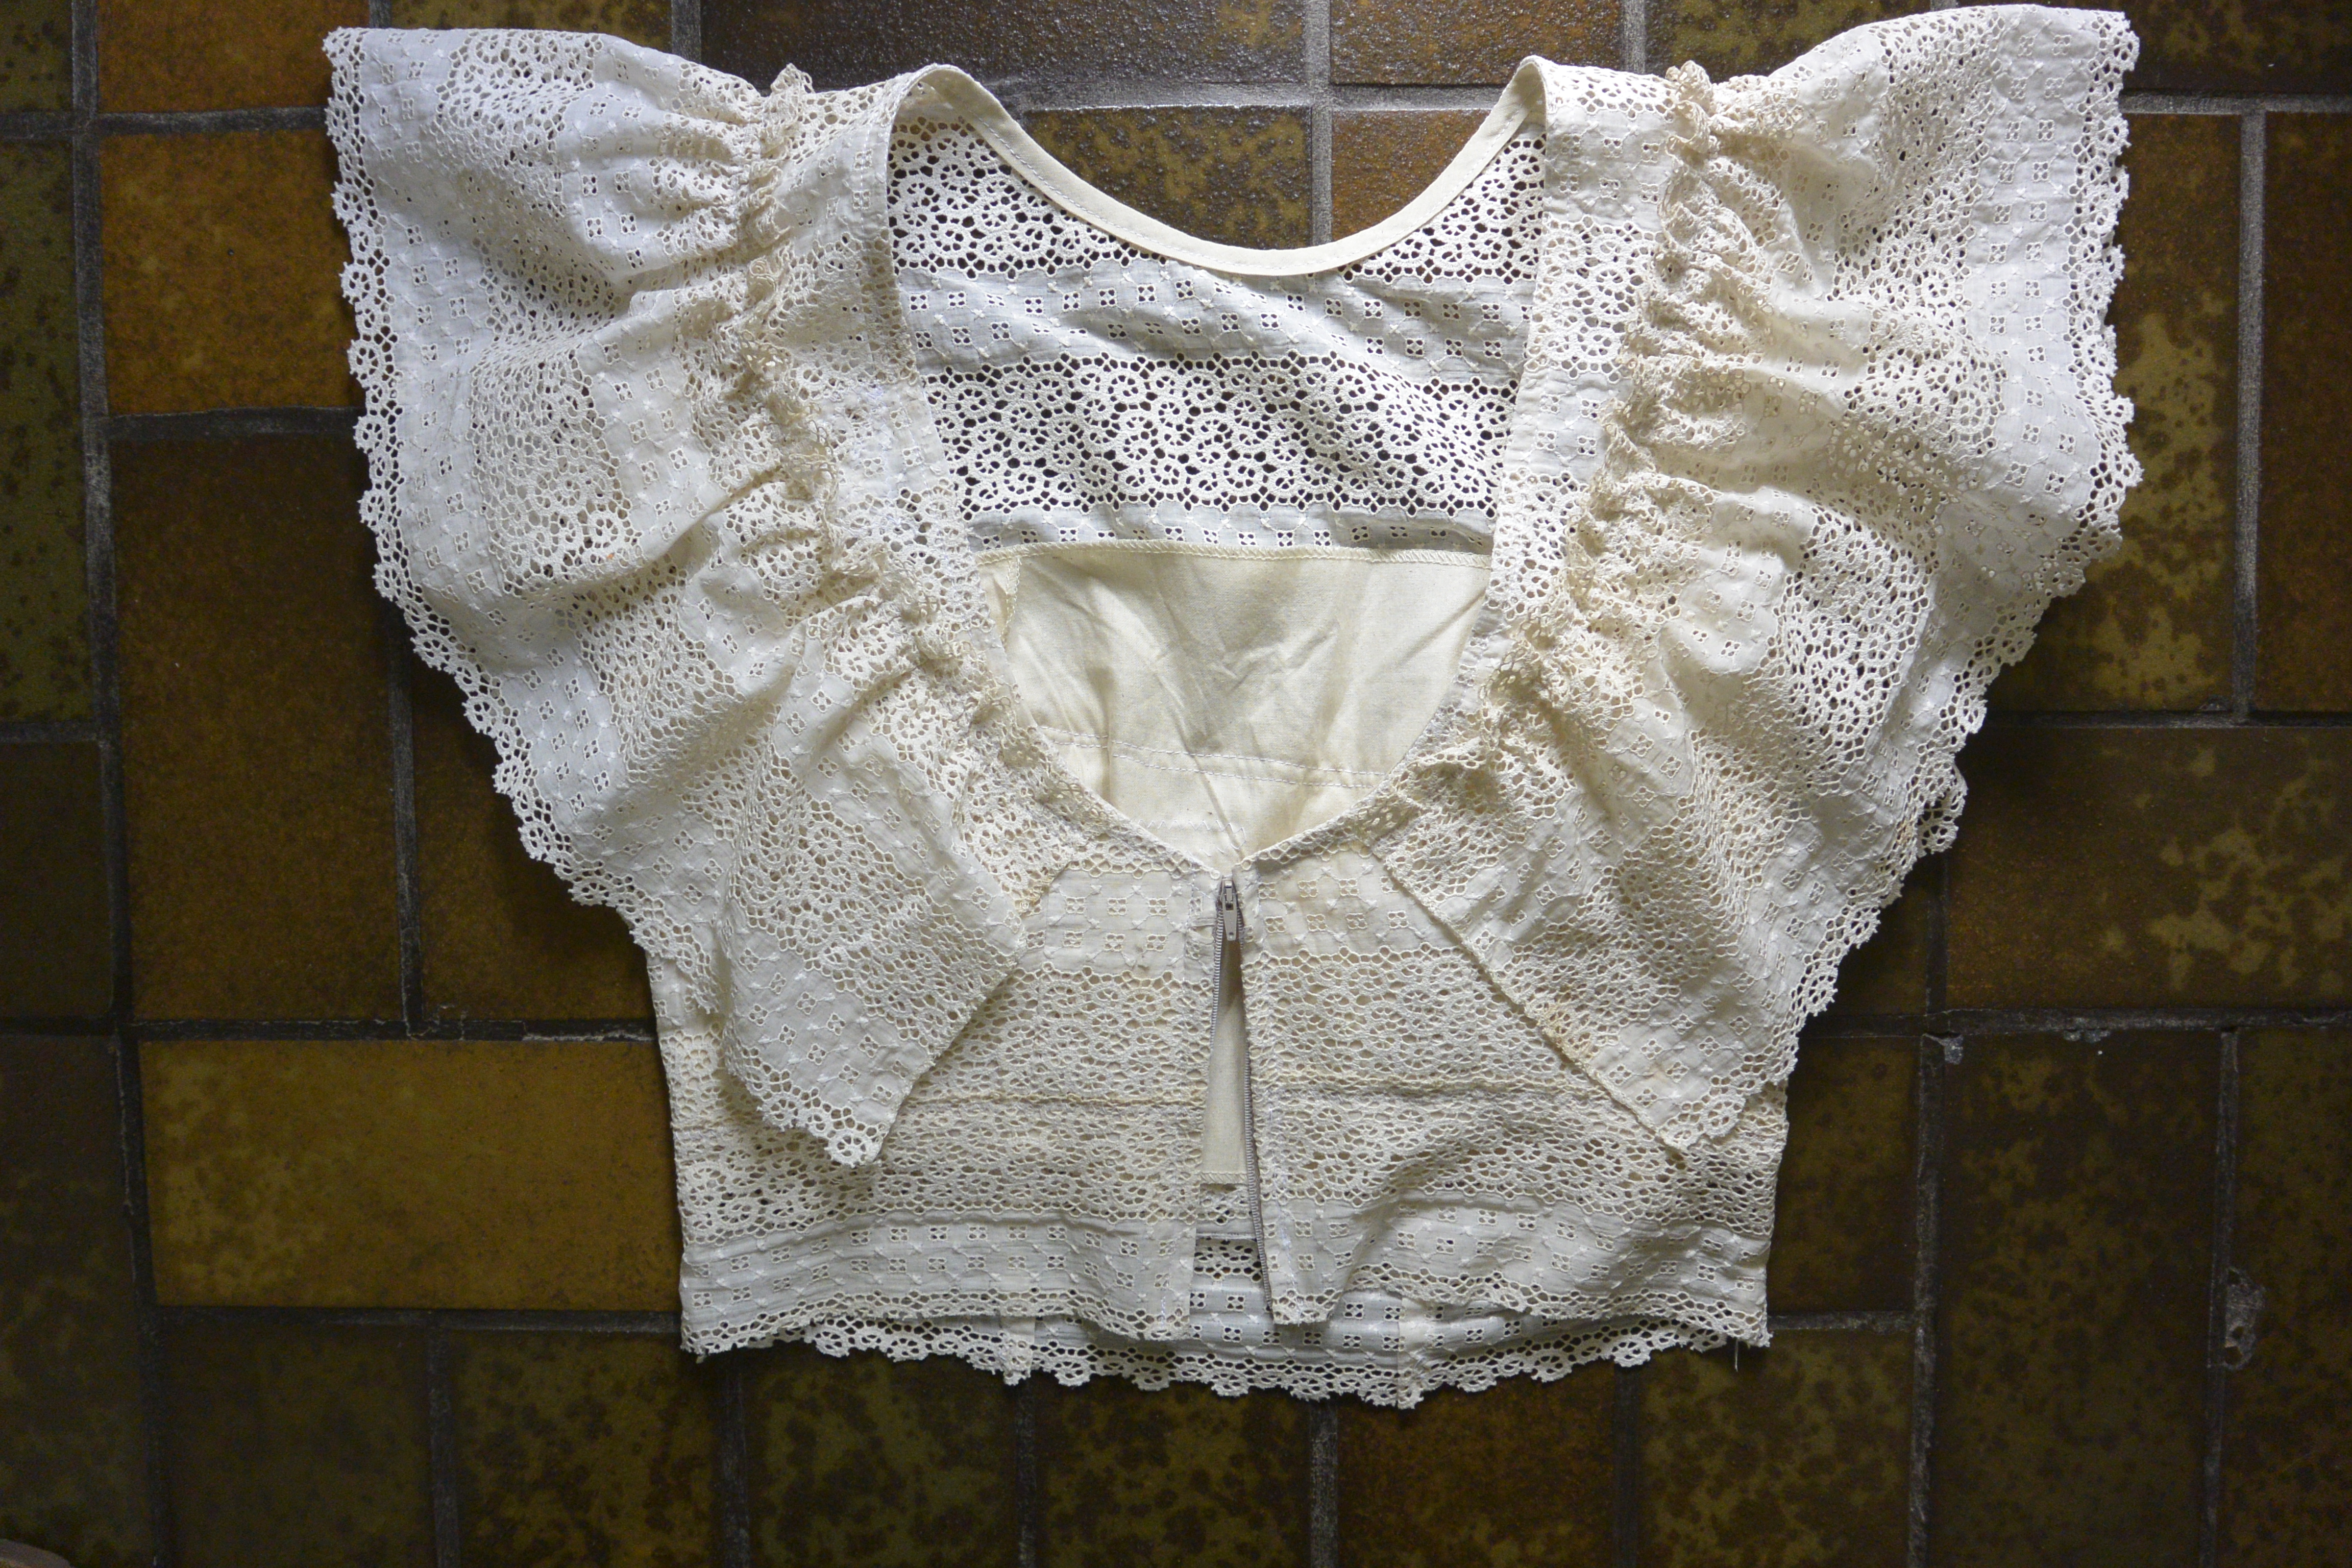
Anyhoo, what I actually did to remake the dress was to turn the bodice back to front. This meant that I could disguise the holes in the former back with a ruffle, and chop out the rust stains in the former front, creating a scooped back. I sewed in this calico bodice (which I made when testing a pattern years ago and kept because you never know when you will need a half-finished calico bodice) to make it a bit sturdier and also because lace is see-through and no one wants to see my underthings!
I made the ruffle from what was probably originally part of the skirt – but I can’t actually remember. (Hey, it was six years ago after all, and I have enough trouble remembering what I did yesterday!)
Also, I removed the collar and added a narrow band around the waist so I wouldn’t be showing off my belly button to all and sundry.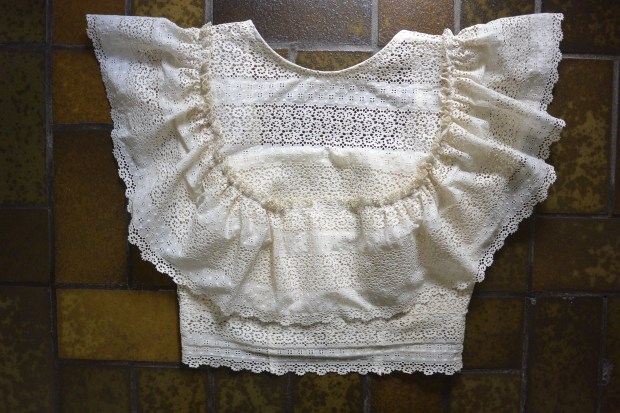
I inserted a zip upside-down at the back (if a fitted garment has a deep back neckline you can do this, if not, you’d need an open-ended zip or to consider using buttons or something else as a fastening) and edged the raw neckline with bias binding.
I had planned to take beautiful romantic, sunny photos in the gardens but thanks to the predictably unpredictable Melbourne weather, the wedding was moved indoors. So here are some shots I took inside at a friend’s house between the ceremony and reception instead.
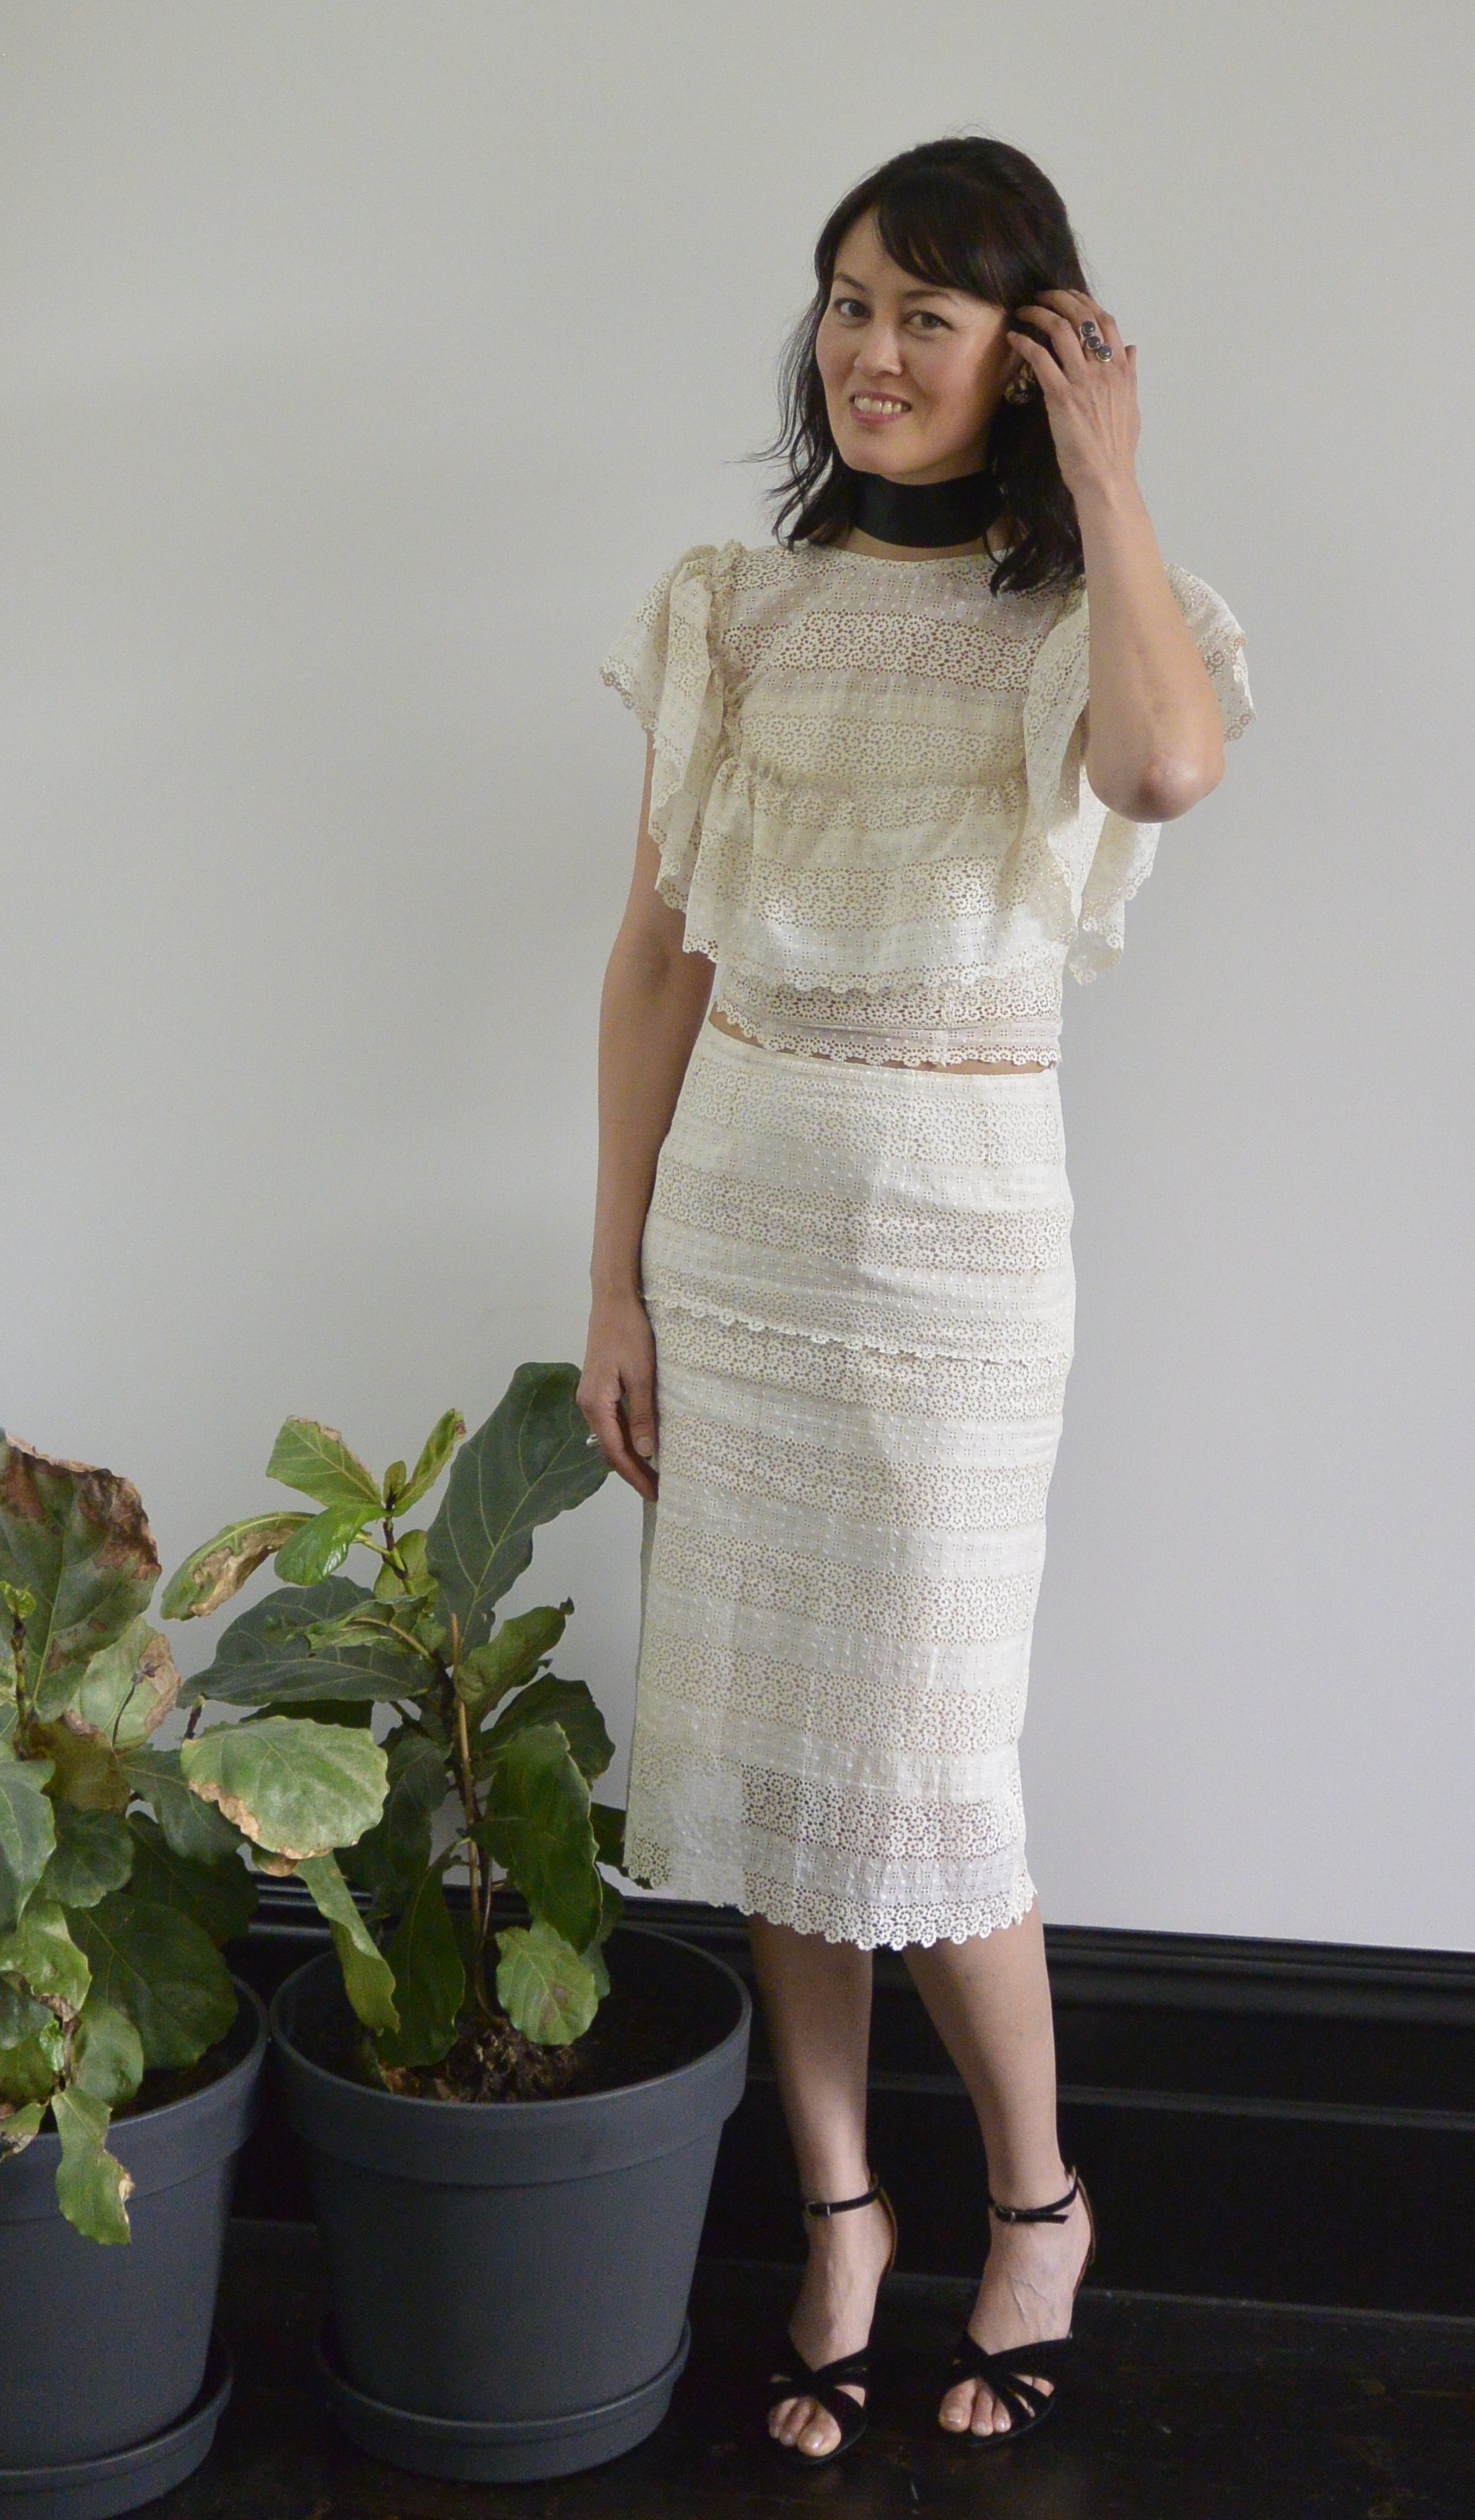
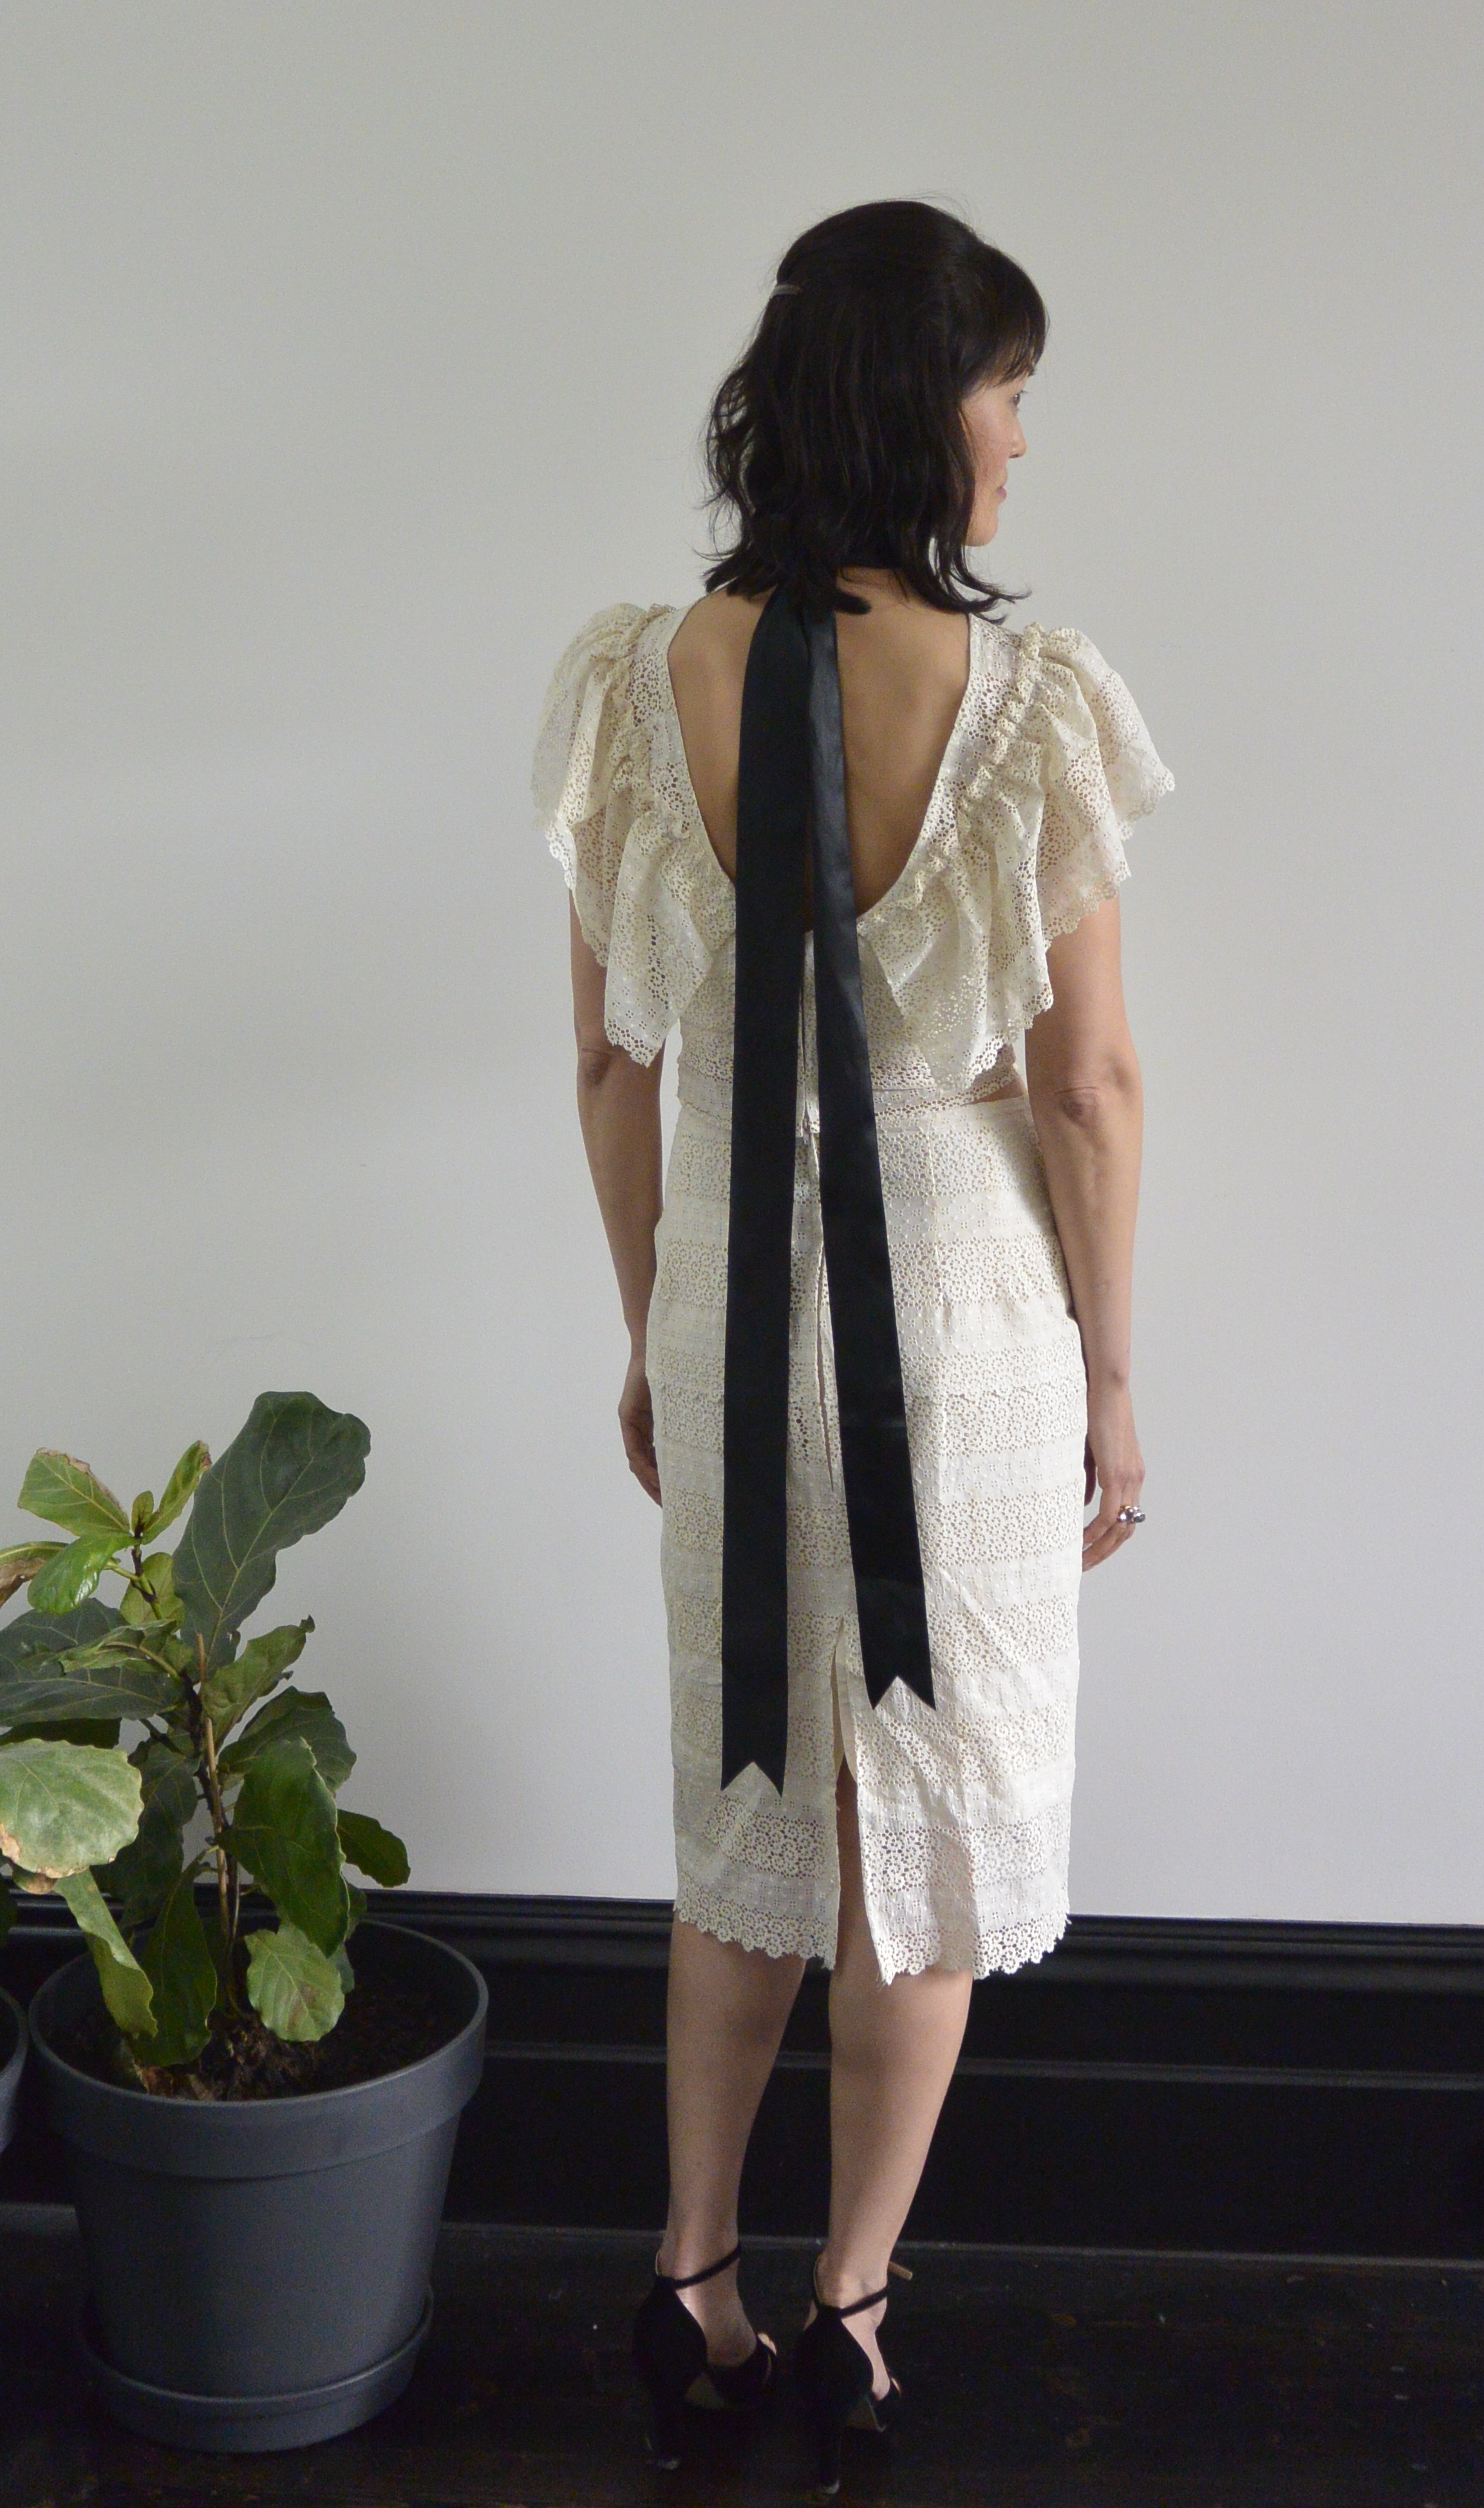
I suppose it’s pretty self explanatory that I used the original skirt section of the dress to make this new skirt (which I lined with calico). I will mention, however, that I had to sew the fabric together to create the length I wanted – maybe you can just make this out along the hip line – and I reinforced the side seams by sewing bias binding over them on the inside.

Although it’s a bit delicate, broderie anglaise and other types of lacy fabrics are quite forgiving in terms of being able to cover things up and also not having to actually make hems – the lace itself makes a pretty edging that won’t fray so it’s great when you’re in a rush/lazy/both. And you all know how I feel about ruffles – they are my solution to just about any DIY disaster! Now if only ruffles would fix the Melbourne weather…
So pretty and unique!
Fabulous! It’s a shame the weather didn’t play along because it would have been perfect for a bit of sunshine. I love the story of the whole outfit – it’s a perfect example of how a garment that’s quite nice to start with can be turned into something unique to you and your style. Hopefully you’ll have another chance to wear it in actual sunshine!
This is so wonderful! I’m so glad I stumbled onto your blog. I’m awestruck by how you transformed this – and that’ dramatic long black ribbon draping down the back sets the whole look off perfectly! Victoriana chic to the max.
Thanks Marisa, glad you like it! Browse through the rest of my blog for more thrifty ideas if you like.
Pingback: 結婚式にはお金がかかるって、誰が決めたの?