The skin-ny on sewing leather
Although opshopping is a bit like pot luck, there is one category of clothing you are guaranteed to find: leather.
 I’m not sure whether there is any data about which pieces opshops find the most difficult to shift, but my guess is it’s any clothing made from leather. Coats and jackets with huge shoulders and massive lapels, unflatteringly bulky pants – those relics from the ’80s and ’90s seem to remain on the racks visit after visit, and even challenge-loving refashioners such as myself are reluctant to tackle them as skins are not easy to rework. But recently I decided to give leather a go and I was quite pleased with the result.
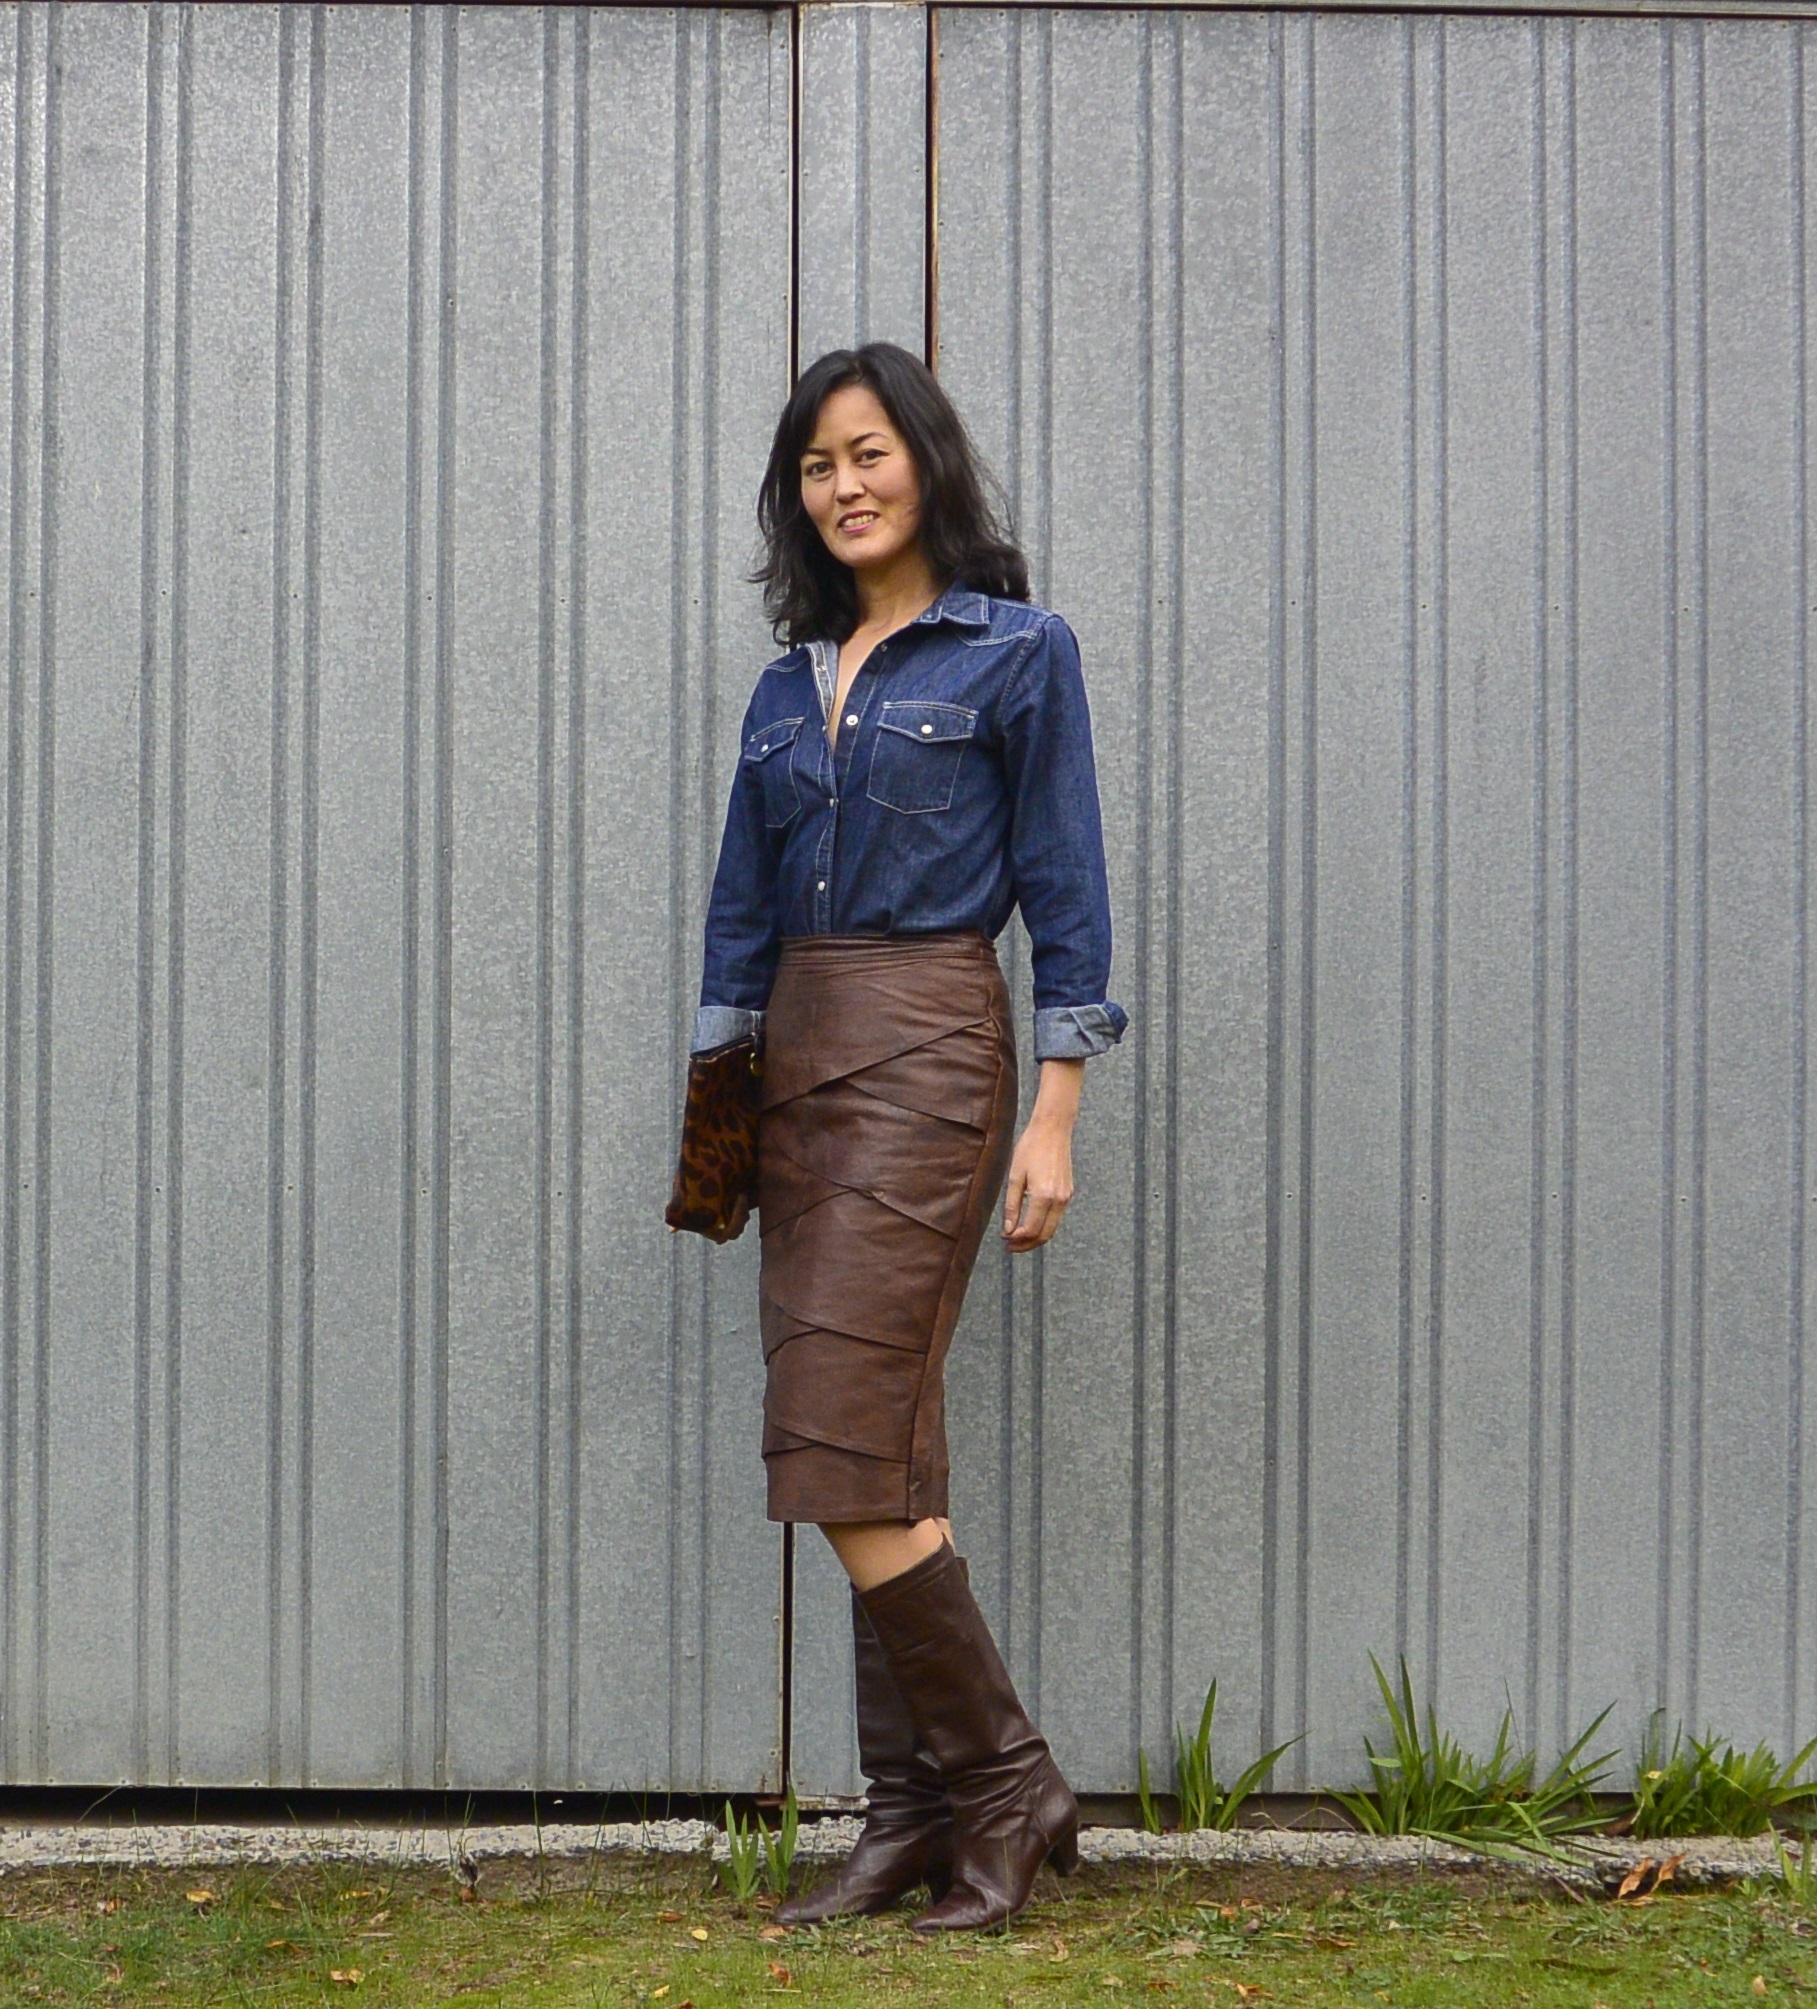 When I found this skirt (not actually at an opshop, it was from a church fete where I also found these pants: I really found the leather lode there!) my cousin commented that it looked like a pine cone. I suppose that she meant that as a deterrent but for $5 I wasn’t going to pass it up. I think pine cones are cool! Admittedly it was a bit too big around the hips, but all that needed to be done was to take it in along the side seams.
 As it is fully lined, and the lining is attached to the skirt, it was a bit tricky to alter and I didn’t want to risk running it through my sewing machine, so the new side seams had to be done by hand. I used a special leather needle and denim-weight thread to do a running stitch up each side (which I filled in on the way back down, kind of making it like backstitch. Leather is too thick for proper backstitching and, being bulky, needs to be pulled into place as you go to achieve a neat, flat seam.)
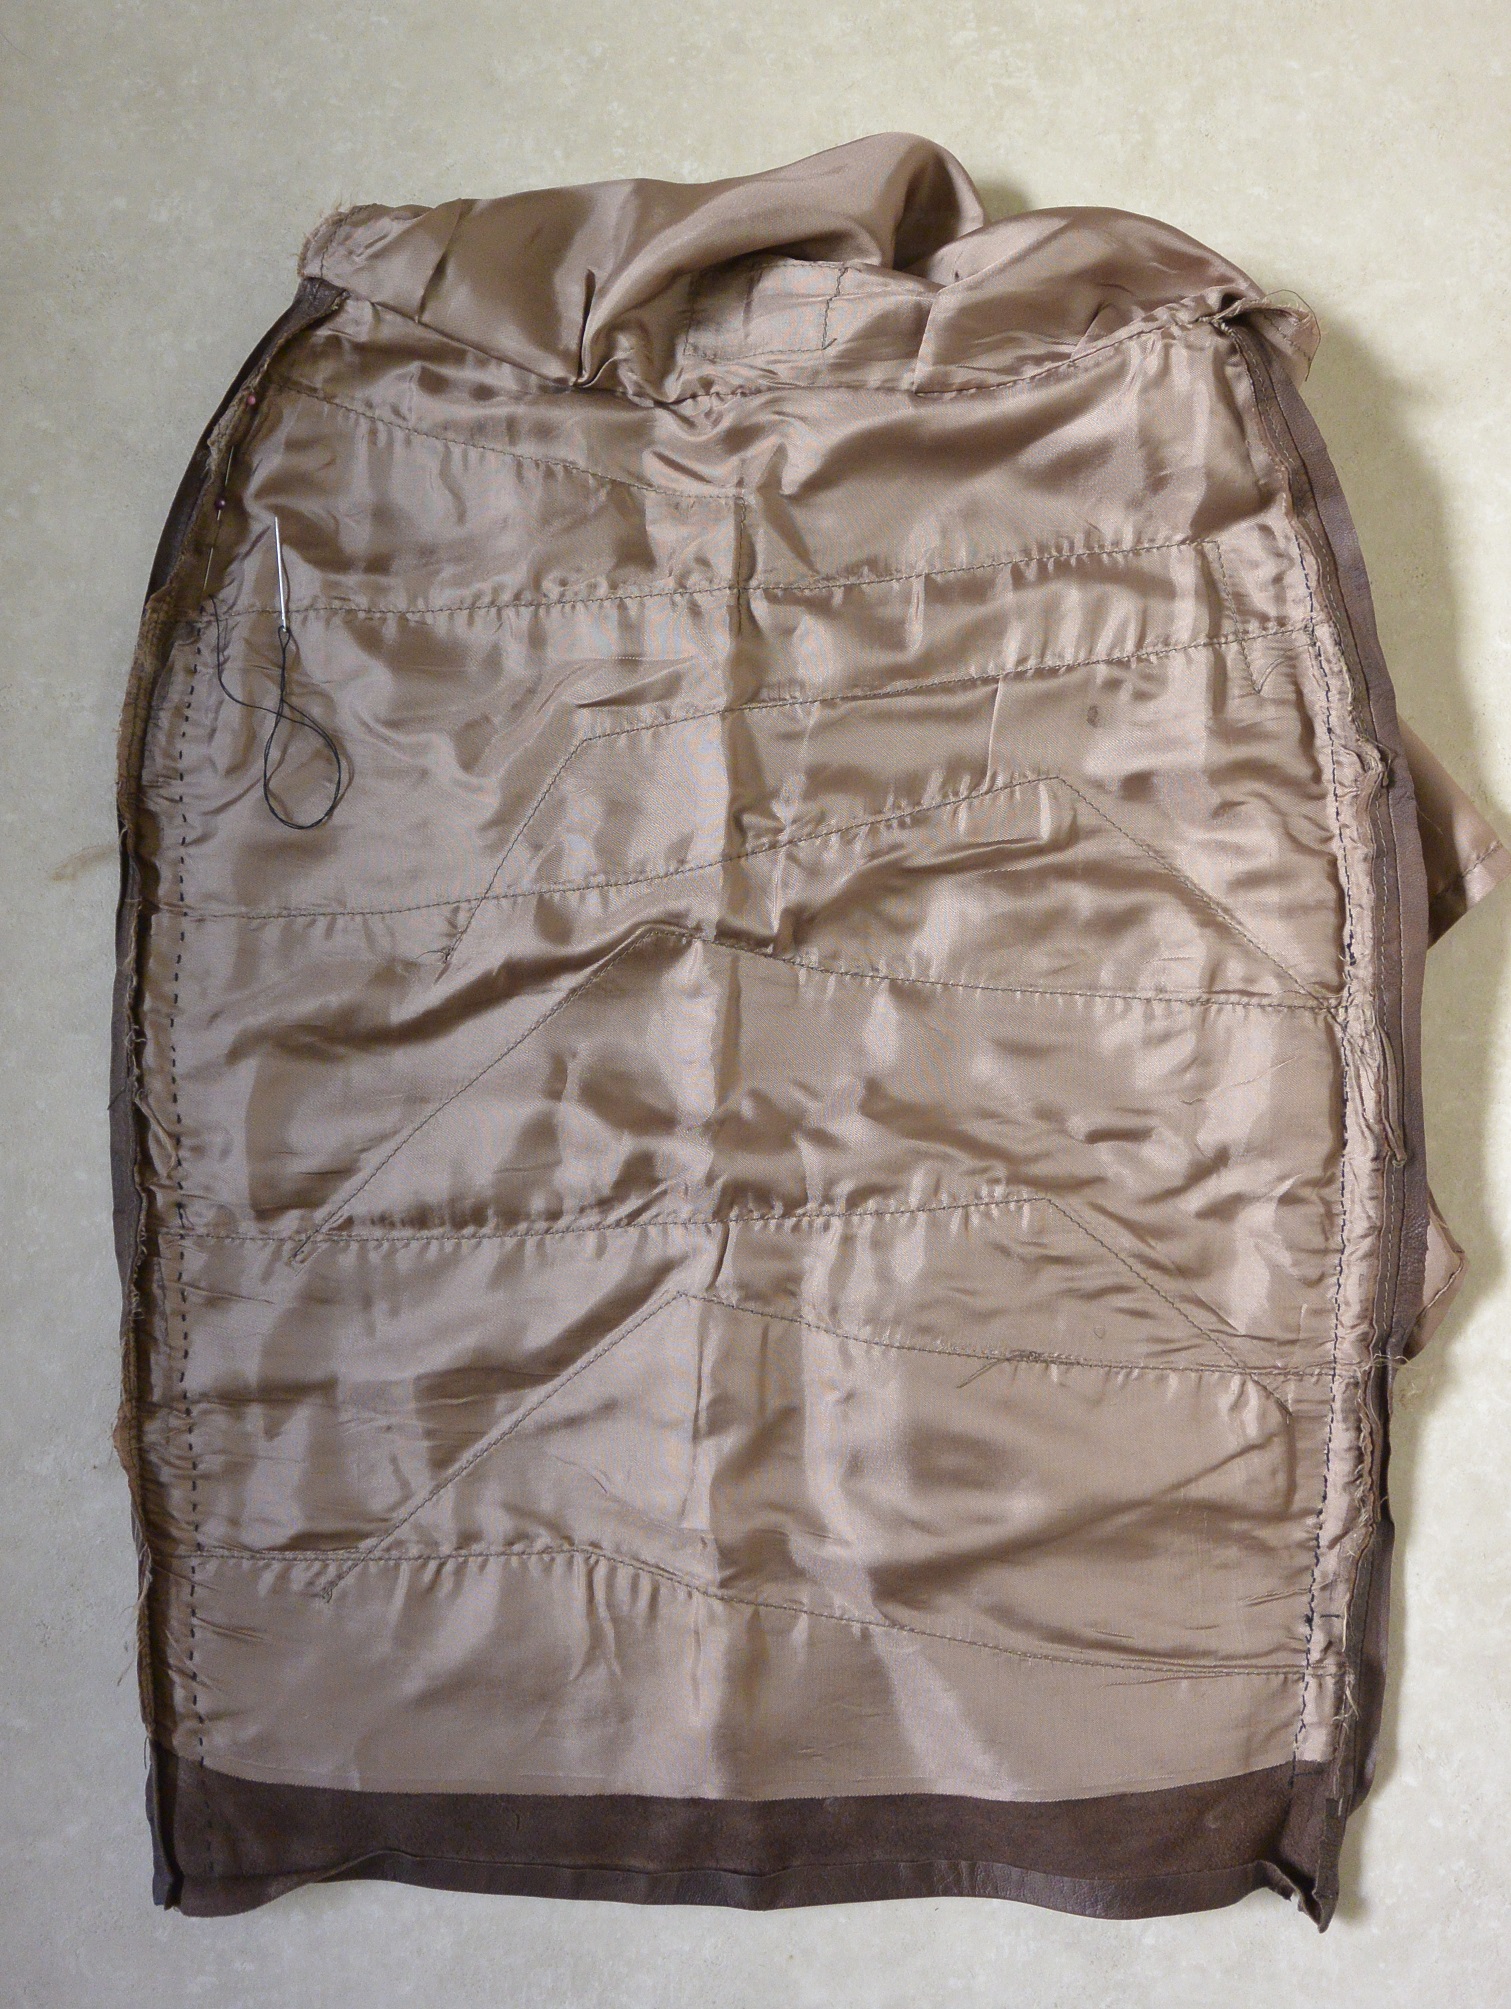
The skirt turned inside out, showing the incomplete new side seam in running stitch on the left, and the complete new side seam in “backstitch” on the right. There are two layers of lining, one sitting closest to the leather and another one which faces onto that, so this skirt’s construction made alteration a bit of a challenge! (In this photo the lining that comes into contact with the skin has been tucked inside out and you can only see the part that is attached to the waist.)

This was a fairly easy refashion but it is a bit time consuming sewing leather by hand so it’s lucky I had plenty of Poirot to watch (hand sewing projects are like a “get out of jail free” card for me to sit in front of the TV!). Fortunately the waist didn’t need altering because that would have been too big a task requiring unpicking, removal of the stud fastener, reshaping of the band, reattaching of the band to the skirt and replacing the stud fastener. I know my limits!
If you’re attempting a similar side seam alteration (with a leather skirt or otherwise), I find the best way to do it is to put the skirt on inside out, pin along the seams so it fits (making sure the material doesn’t shift around) and then try the skirt on the right way and check that you’ve taken in equal amounts of fabric along each seam. Also make sure you try sitting down in the skirt before you sew the seams or you might get a nasty surprise when you wear it!
It turns out that a leather pencil (or pine cone?) skirt lends itself to all kinds of styling.
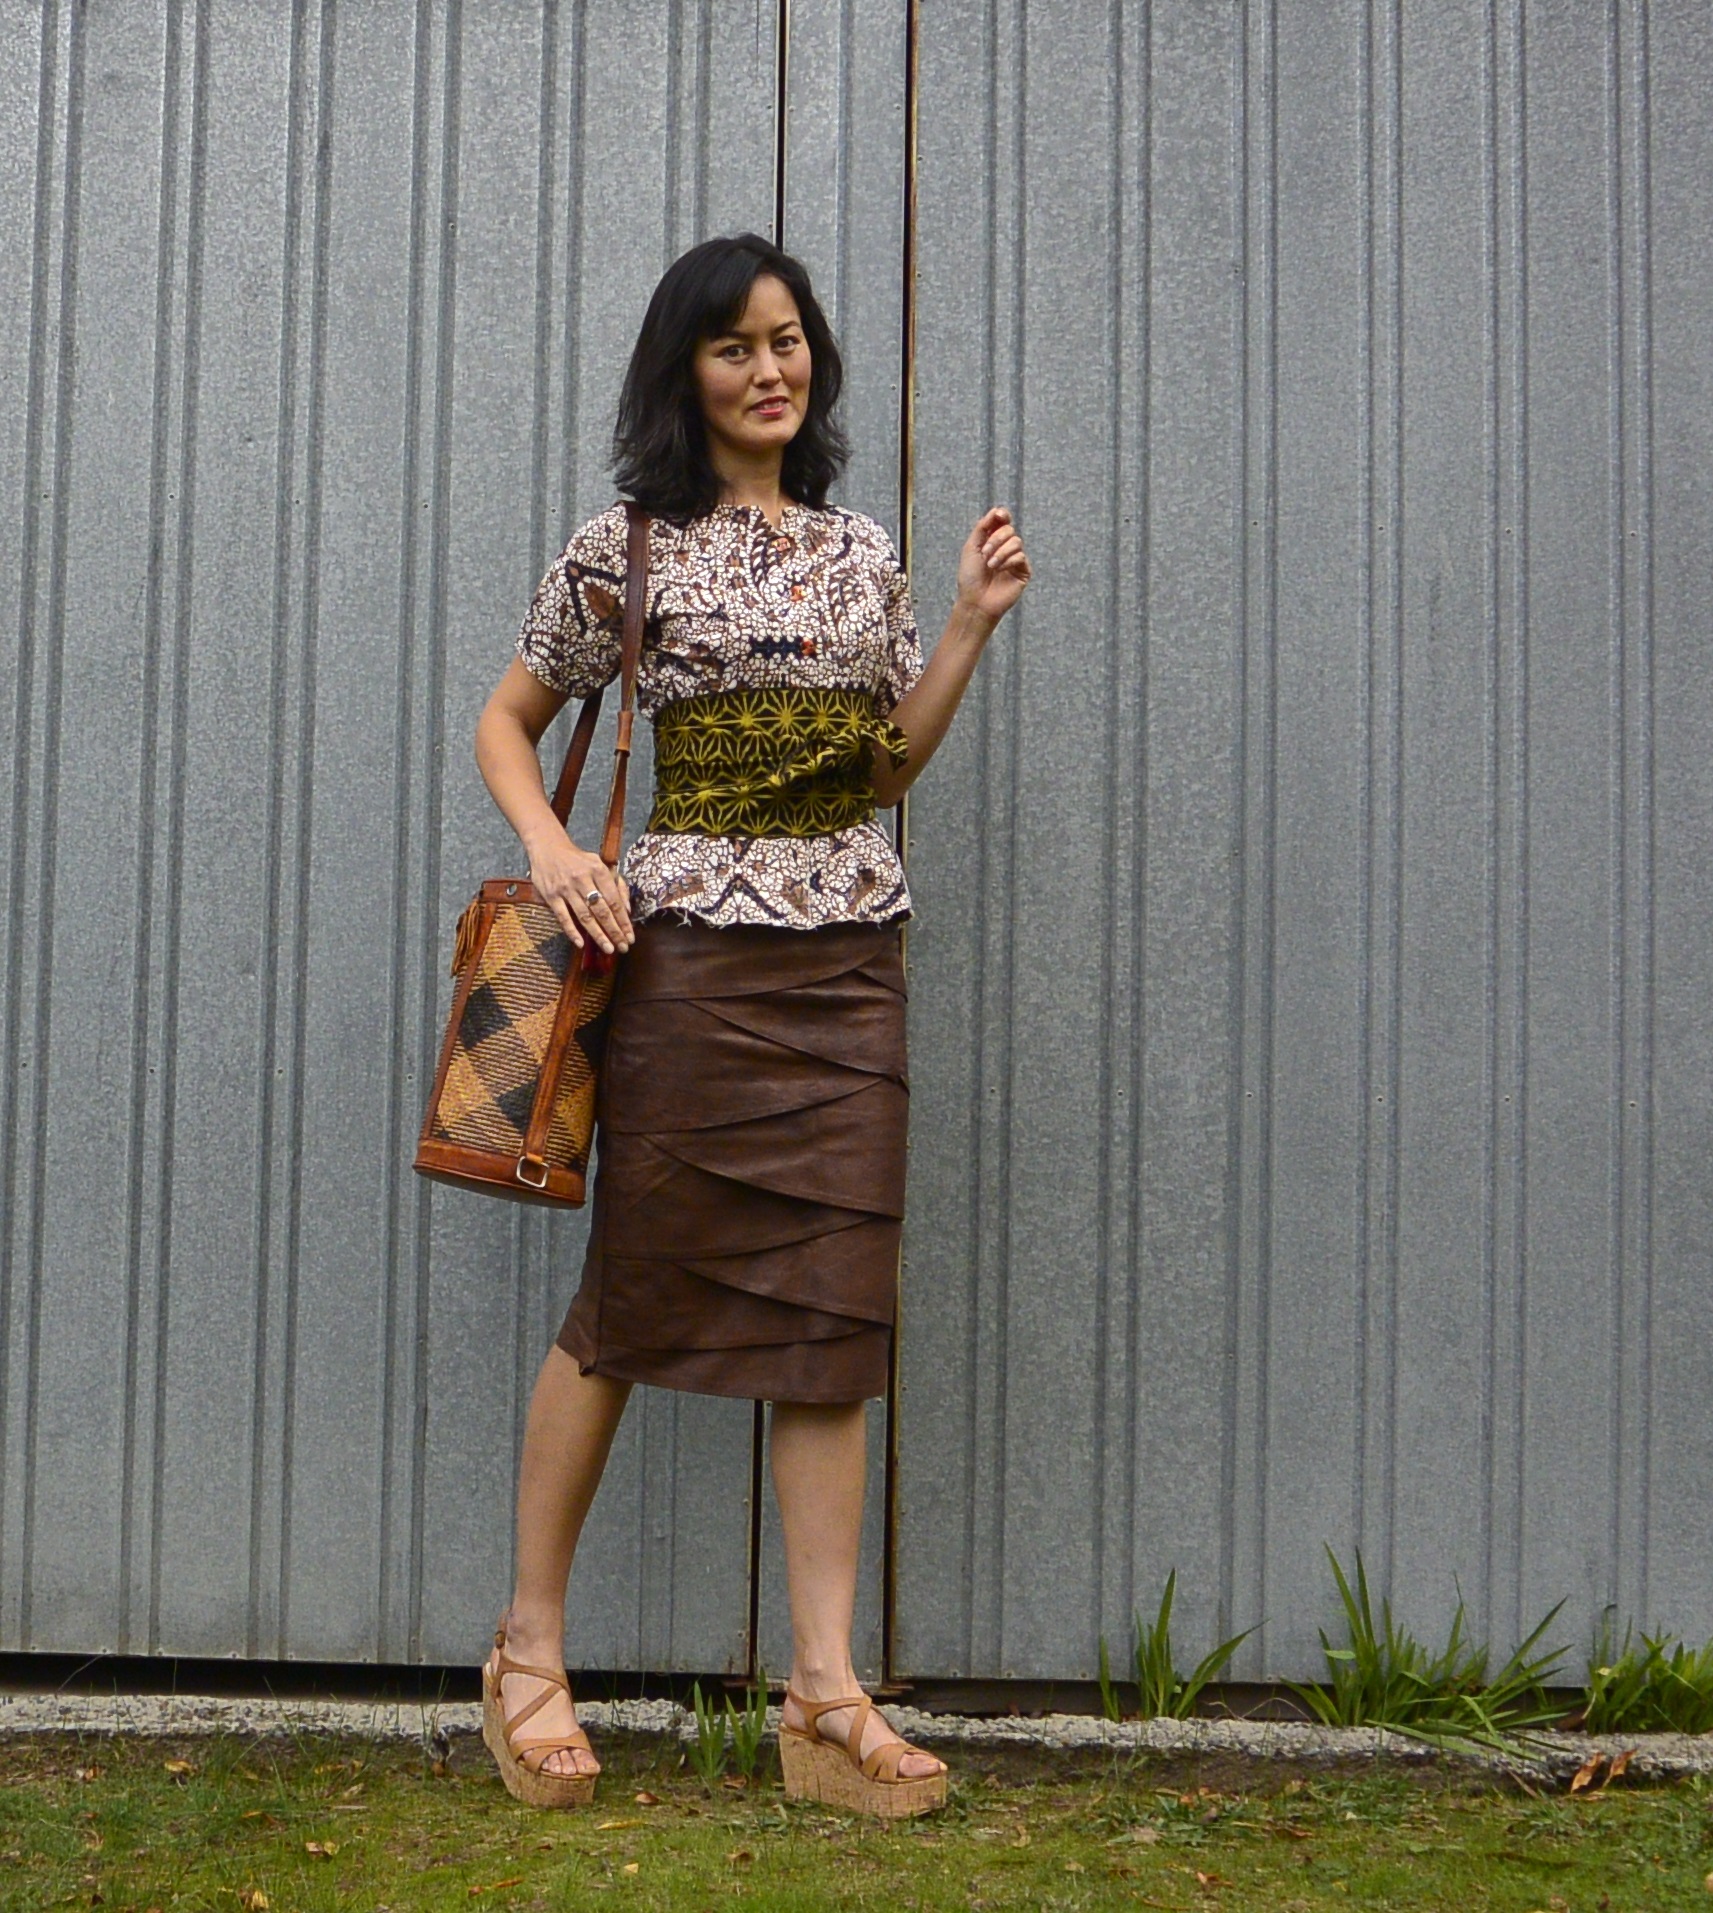
The length and shape of the skirt are both kind of new to my wardrobe so I’m looking forward to getting creative with some styling ideas!

For $5 and a bit of hand sewing in front of the TV, I think it was worth giving leather a go!
What a great look! Awesome job
It was definitely worth the effort to come out of it with a rather fantastic skirt! I have to agree with you on the hand-sewing and TV combination – it’s a brilliant way to take away the inevitable tedium of hand-sewing. If the TV’s on in my house, I need to be doing something other than just watching it, which is why I get quite a lot of knitting done these days.
Enjoy wearing your new skirt!
And keep up the puns.
I don’t need encouragement to keep up puns, but thanks 🙂 Looking forward to seeing your knitting!
Nice job! I love a bit of leather refashioning myself and often snap up leather beauties second hand. The best thing about refashioning leather is that it doesn’t fray, so when you customize hems, arm holes, sleeves, boot tops etc you can either leave a raw edge, or if you want a more finished look you can just fold it under and glue flat with clear drying shoe glue. The scraps come in handy for all kinds of things too!
Thanks Victoria, would love to see some of your leather refashions! (Are you on Instagram?)
Ha yes sort of – if you count a grand total of about 10 photos, mainly of my 2 year old! But you’ve got me thinking – maybe I should post photos of some creative projects? If I do ever get myself organized to do that I’ll make sure I let you know! 🙂
Yes! We want to see creative pics!
Pingback: Seven ways with a shirt | Style Wilderness
Pingback: The skinny on sewing leather #2 | Style Wilderness