A patch of bother
About 17 years ago, when I was living in Tokyo, I spent up big on a pair of jeans (Hysteric Glamour brand). When I say “spent up big”, they were probably only about $150, but for me, that’s a lot! But it wasn’t so much the cost as the fact that they’ve been with me so long that made me loath to get rid of them when they started getting too tight for me last year.
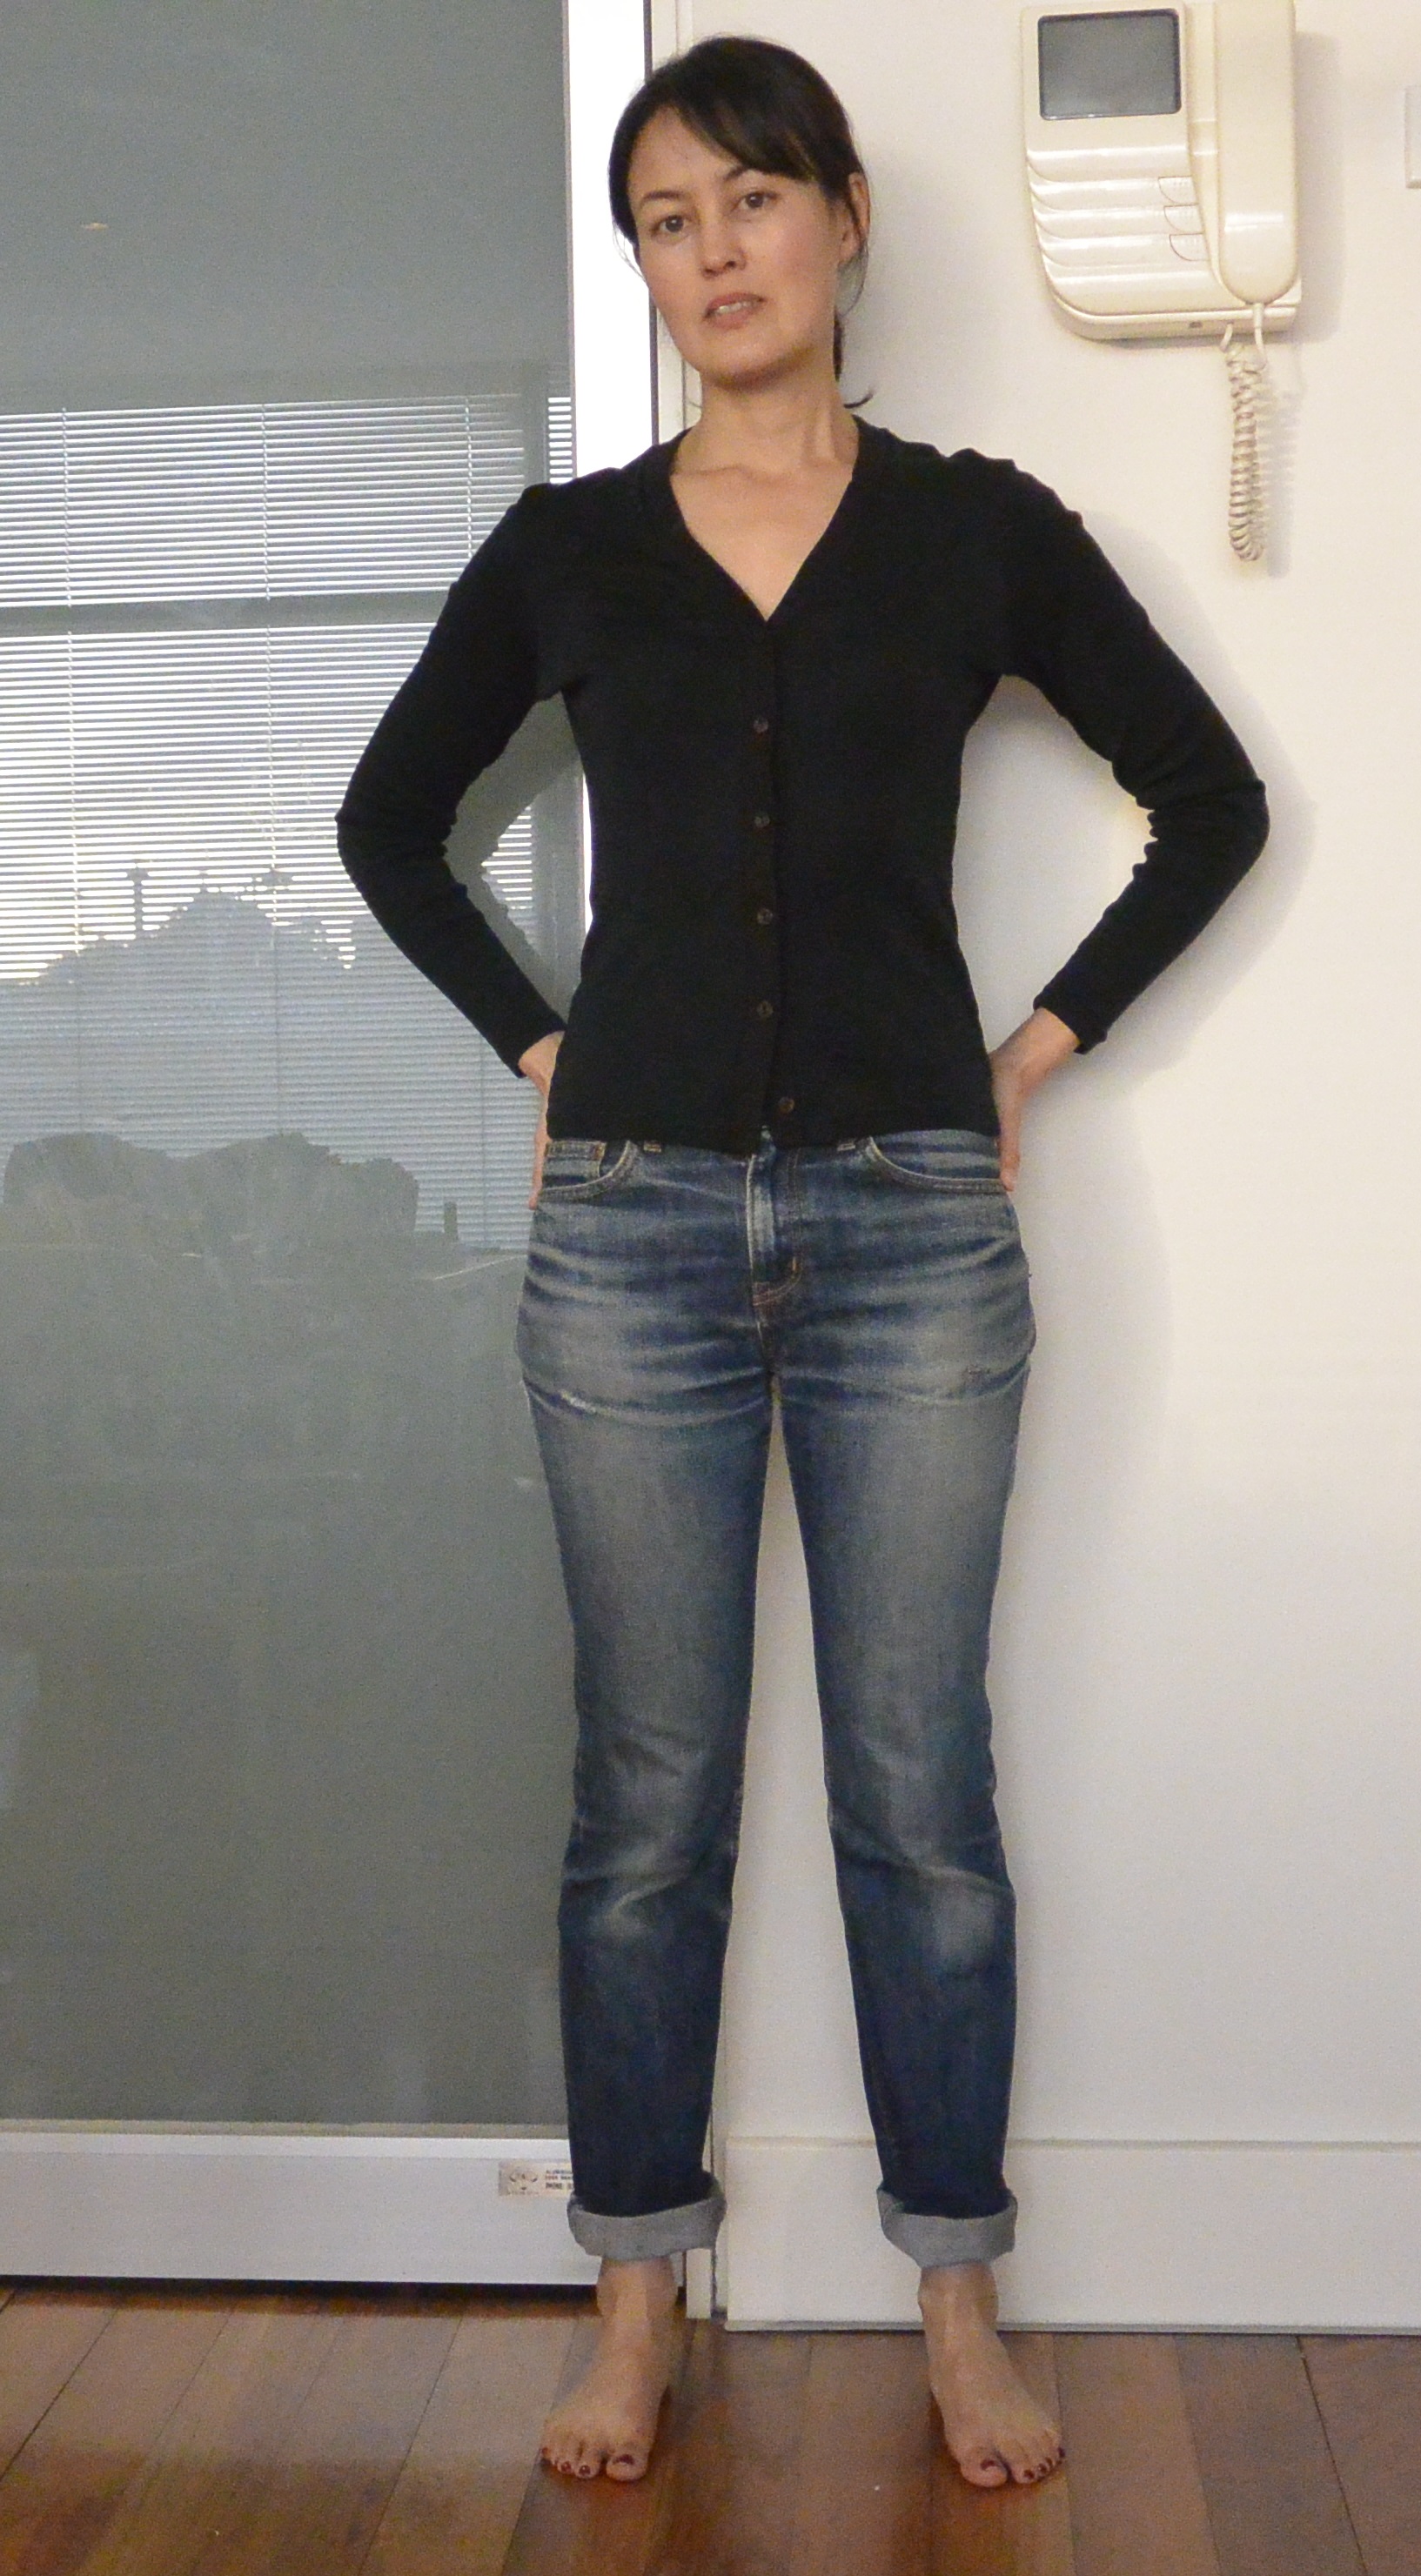
Crappy “before” shot… wow, these jeans were really NOT flattering!
Middle age spread is definitely a thing! How else do you explain jeans that I’ve worn since about 1999 suddenly nearly cutting off my circulation around the hips and thighs?
I did hope to get my legs back to their pre-40s stick-like proportions, but after a year, I still couldn’t sit down in these jeans without considerable discomfort and decided something needed to be done.* Enter the unpicker!
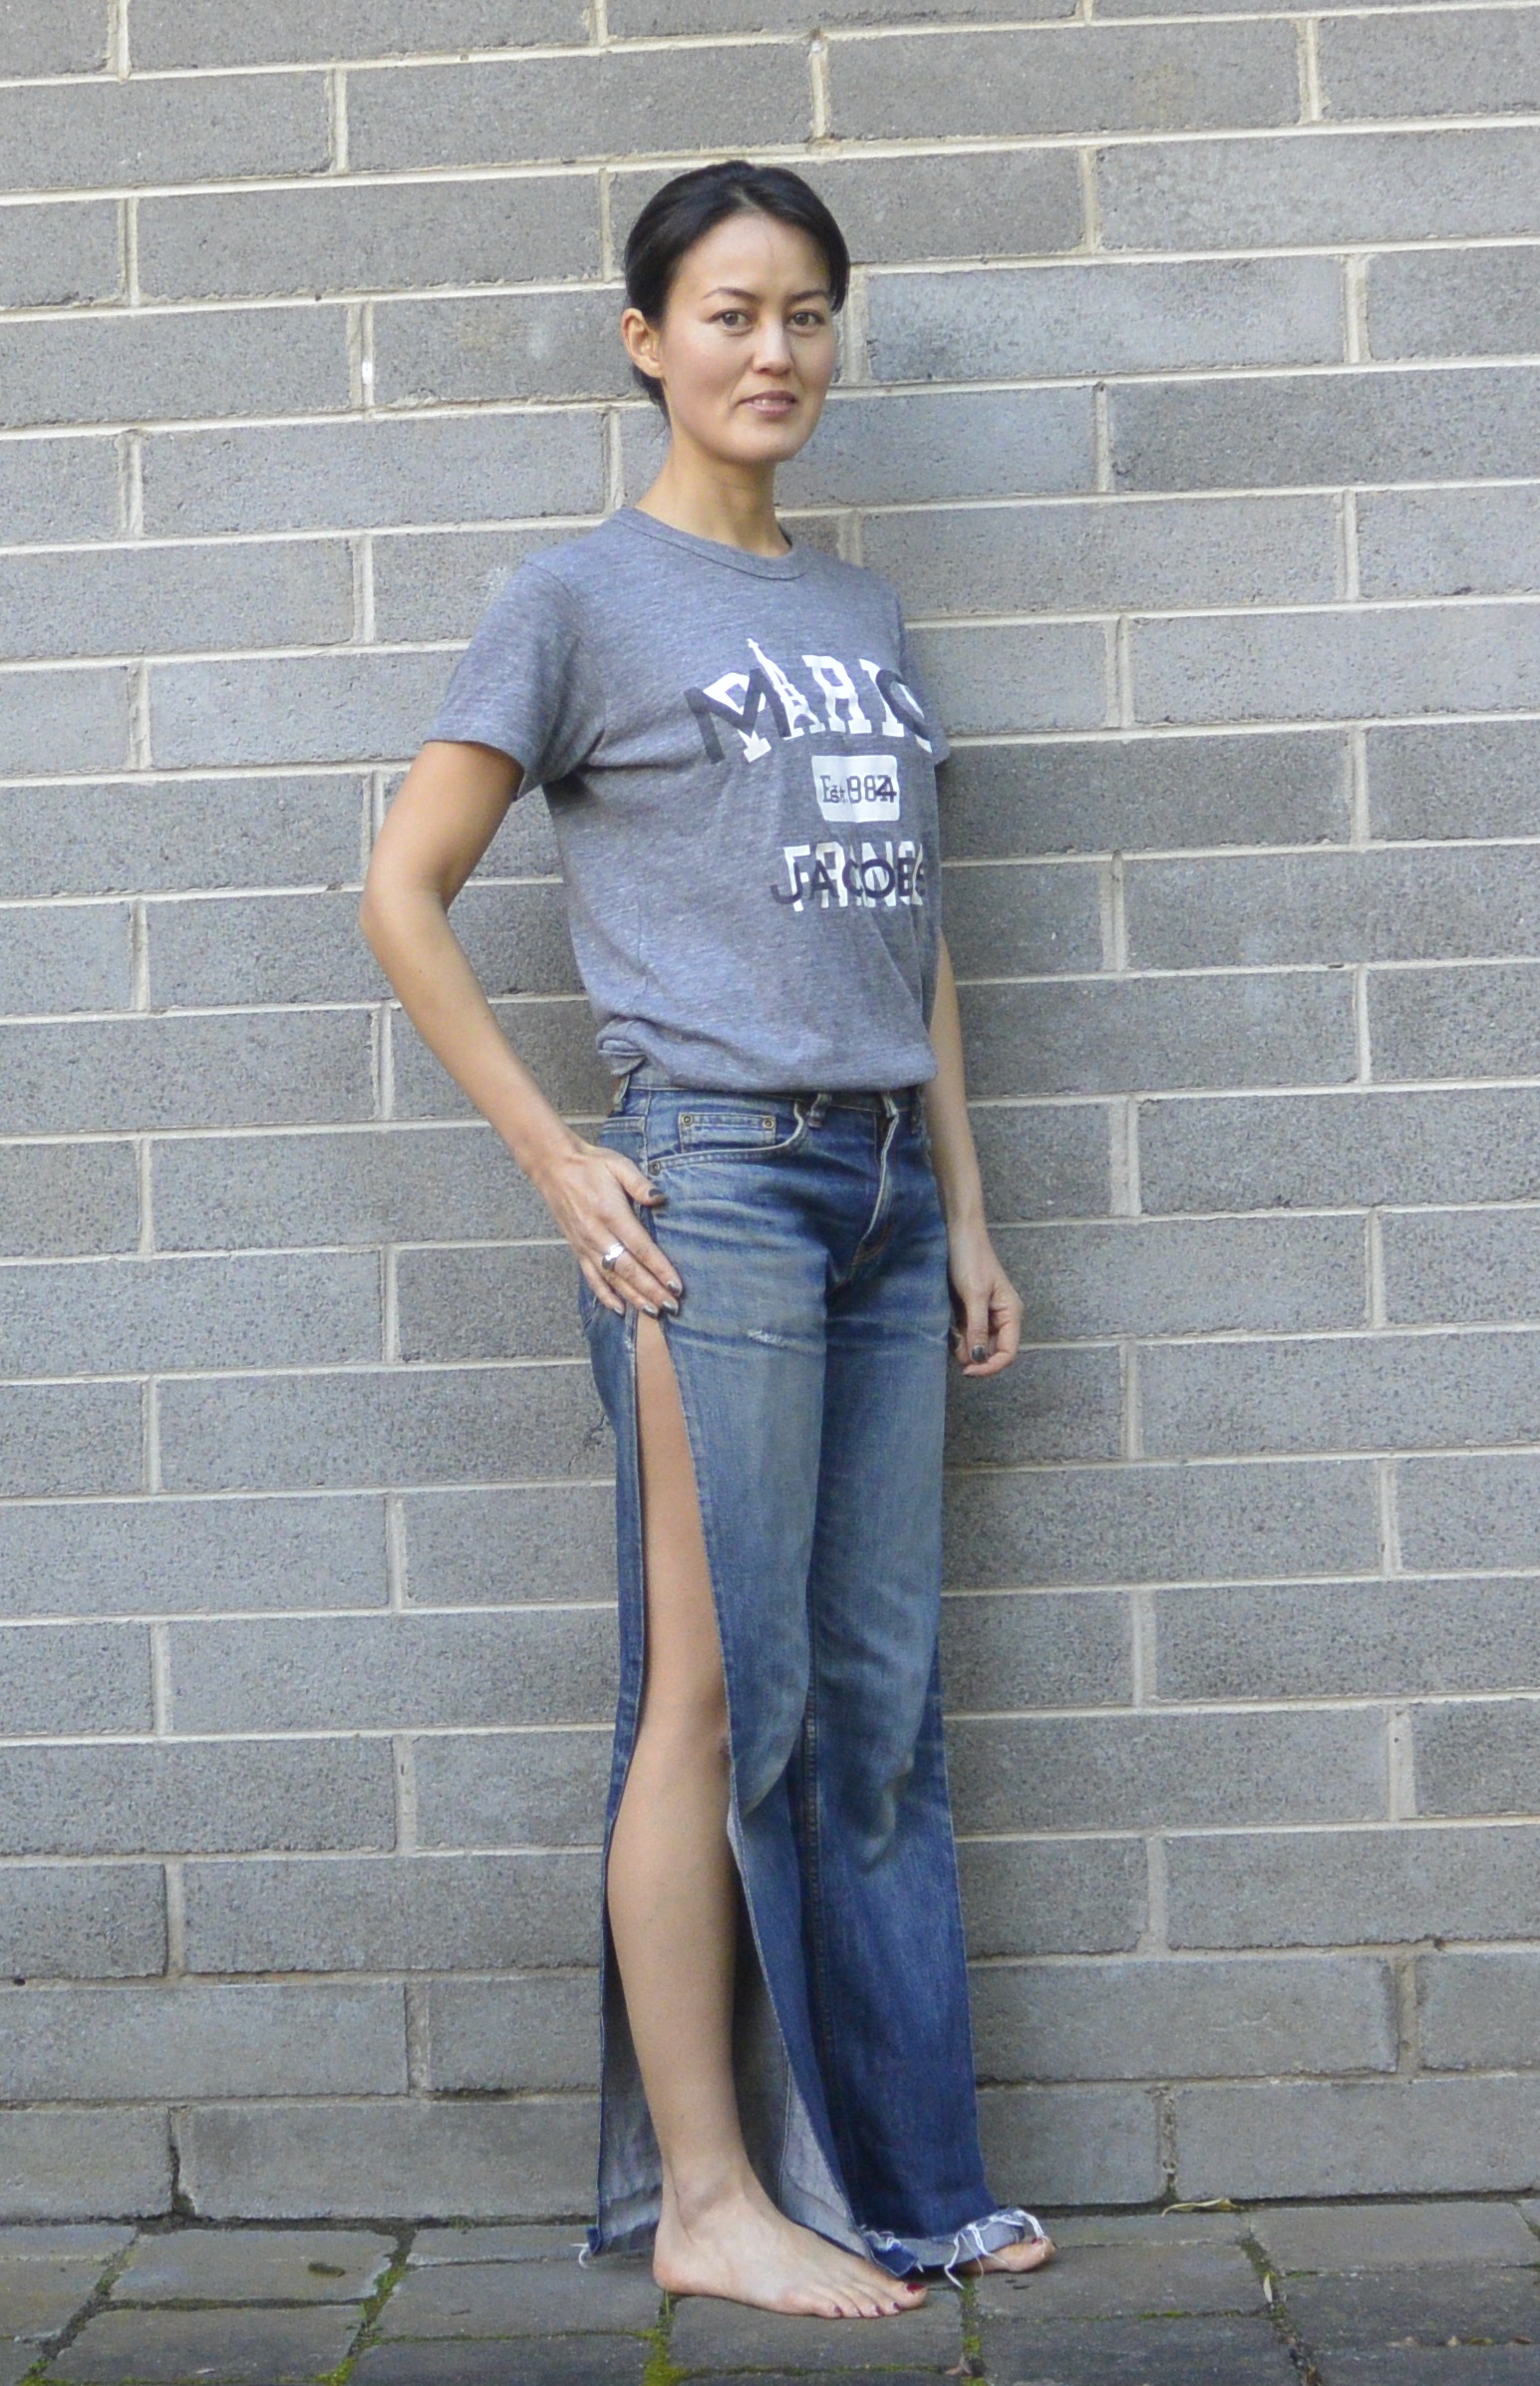
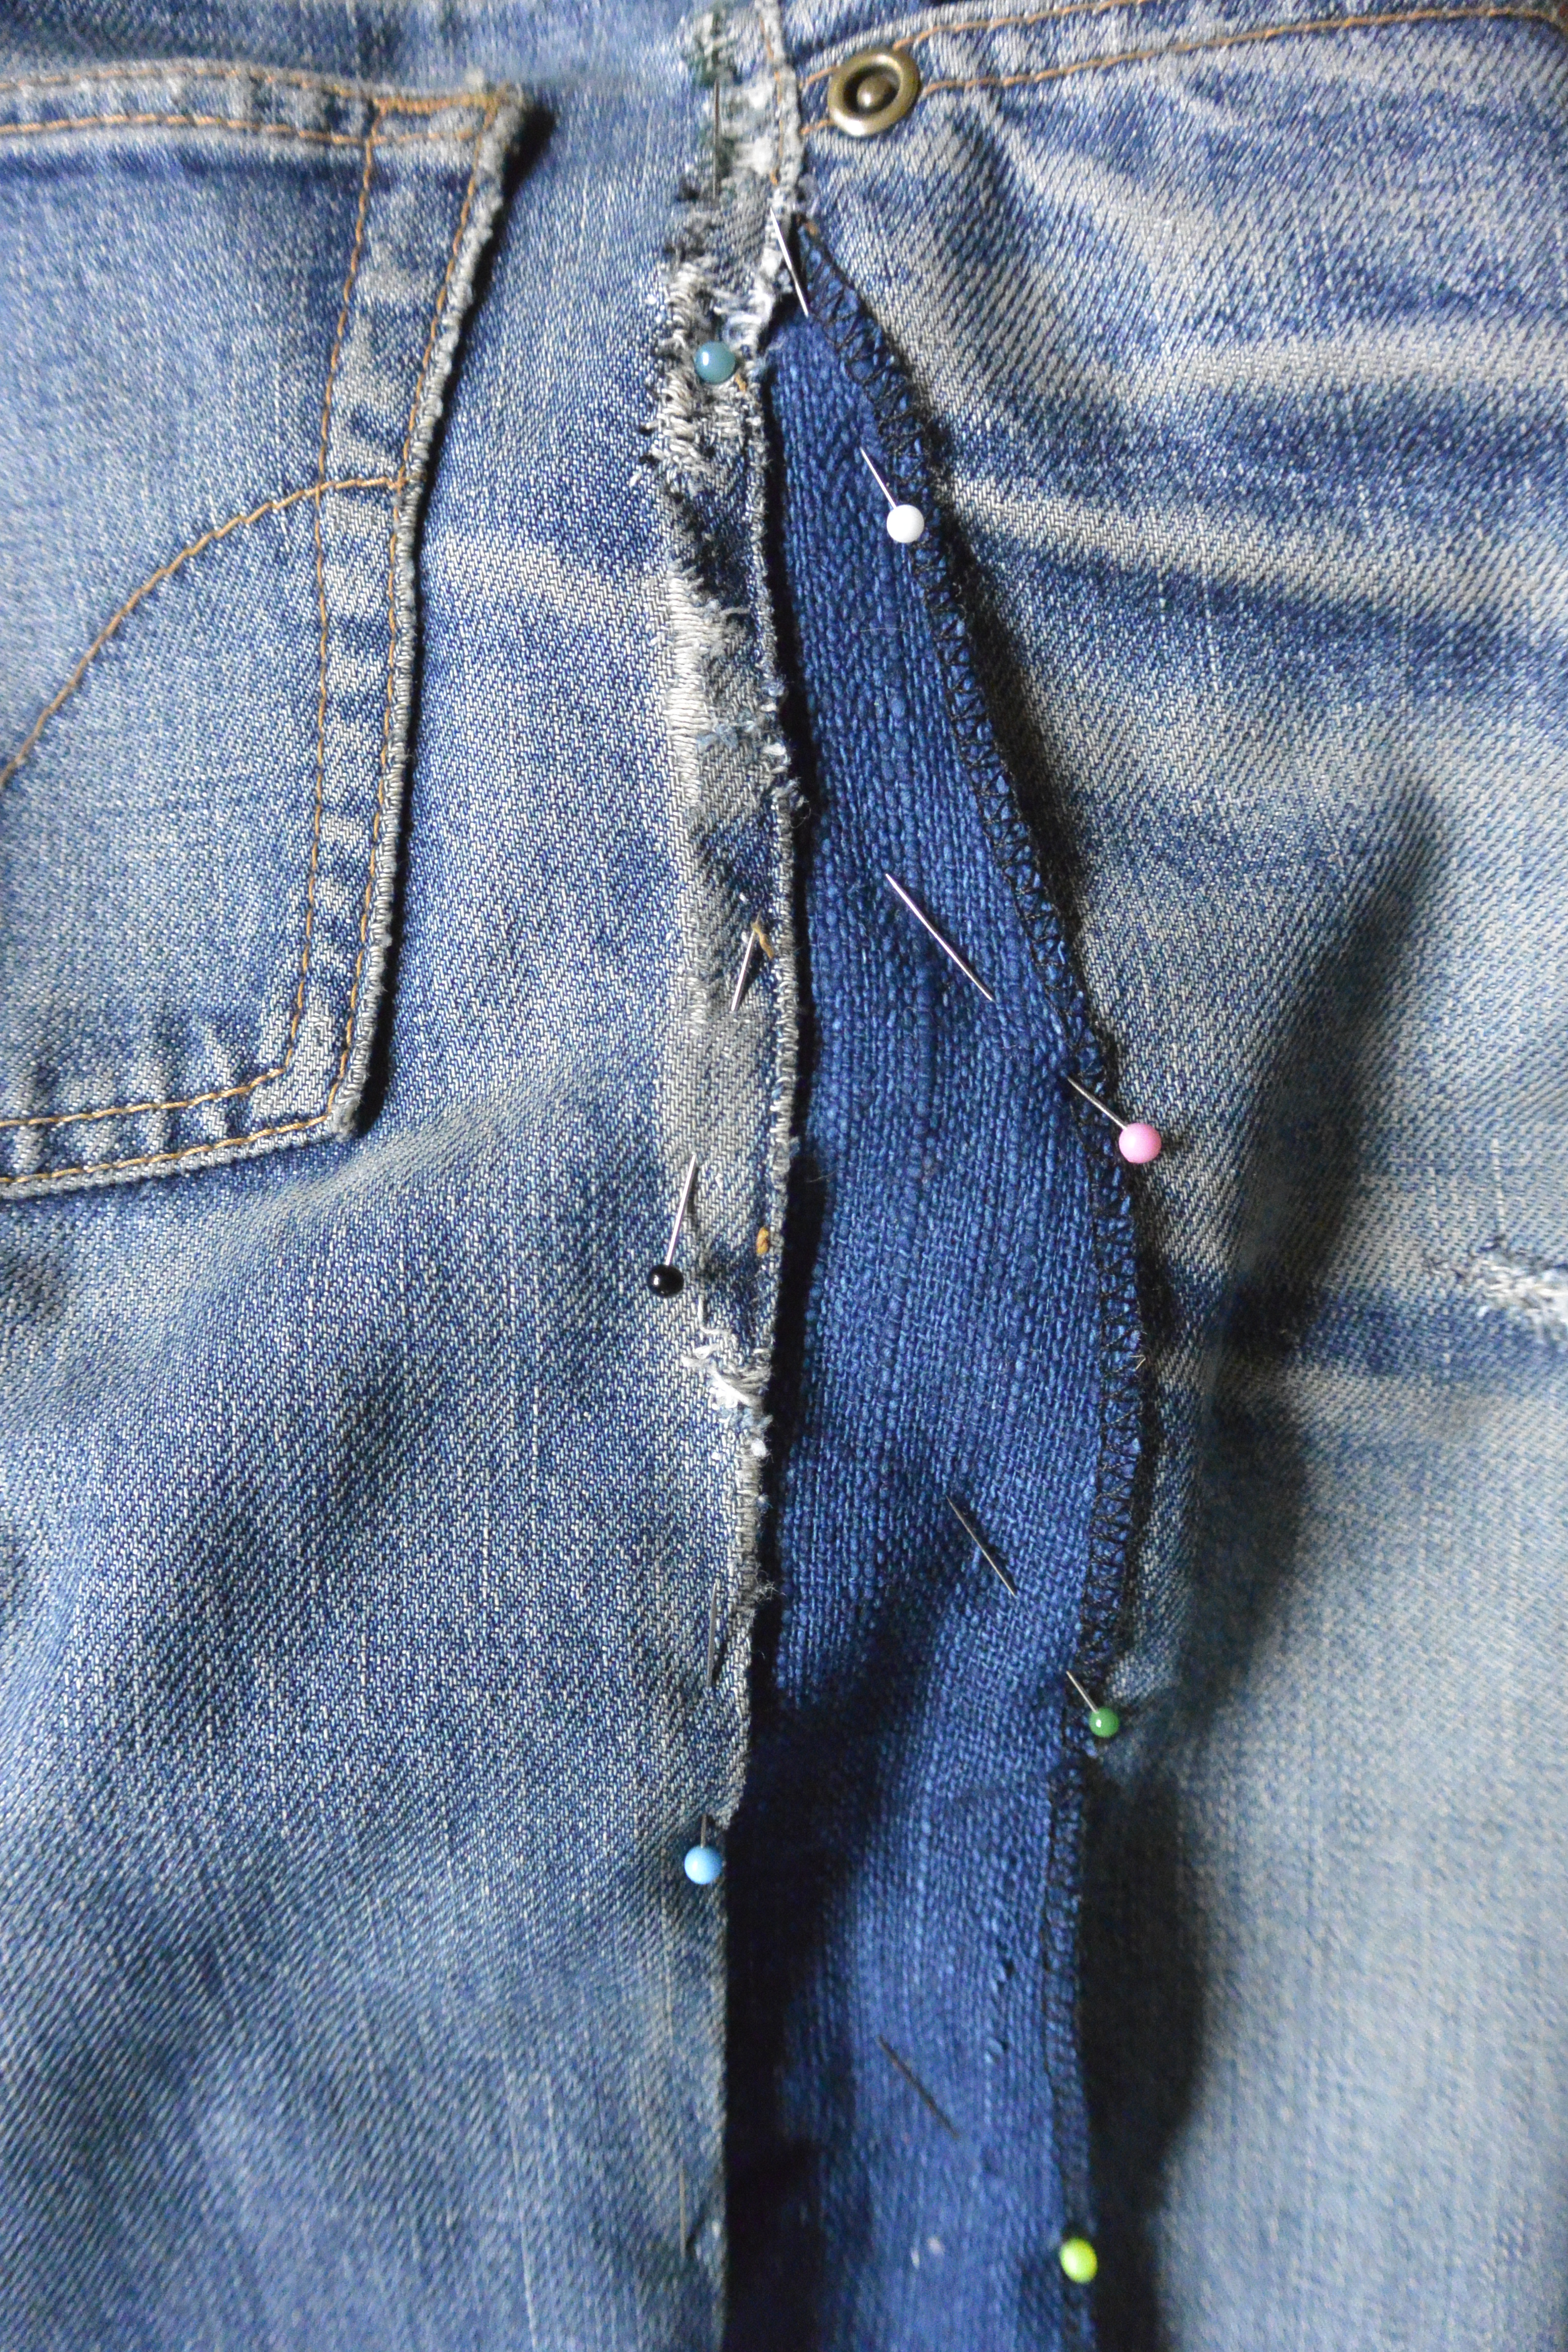
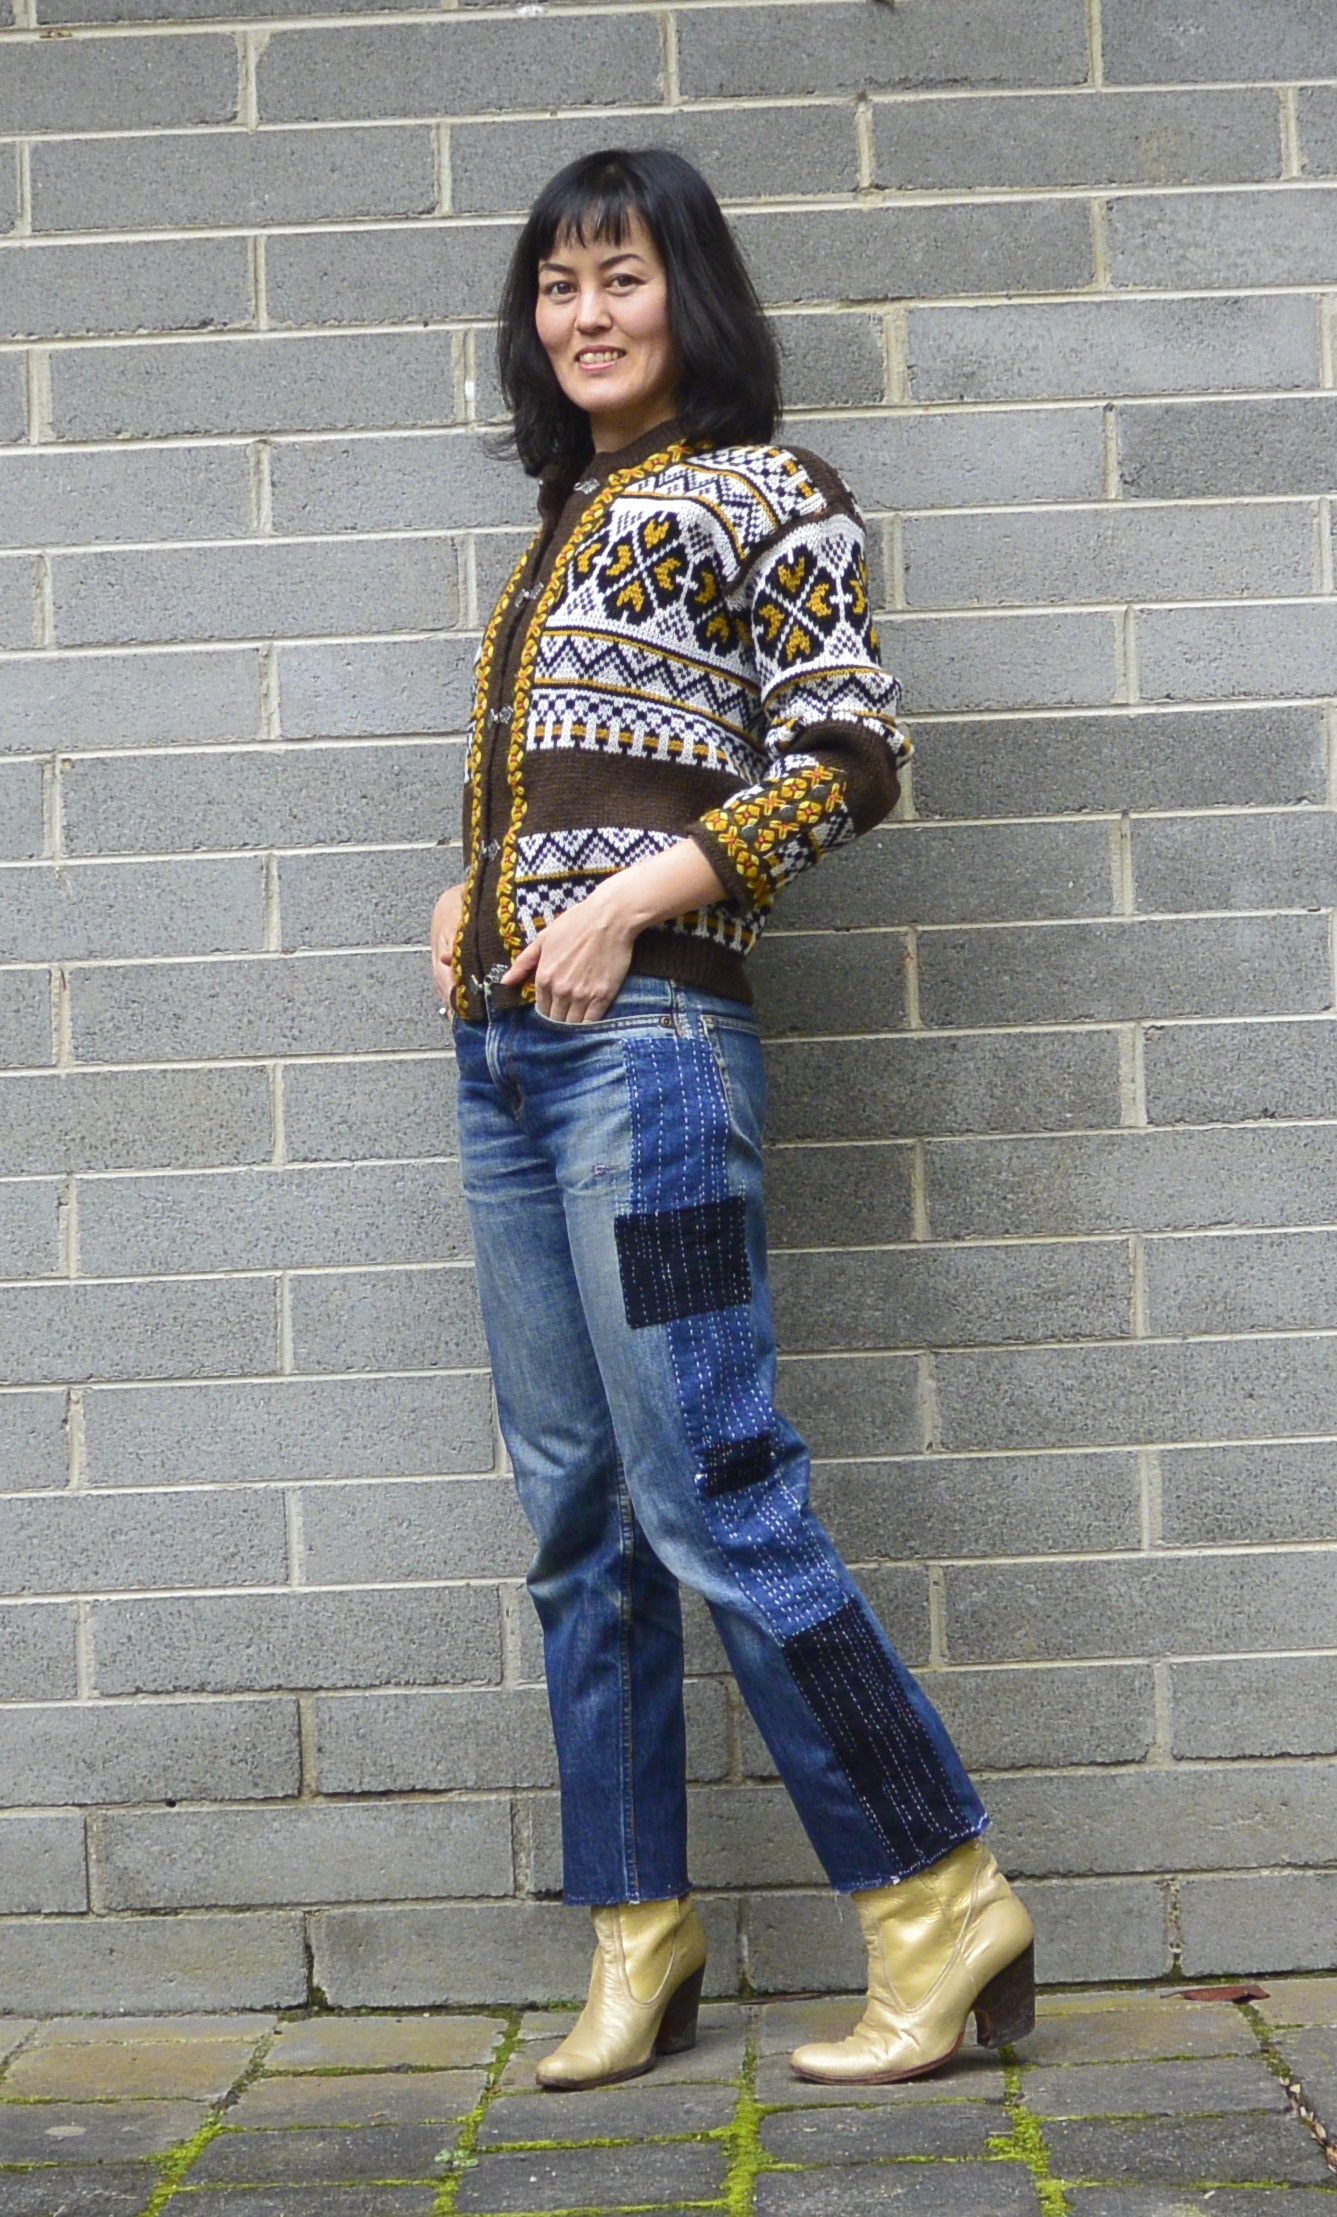
I ripped open the outer leg seams to around the hips to make the fit slightly looser…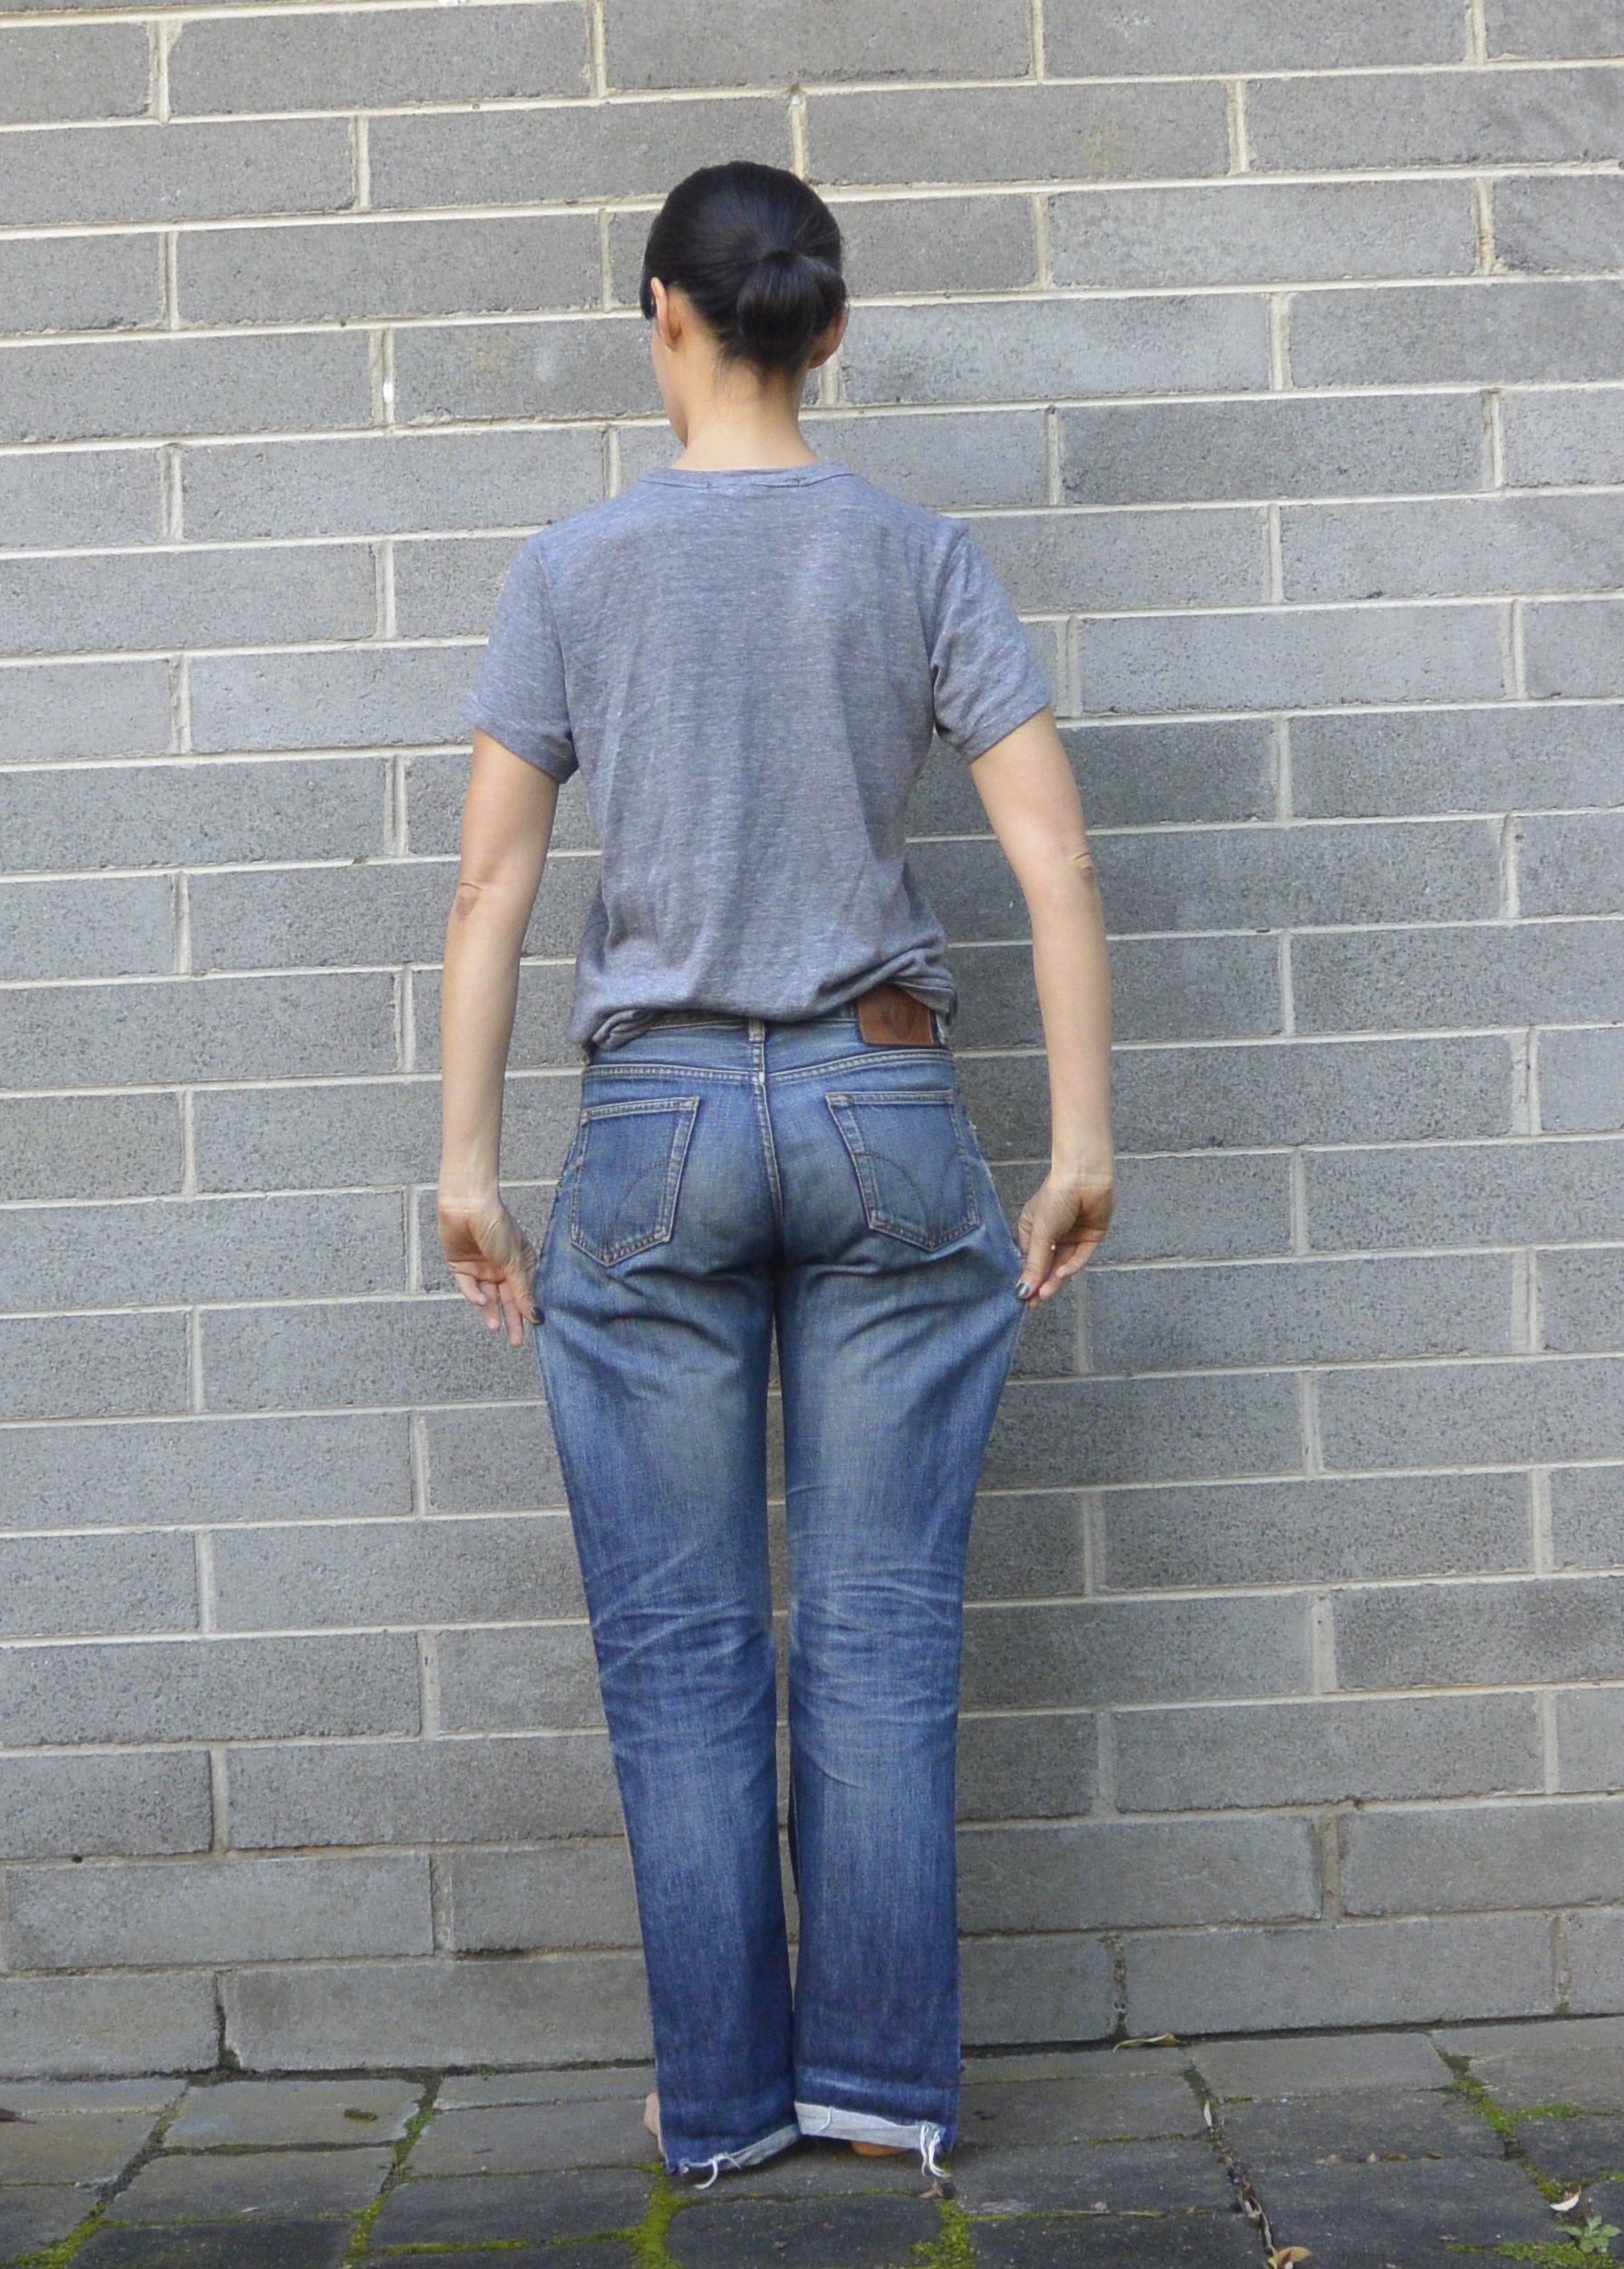
… then inserted a panel of indigo dyed cotton (the real, organic thing! I got it in Laos) a few centimetres wide into those outer leg seams.

This wouldn’t work with all jeans, but it was OK to do it on these as they were originally kind of a slim boyfriend fit rather than skintight. If you want to try this on similar jeans or pants, note that the panels you are inserting to create extra legroom have to be tapered in at the hips. I’d recommend trying this only if your jeans are about a centimetre or two too tight, and only around the legs (ie not around the waist as that is way too much hassle in my opinion!). Also, unless you don’t mind a strange looking result, only add panels that are a few centimetres wide (ie don’t try adding really wide panels).
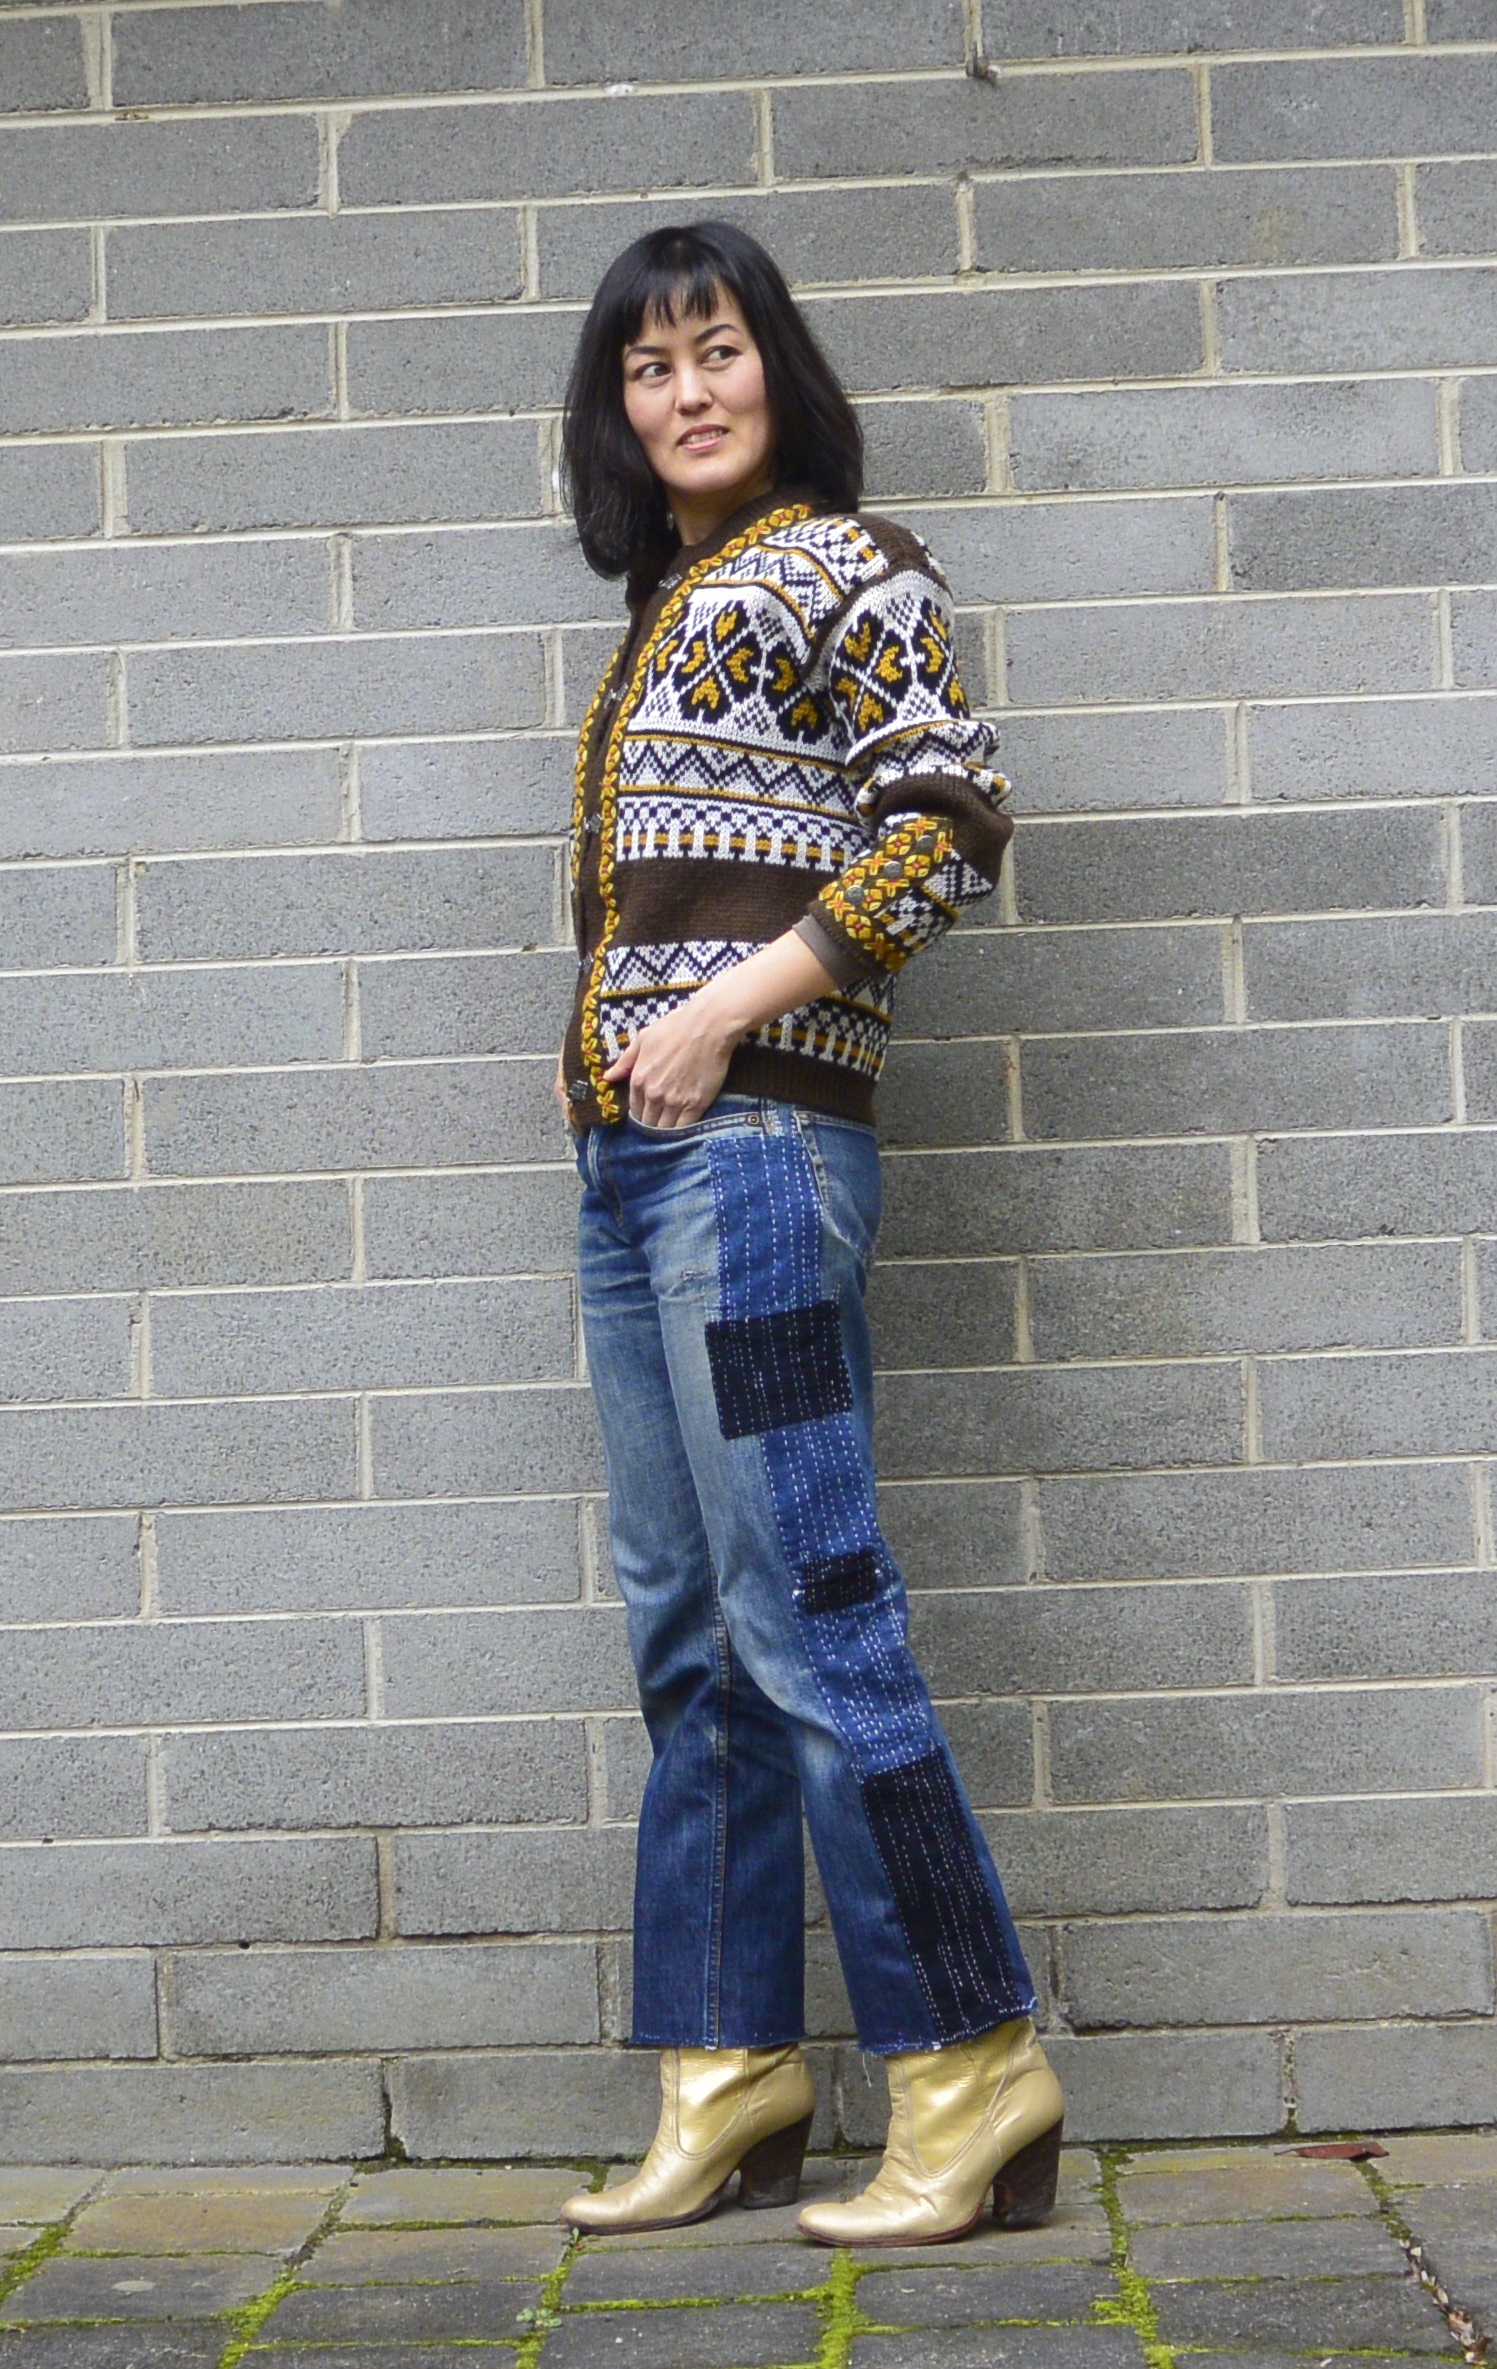
 After sewing the panels in place, I covered them with patches of denim left over from other projects along with some more indigo dyed cotton.
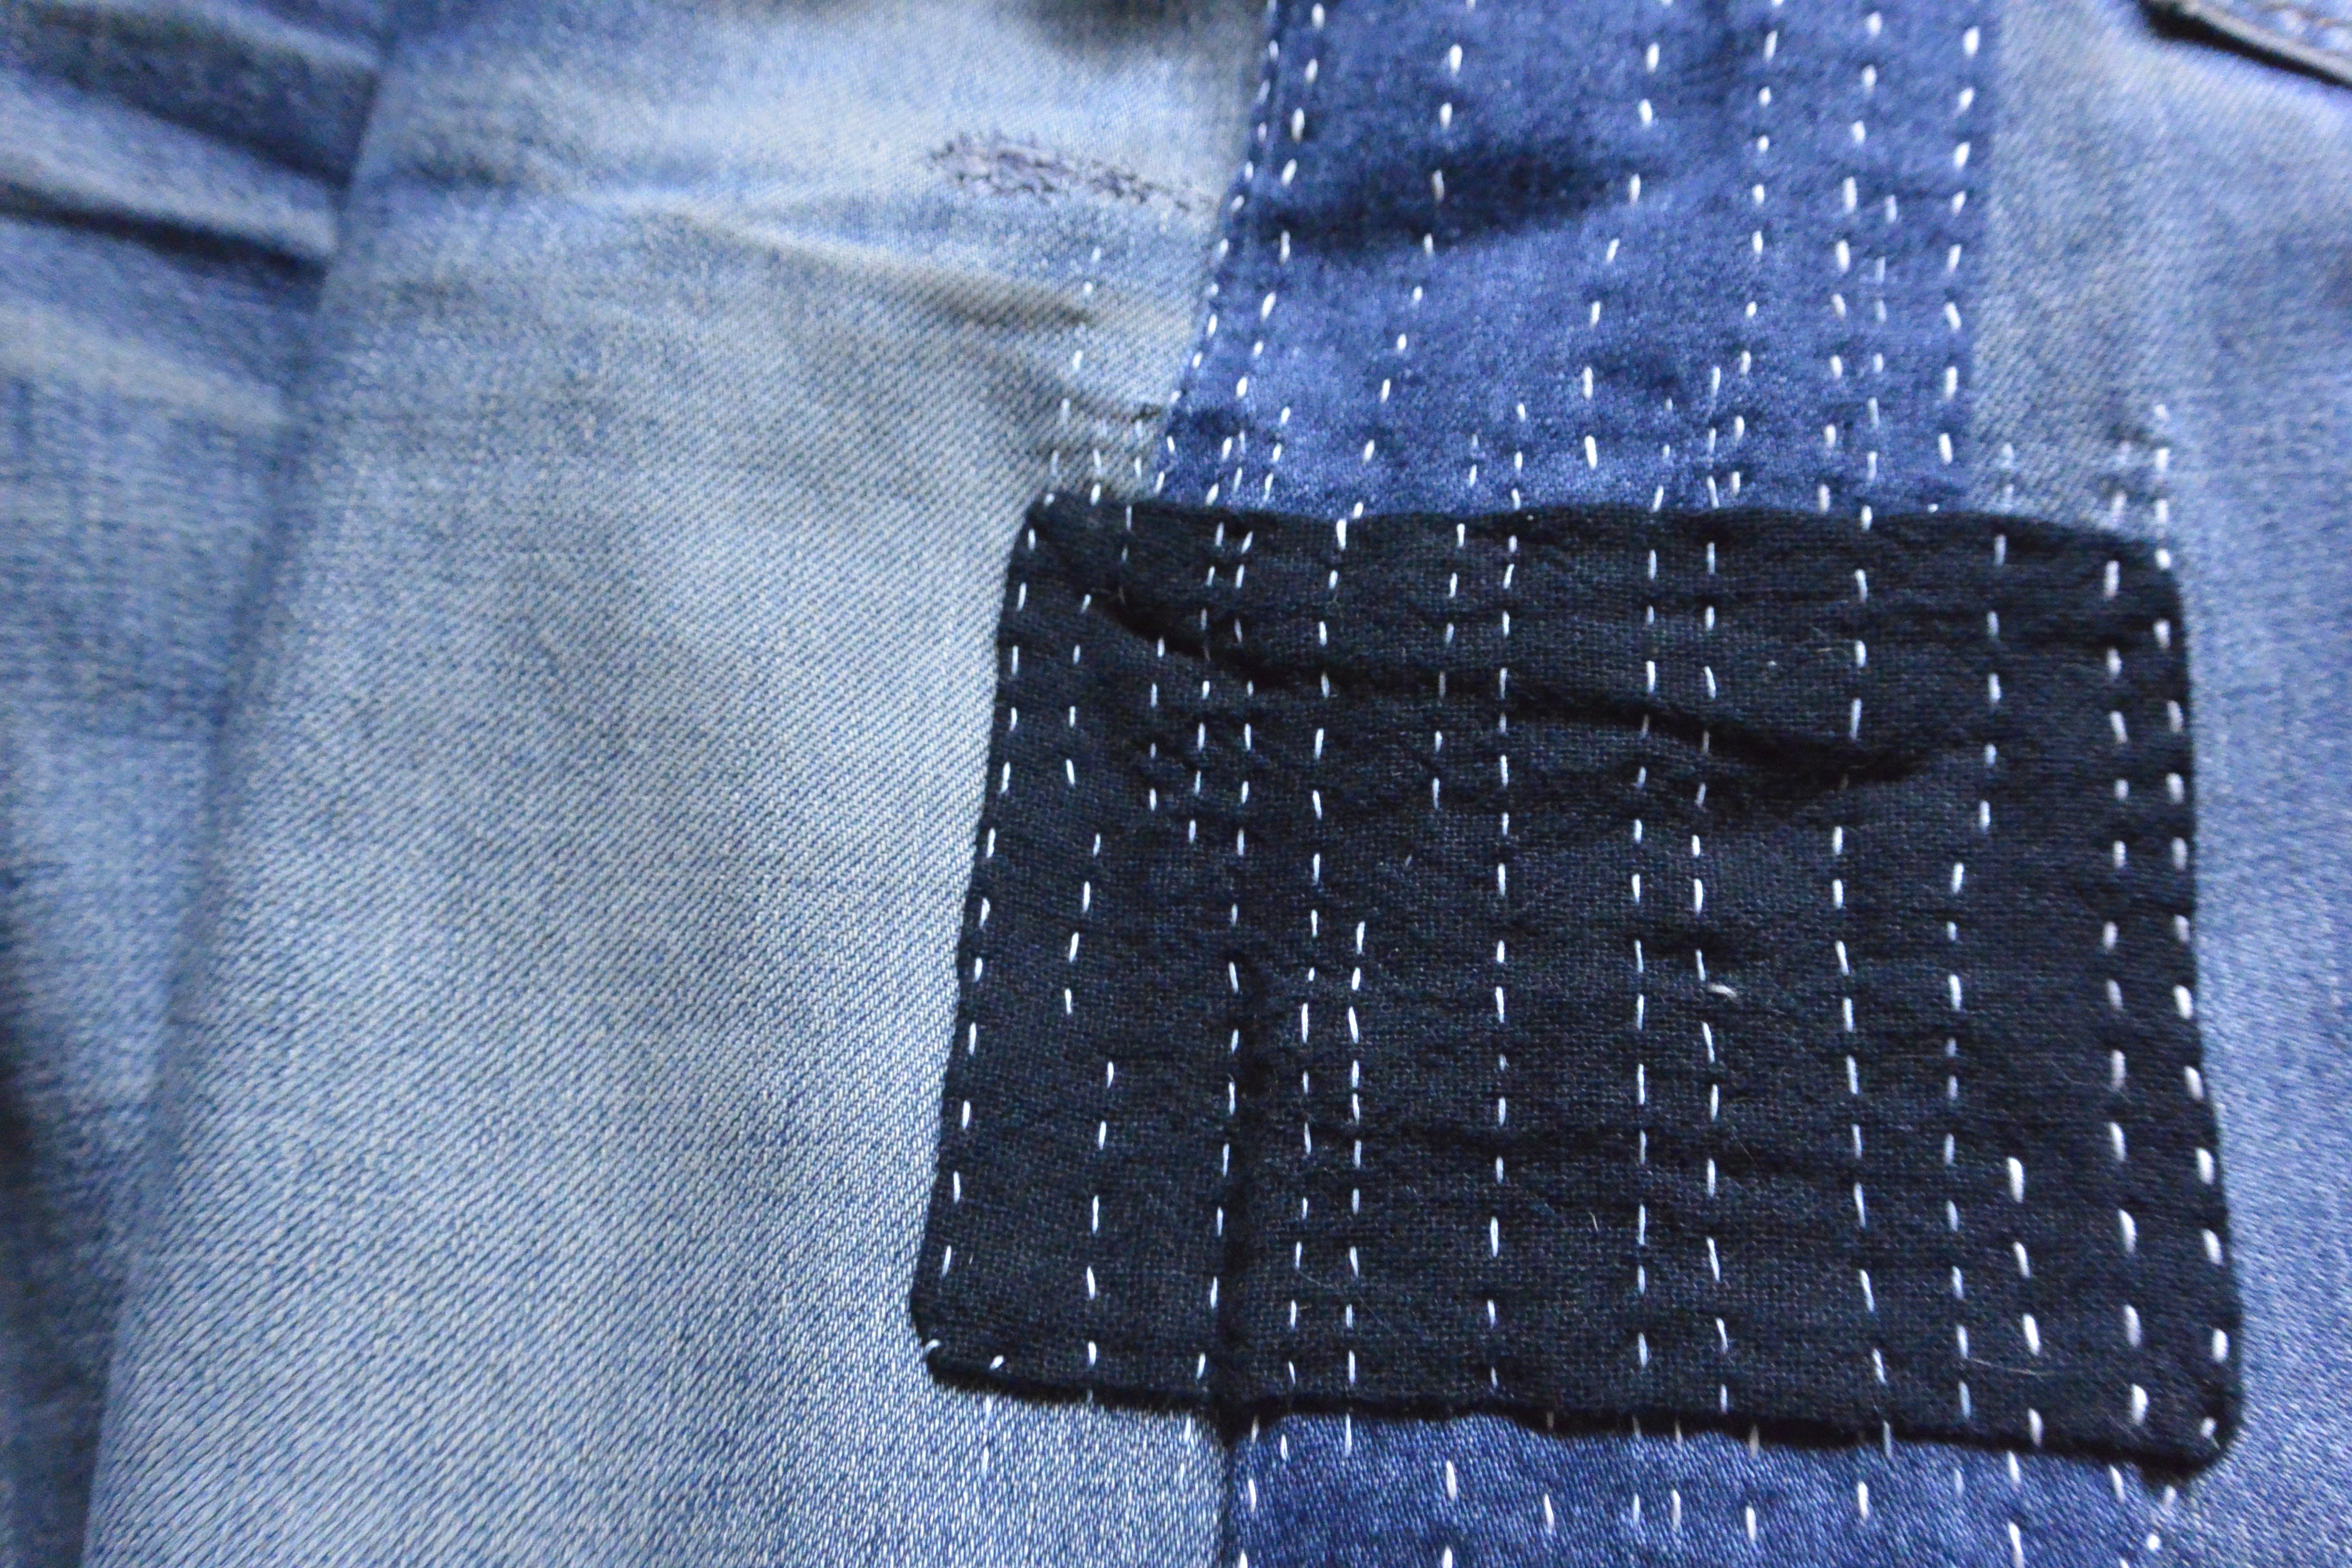 I was going for a very basic sashiko or kantha kind of look but it was quite time consuming and denim is pretty tough to hand stitch! So there is less stitching than I’d planned.
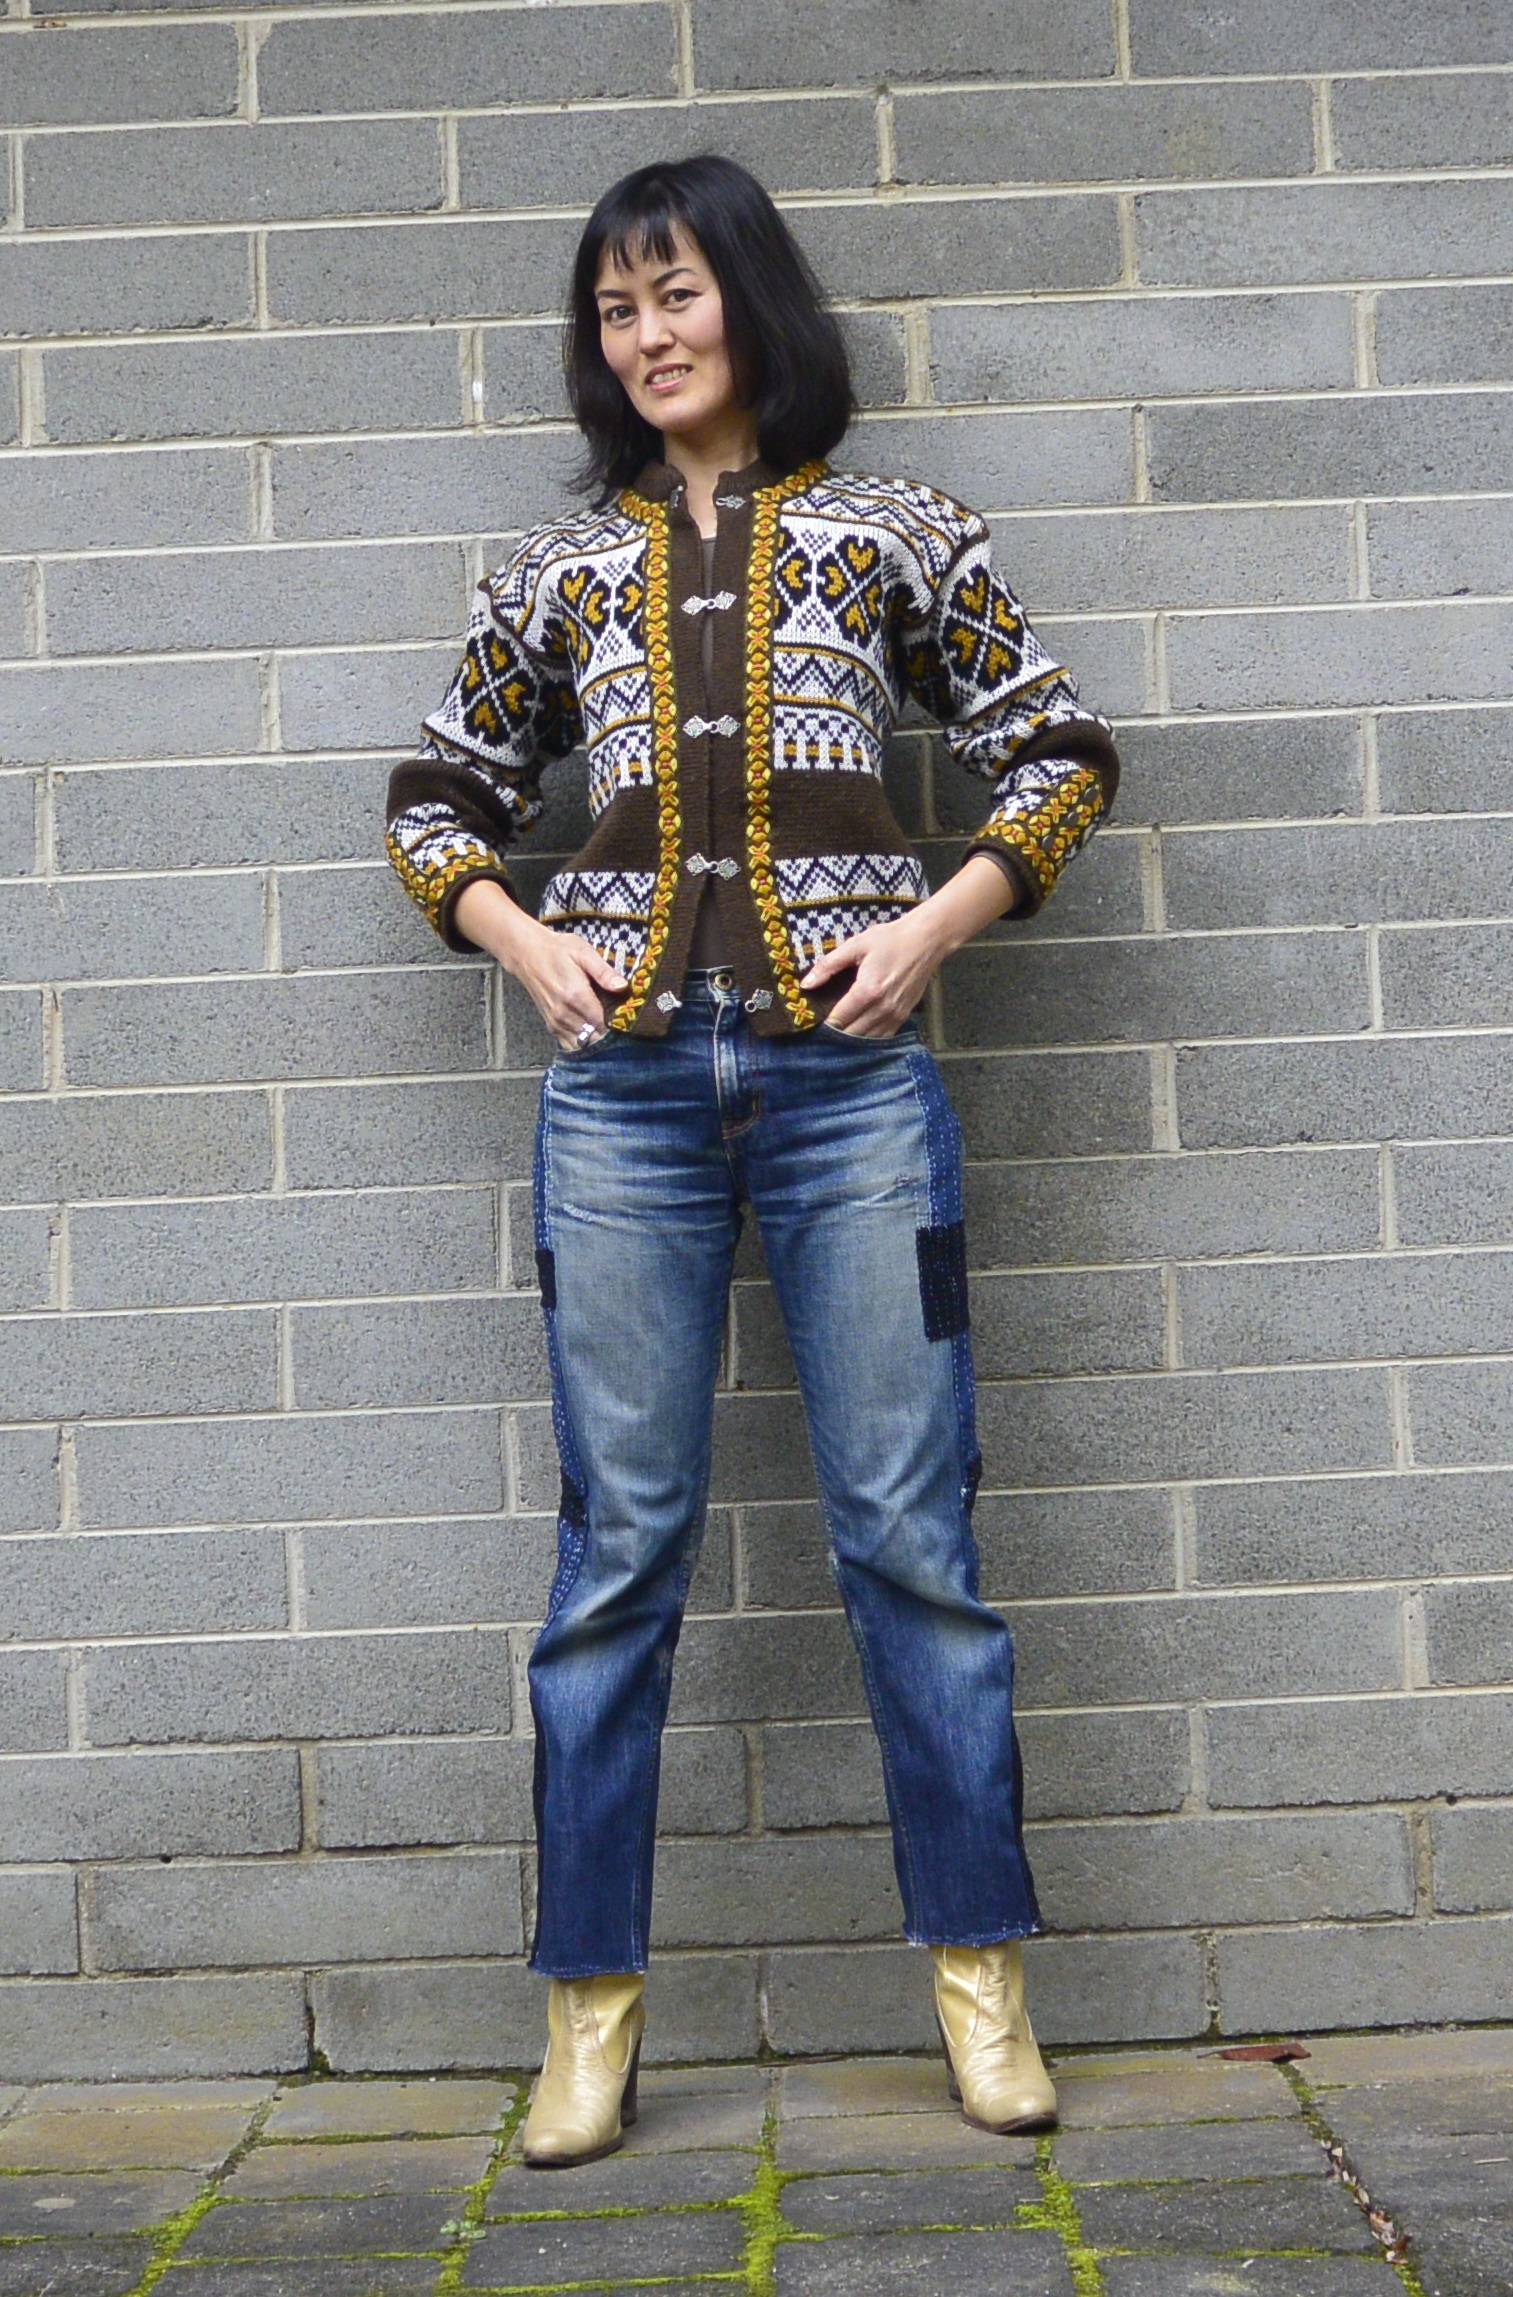
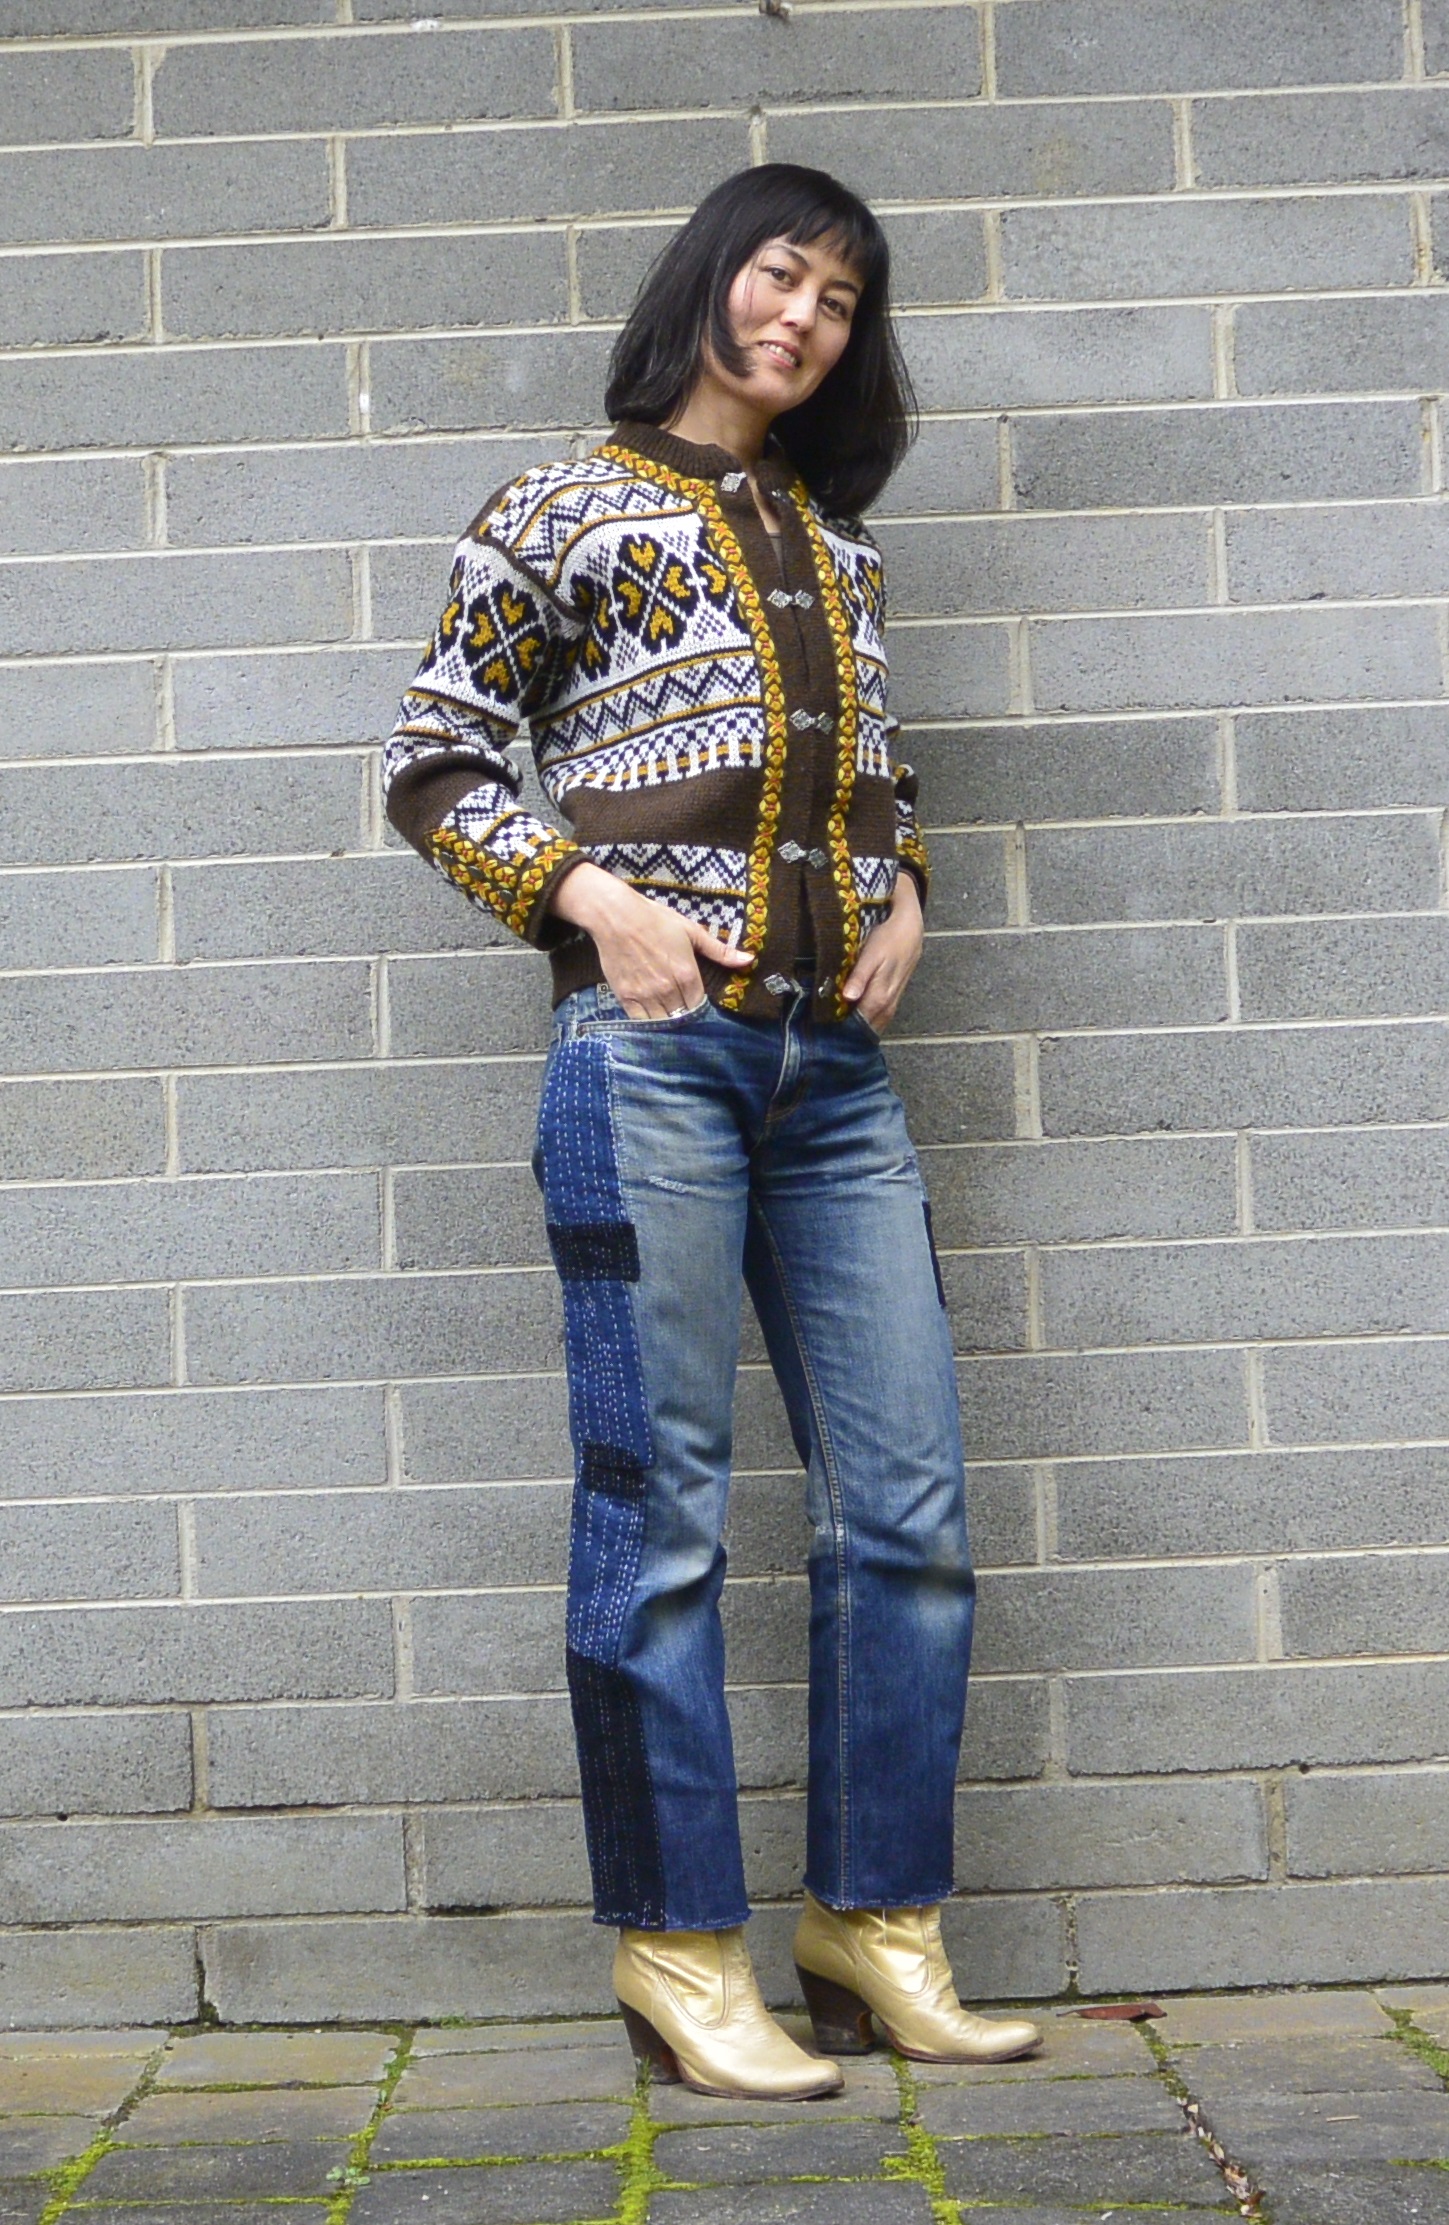 I’m still quite pleased with how these turned out, though! And they should last a few more years yet, although into the future, they might end up being more patch than actual jeans!
 They’re not really finished as I’ll probably add patches to reinforce at least the knees and probably the butt, but seeing how long it’s taken to do this much, I’m going to take a little break. I actually trimmed off the hems of the jeans too, so I might use that bit of denim to patch up the other areas.

Oh, and the cardigan? It’s a traditional Norwegian design… I snapped it up at an opshop recently for $30. Yep, there I go, spending up big again…
Of course you don’t have to be busting out of your jeans to try this. I admit, I’ve seen this kind of thing all over style blogs and in fashion mags – boro is big, and even though I don’t normally follow trends, I like this one! If you have some jeans or a denim jacket that could do with a facelift, try stitching some patches on. There’s plenty of inspo on Pinterest – just search “boro”, “sashiko”, “patchwork” and so on. Happy stitching!
*I did consider buying new jeans, but buying new clothes requires so much thinking (I only want to buy ethically made, sustainable fashion) that this kind of seemed the easier option (plus, it was free, and gave me an excuse to sit in front of crappy TV)! There are quite a few good denim brands around, though, and actually quite a few based in Melbourne, so if you’re looking for new jeans, you might like this article from one of my work colleagues.
I love clever fixes like this: in one fell stroke, you’ve made your jeans more comfortable and turned them into a unique item of clothing. Perfection! ($150 sounds like a lot to me! It’s definitely worth keeping them alive – as it were – than starting again.)
Pingback: Every week is National Op Shop Week | Style Wilderness
Pingback: Normcore – but not as you know it | Style Wilderness