The caftan story continues
Hello! It’s your local crazy cat lady here, reporting on even more ways to refashion a caftan (so you can give your cat-walking outfits some variety, of course).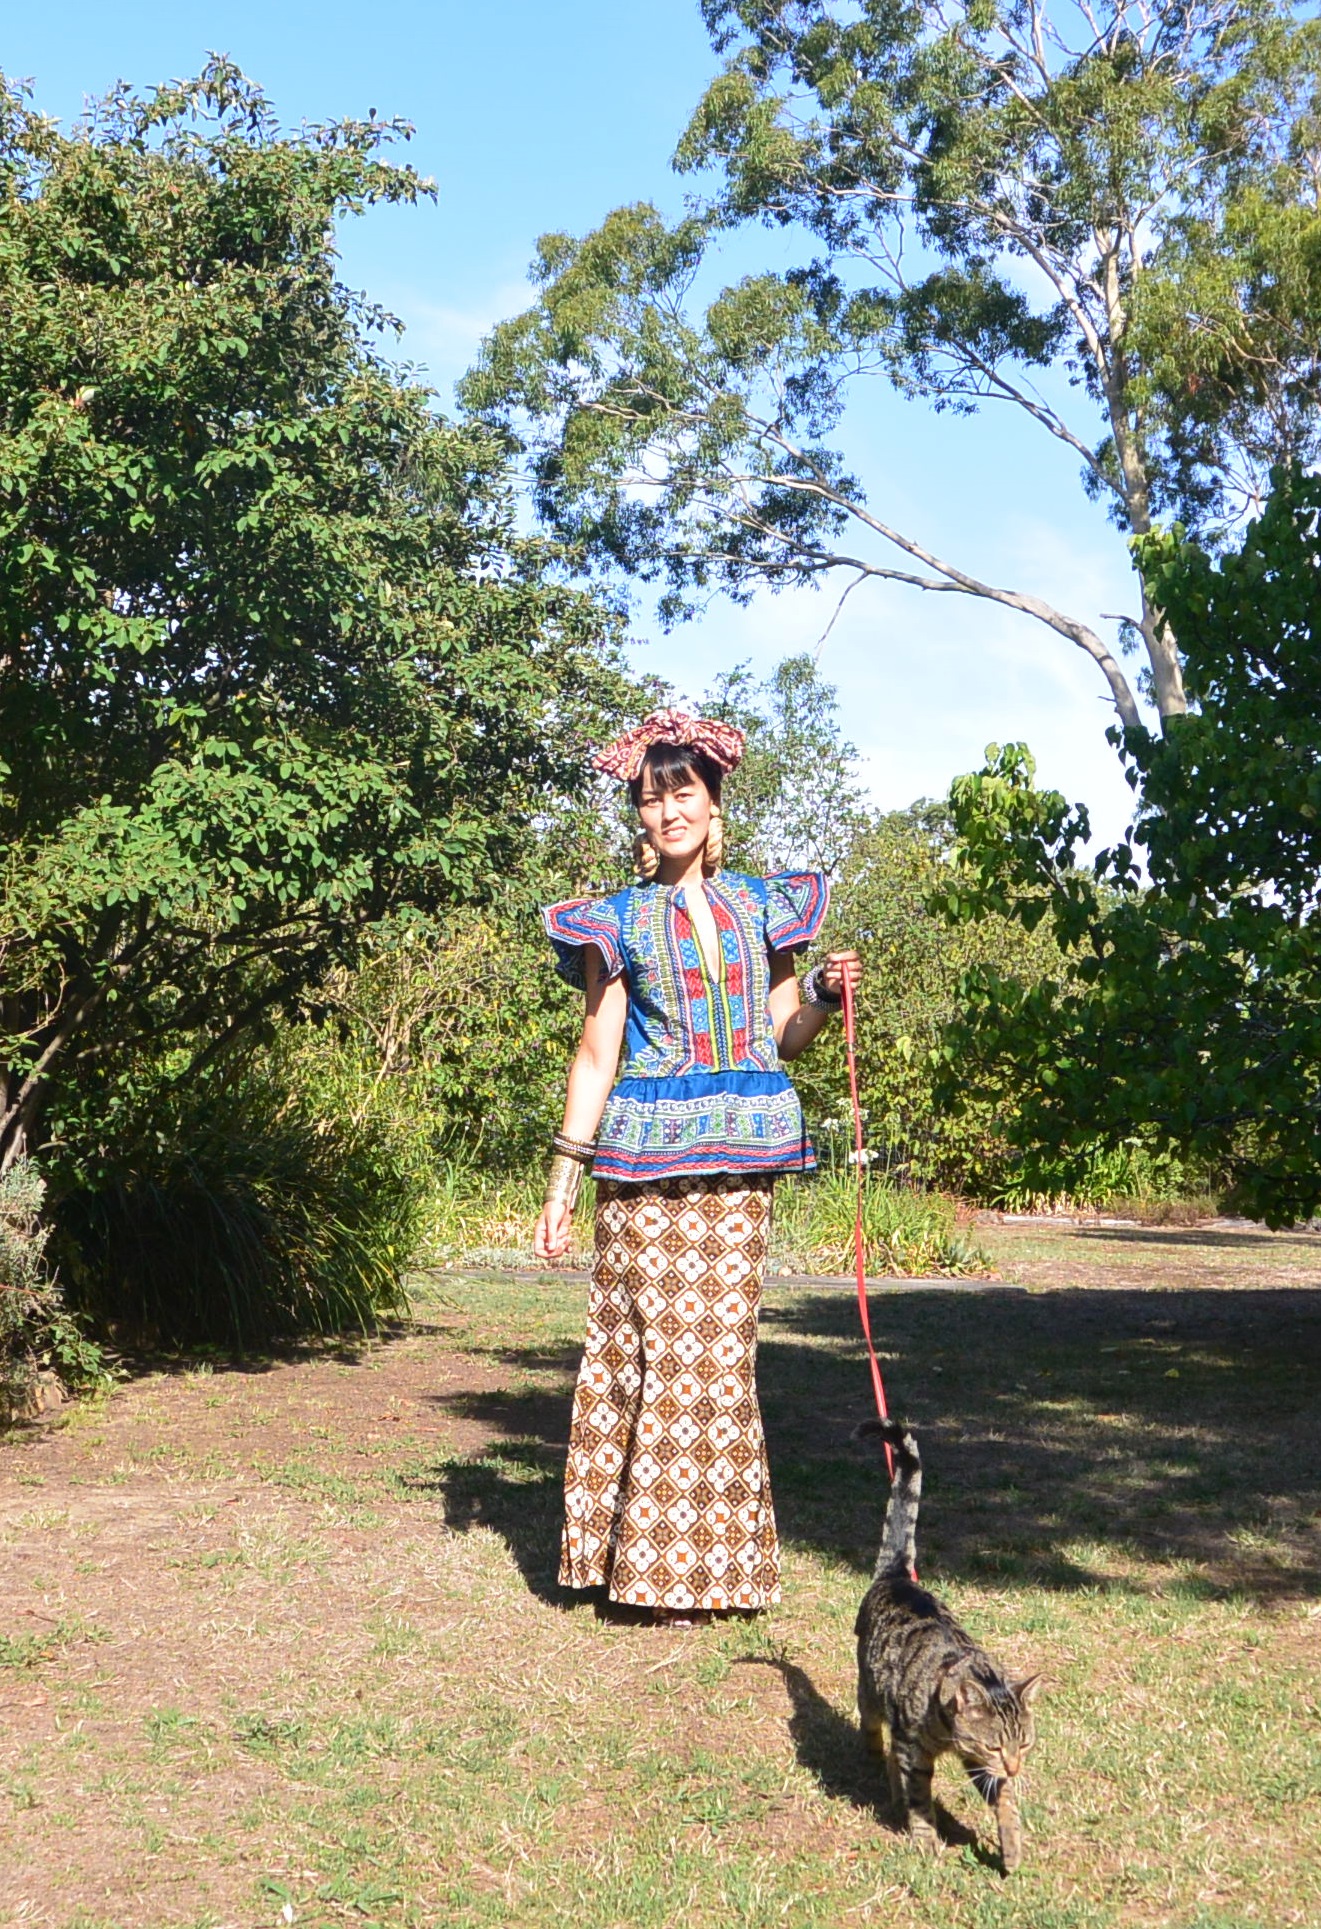
You might remember that after using the lower half of a floor-length, hooded, long-sleeved cover-up to create a mini-caftan, I was left with this.

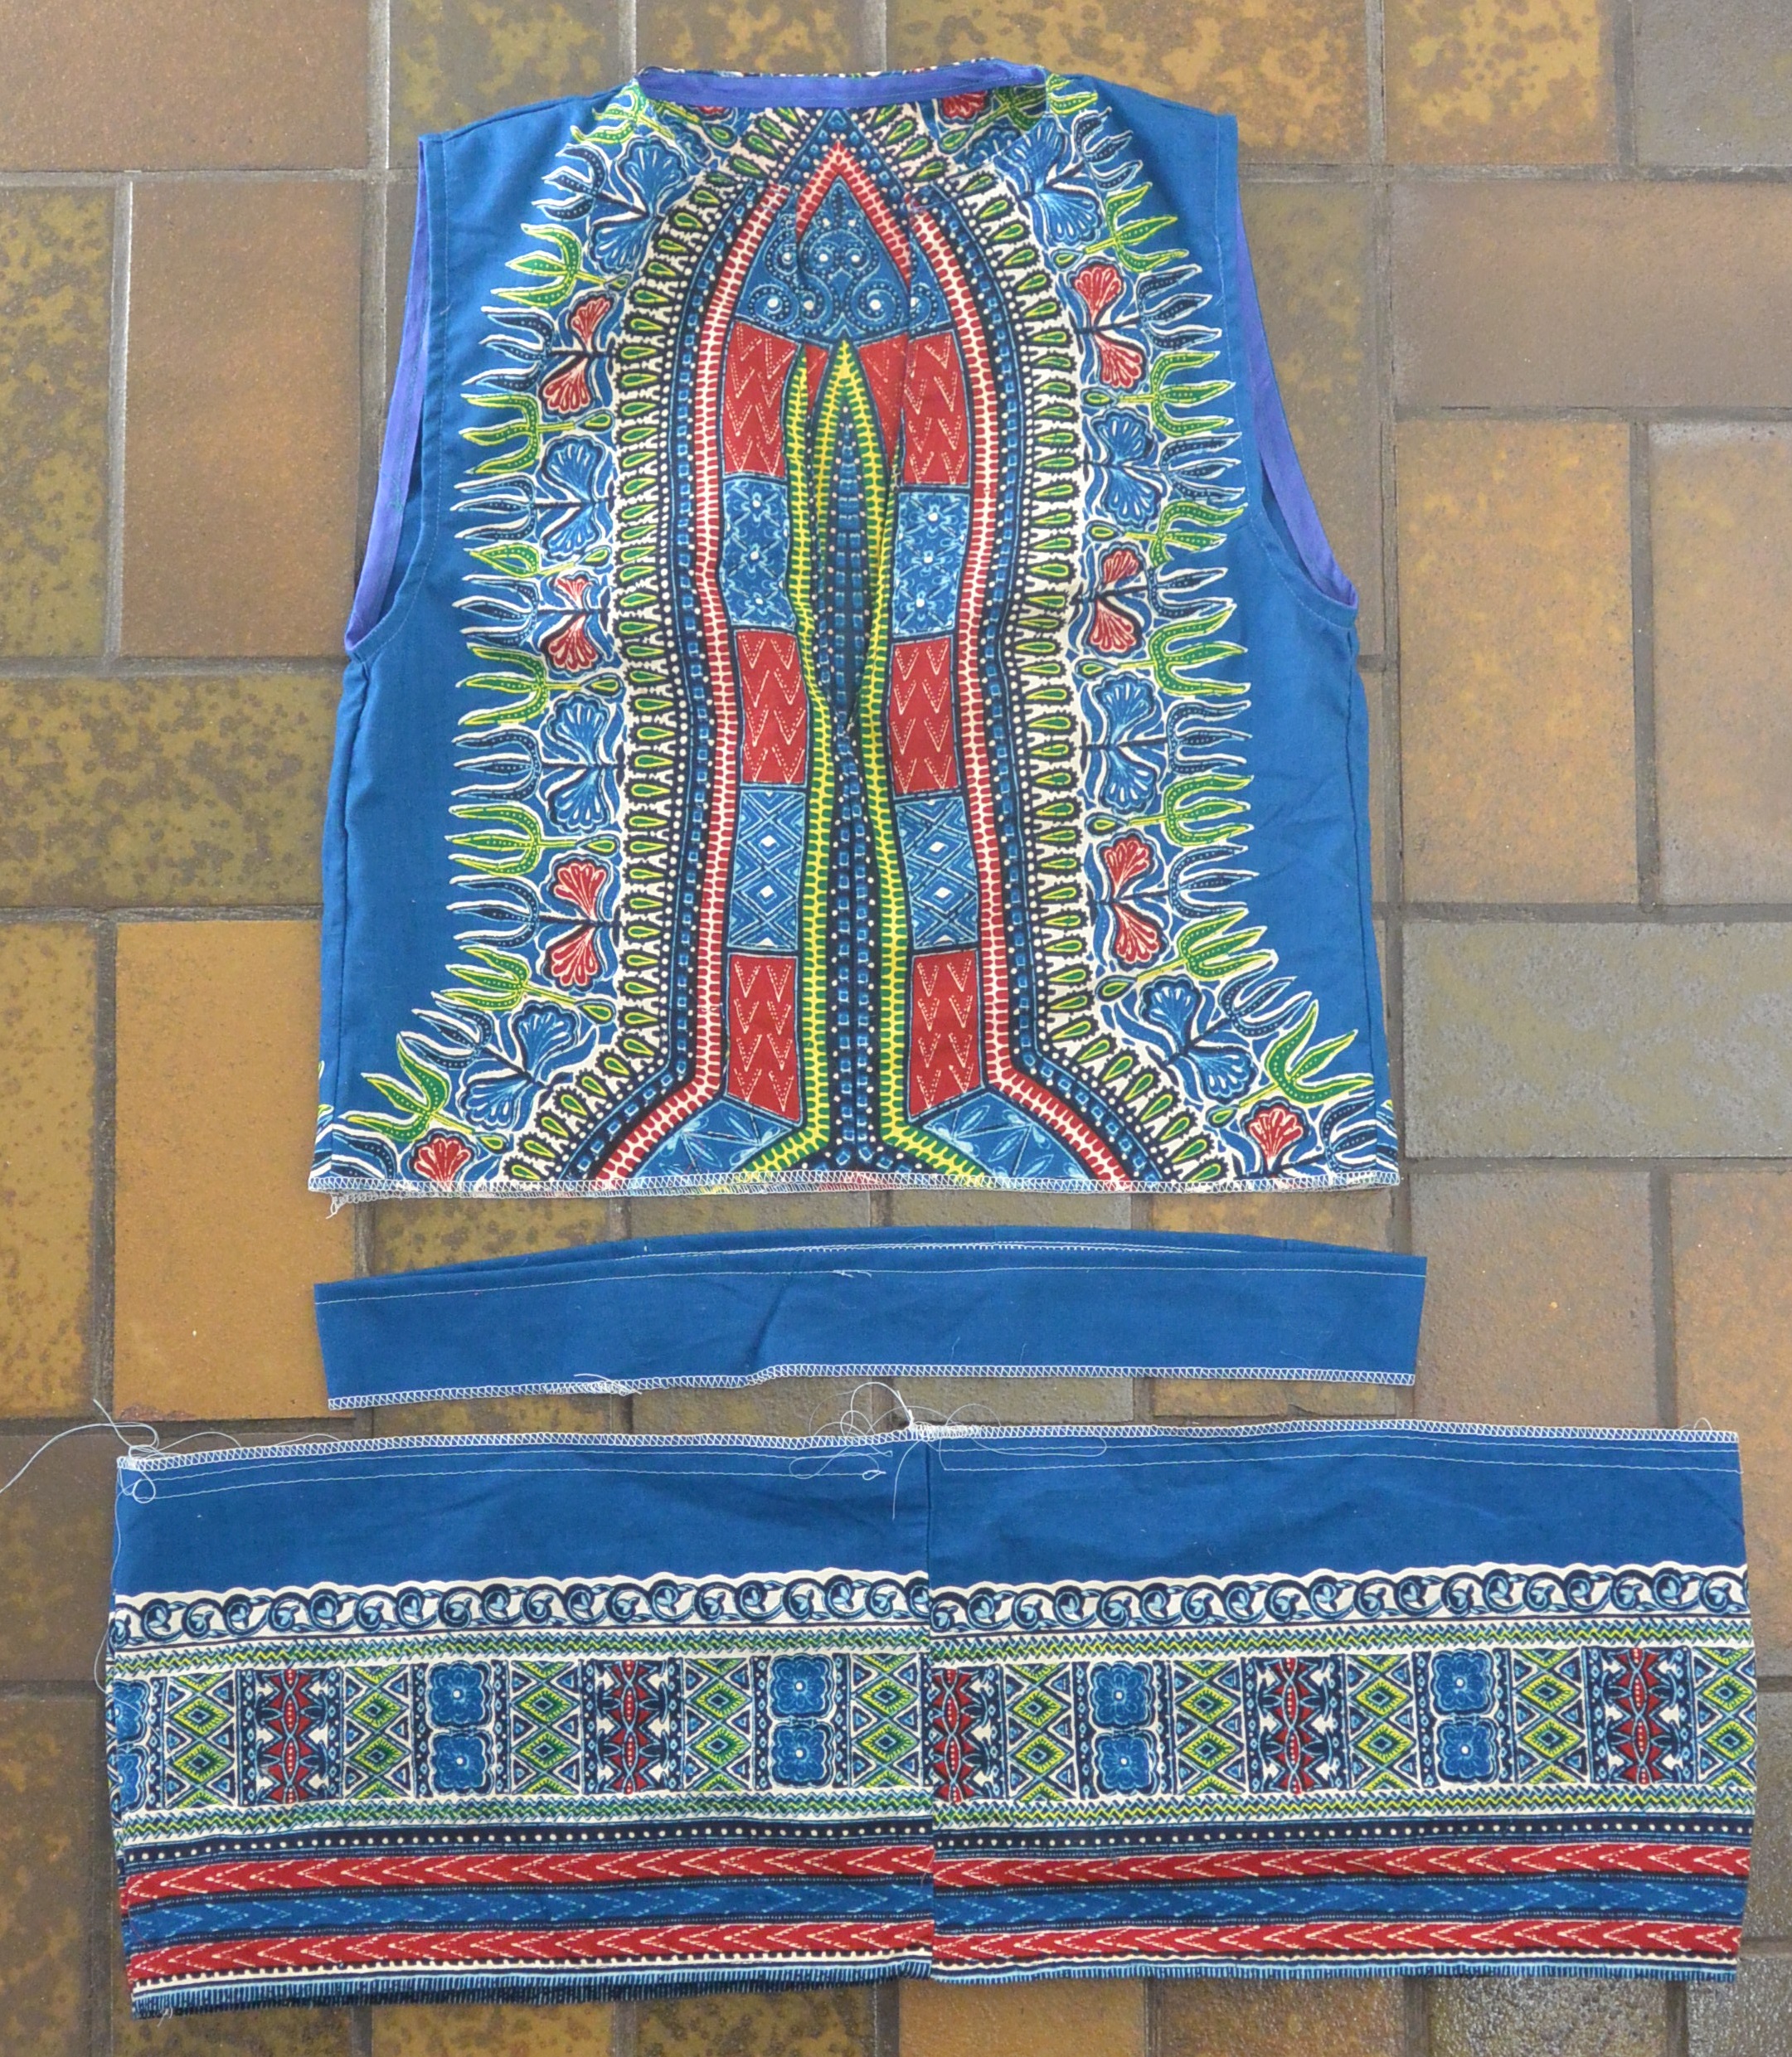
As-was, this top was a bit short, which is fine sometimes but not always appropriate. So I chopped off the sleeves and removed the hood to give me some material to play with. (I neatened the neck and armholes of the remaining sleeveless top using some bias binding. Apparently it looked like I needed help with ironing the bias binding.)

The hood was made from two squarish pieces of fabric joined together so I unpicked them, cut them along the horizontal and sewed the ends together to form long rectangles to create ruffles for the shoulders. Shoulder ruffles don’t help if a top is too short, I hear you say, but wait, I’m getting to that!
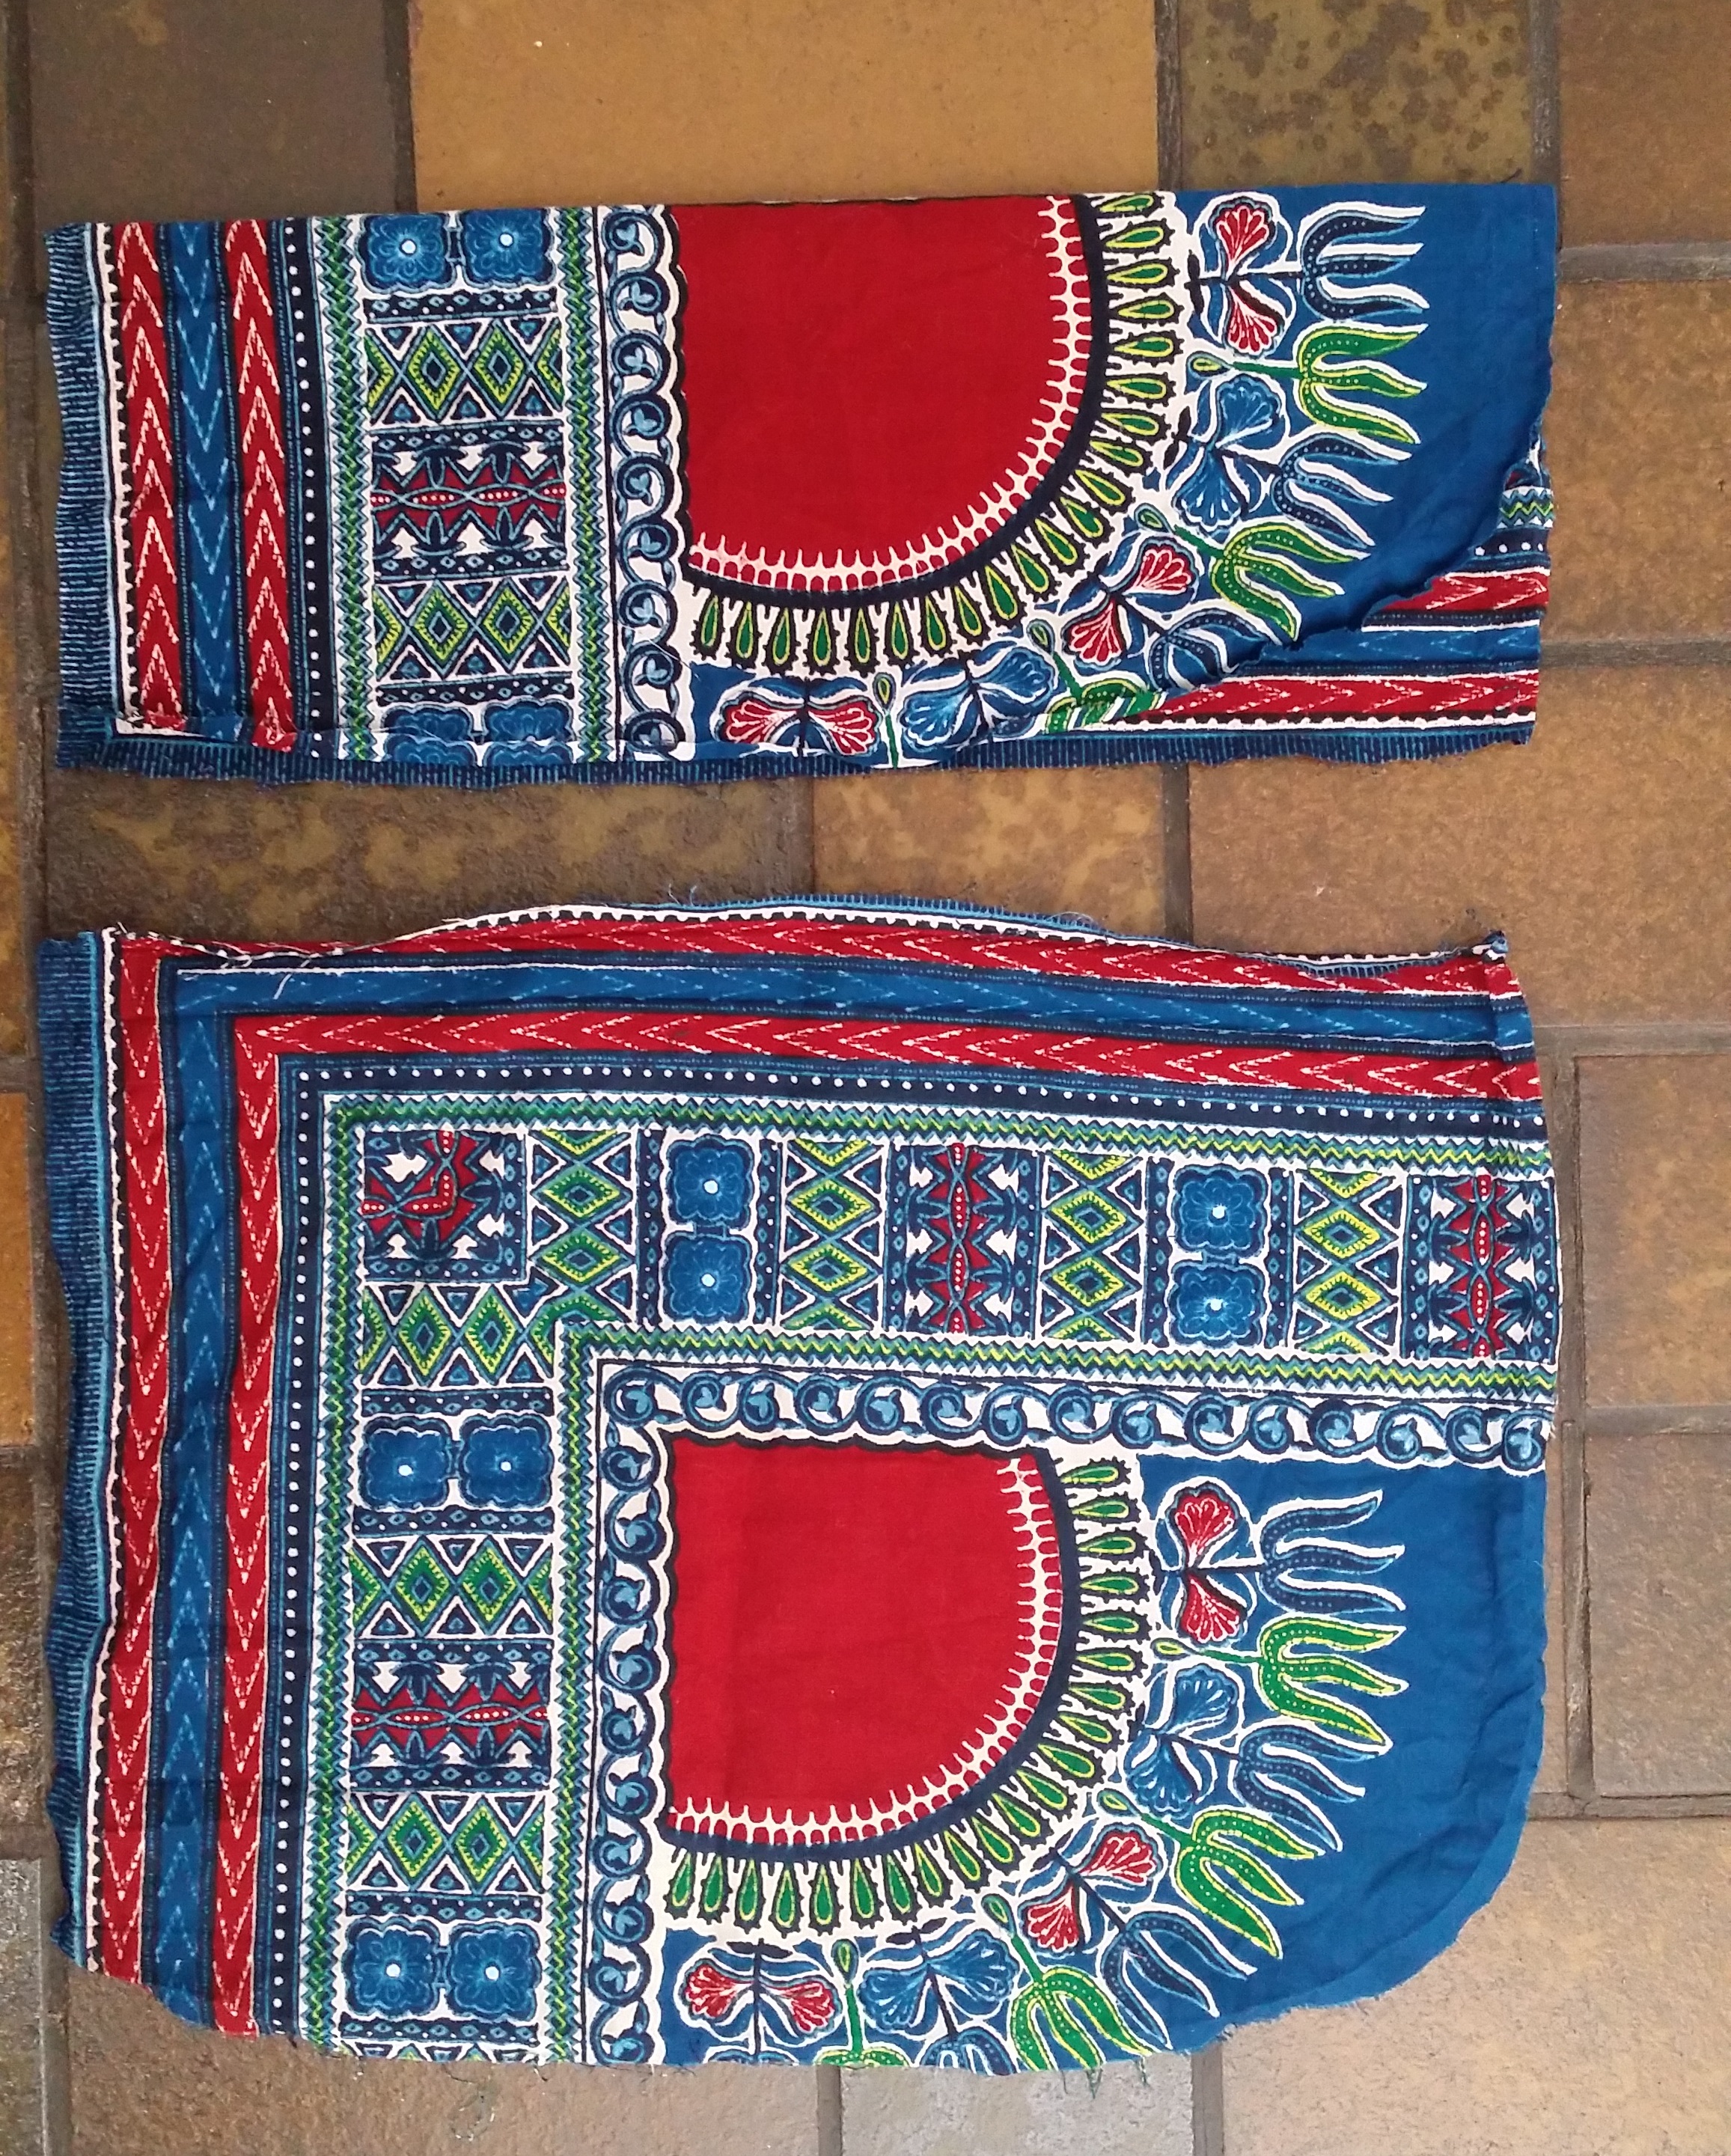
The two pieces of the hood section, separated. The top piece is folded in half – I cut along this fold on both pieces.
As someone who likes to keep their options open when it comes to clothes, these were not just going to be any old ruffles – I made them detachable so I could wear them or not depending on my whim. Same goes for the detachable peplum that I made from the sleeve fabric and that was going to solve the too-short issue. (I have made a detachable peplum before, by the way: here and here.)
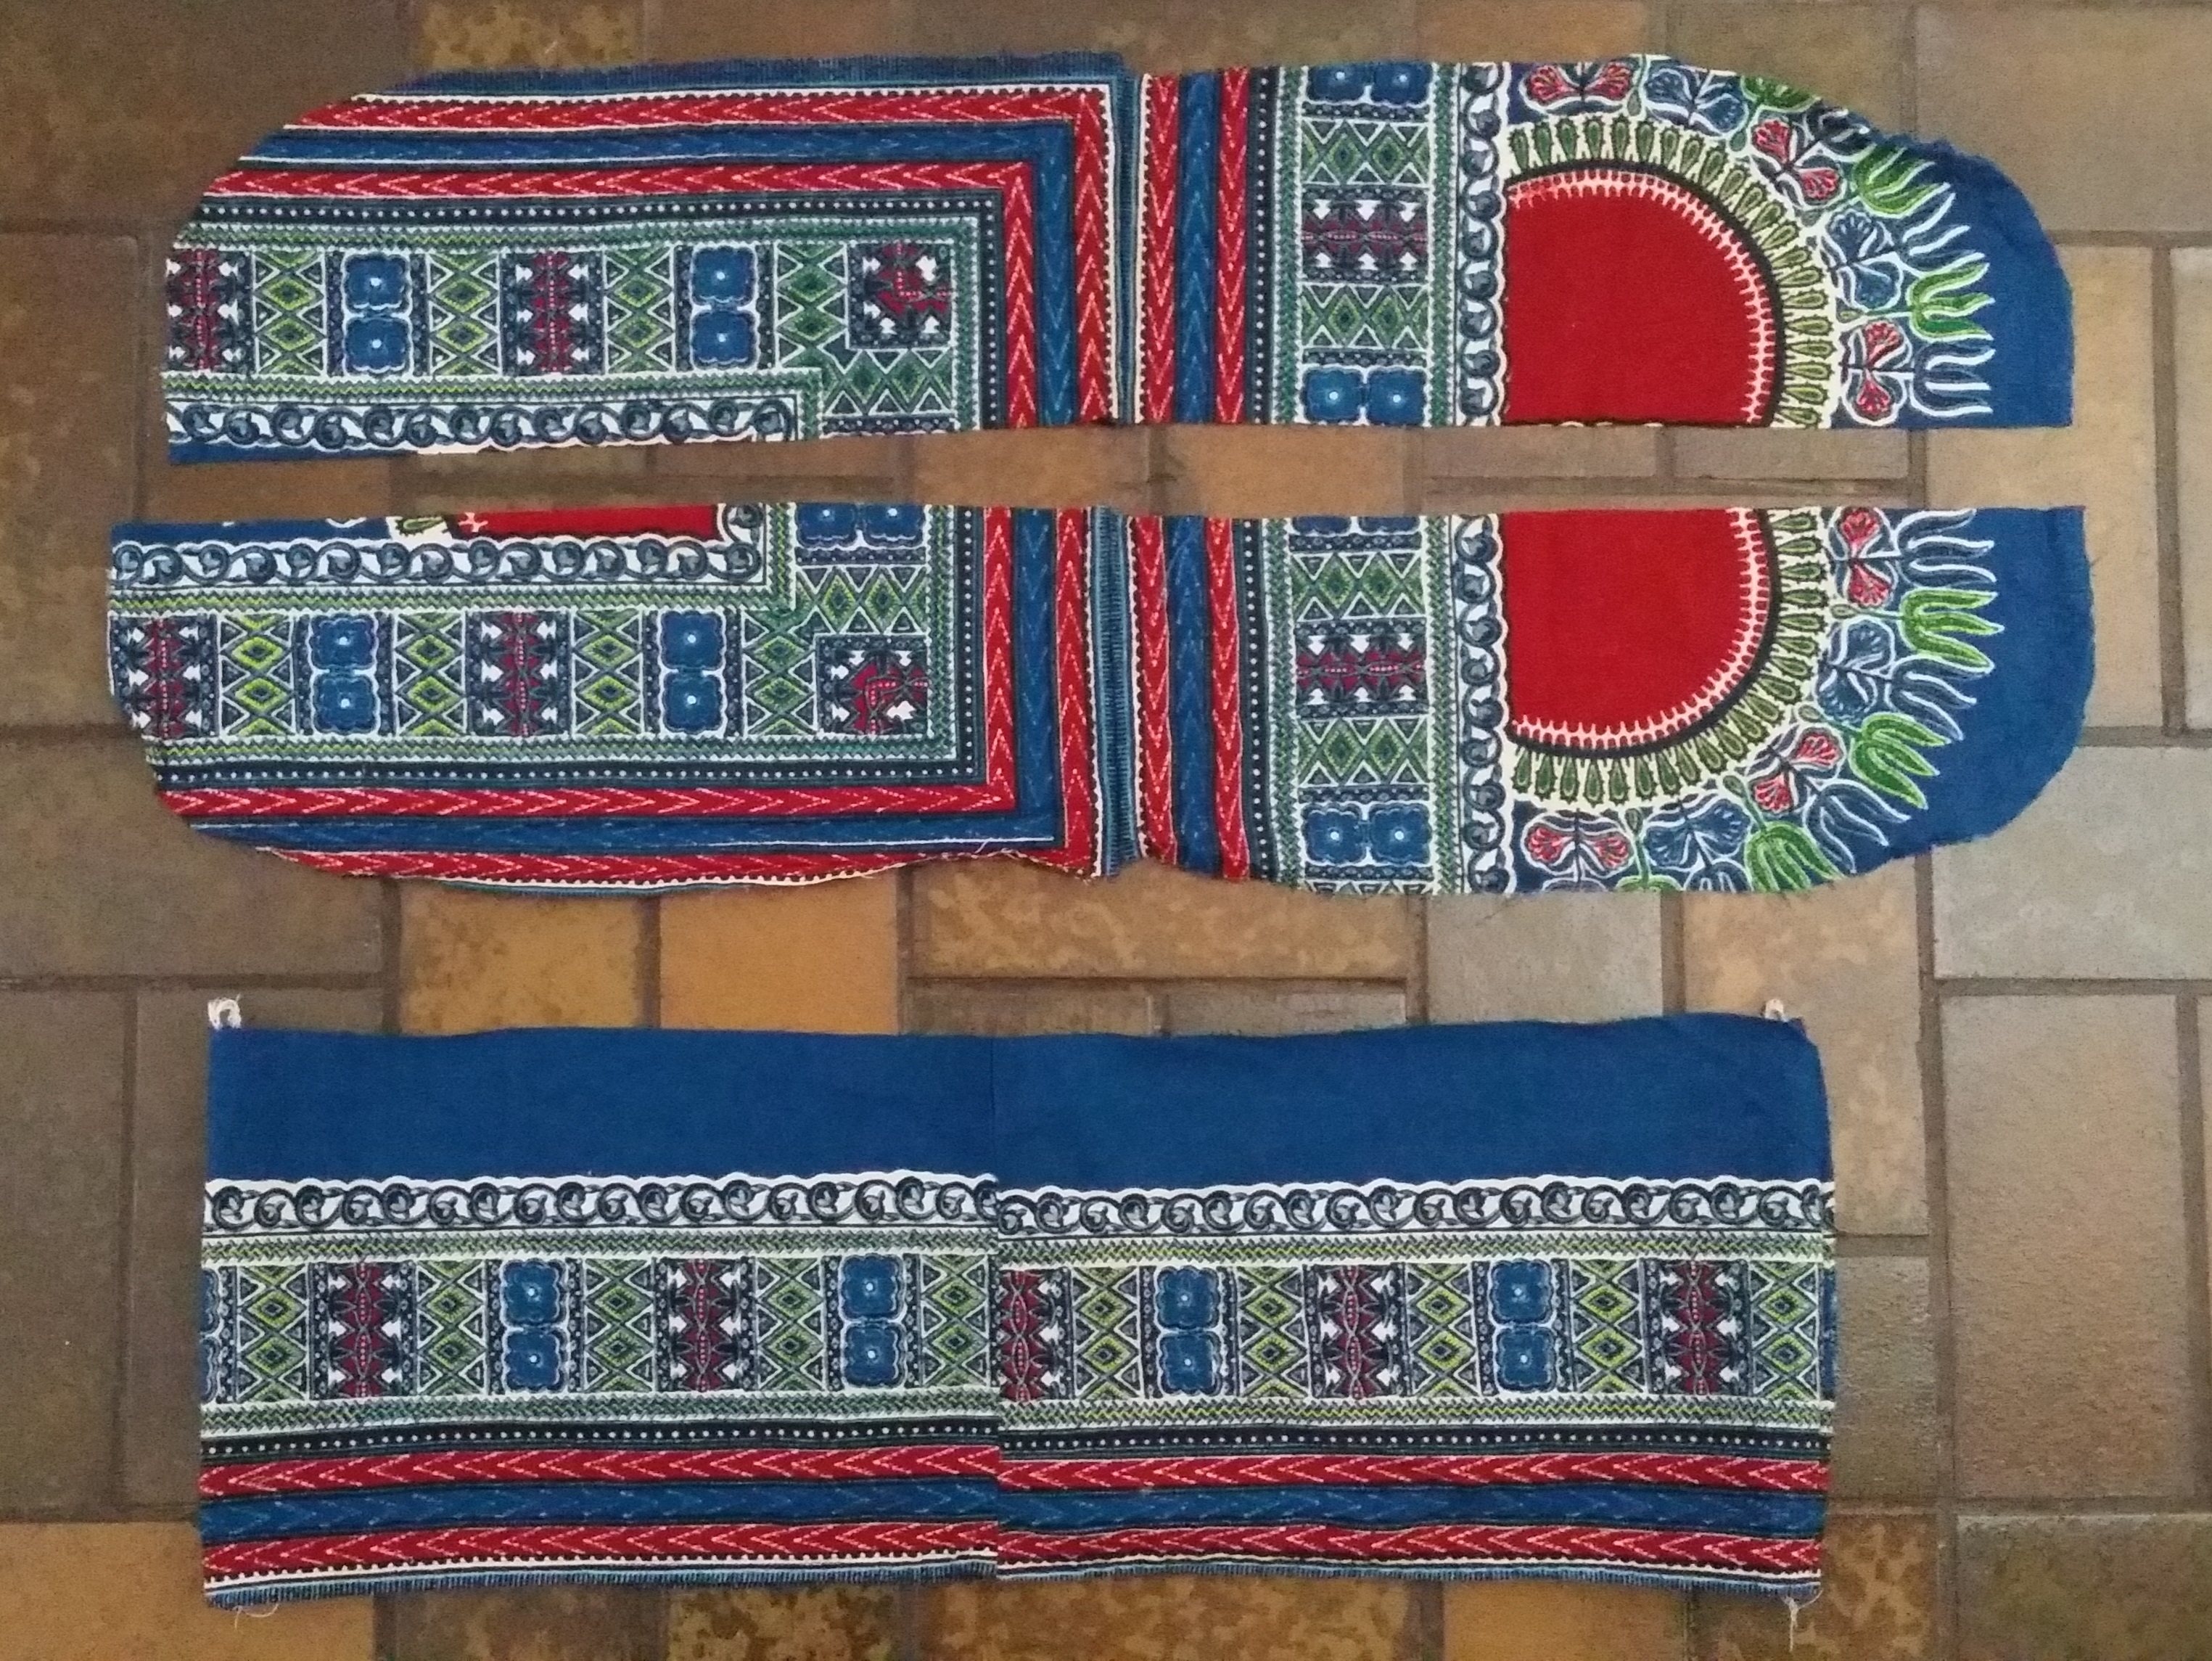
I also unpicked the sleeves, trimmed the fabric into shape and used it to create a big loop. This photo shows the two sleeve ruffles at the top and the peplum at the bottom, before gathering stitches were added.
I used excess fabric to create a narrow loop the same measurement as the bottom of the garment (the waist area) and used the sleeve material to create a wide loop. I gathered one edge of the wide loop and sewed it to the narrow loop to form my detachable peplum.
 I made the detachable ruffles in the same way, gathering one edge of the hood fabric and attaching it to a strip that would fit over my shoulder.

I then added press studs along the fabric strips of the peplum and the shoulder ruffles and corresponding press studs along the waistline and the shoulders of the top. And now I have a top that I can wear four ways!
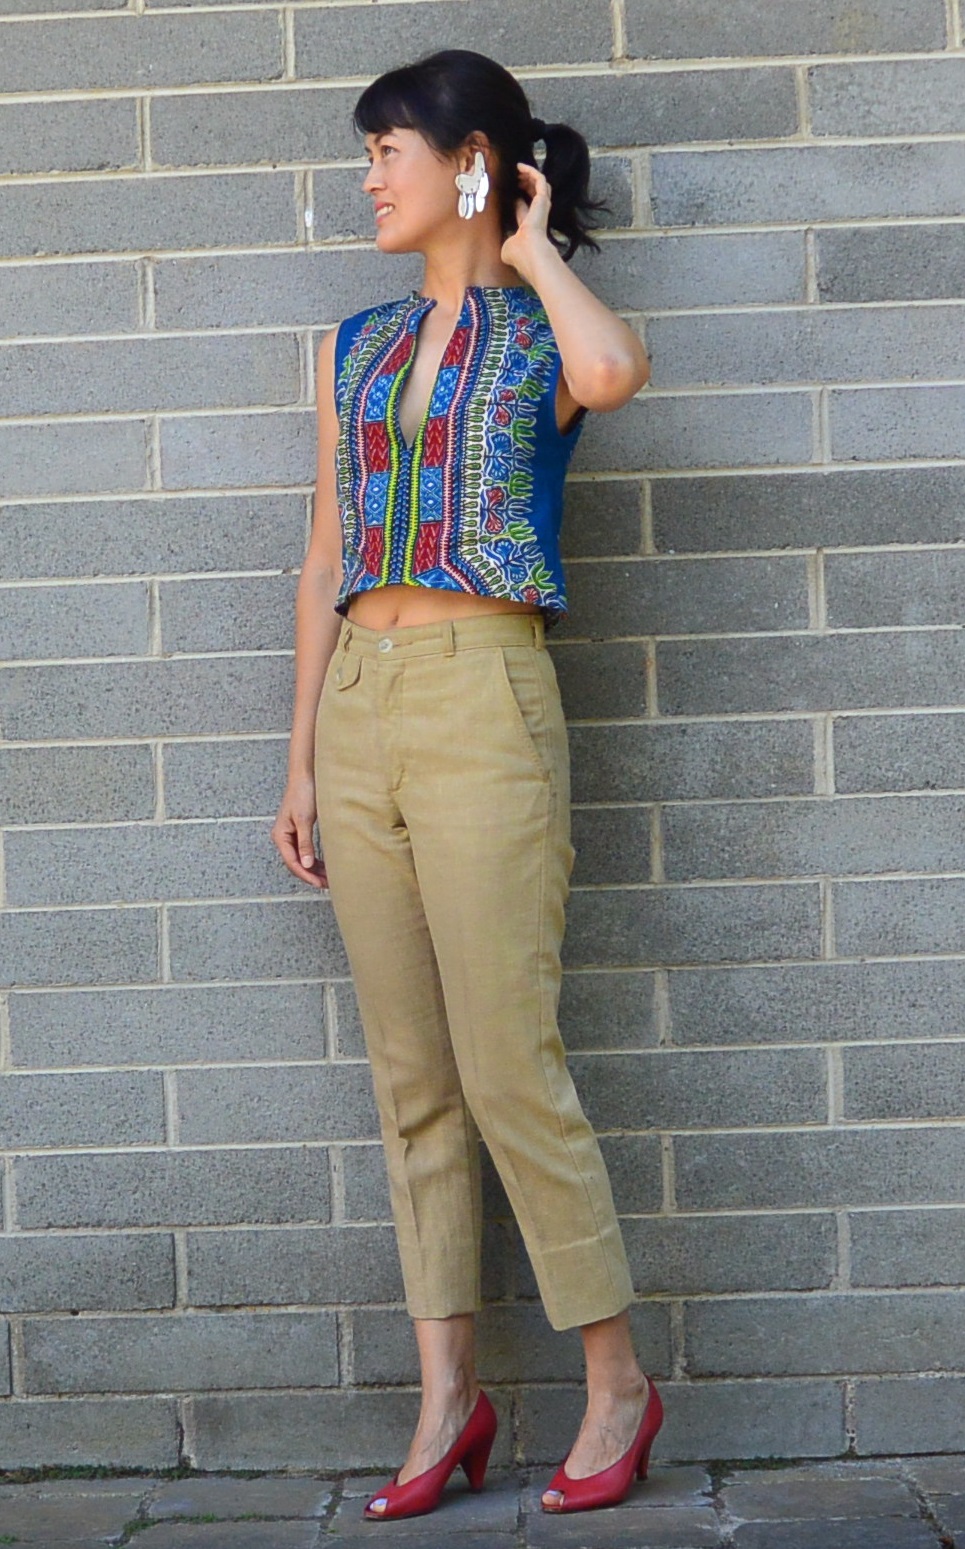
As the basic shell top with fairly high-waisted pants so not too much is on show…

With the shoulder ruffles attached. This works best when you need to balance out pants or a skirt with a wider silhouette (I have narrow shoulders so sometimes just a plain sleeveless top makes me look scrawny).
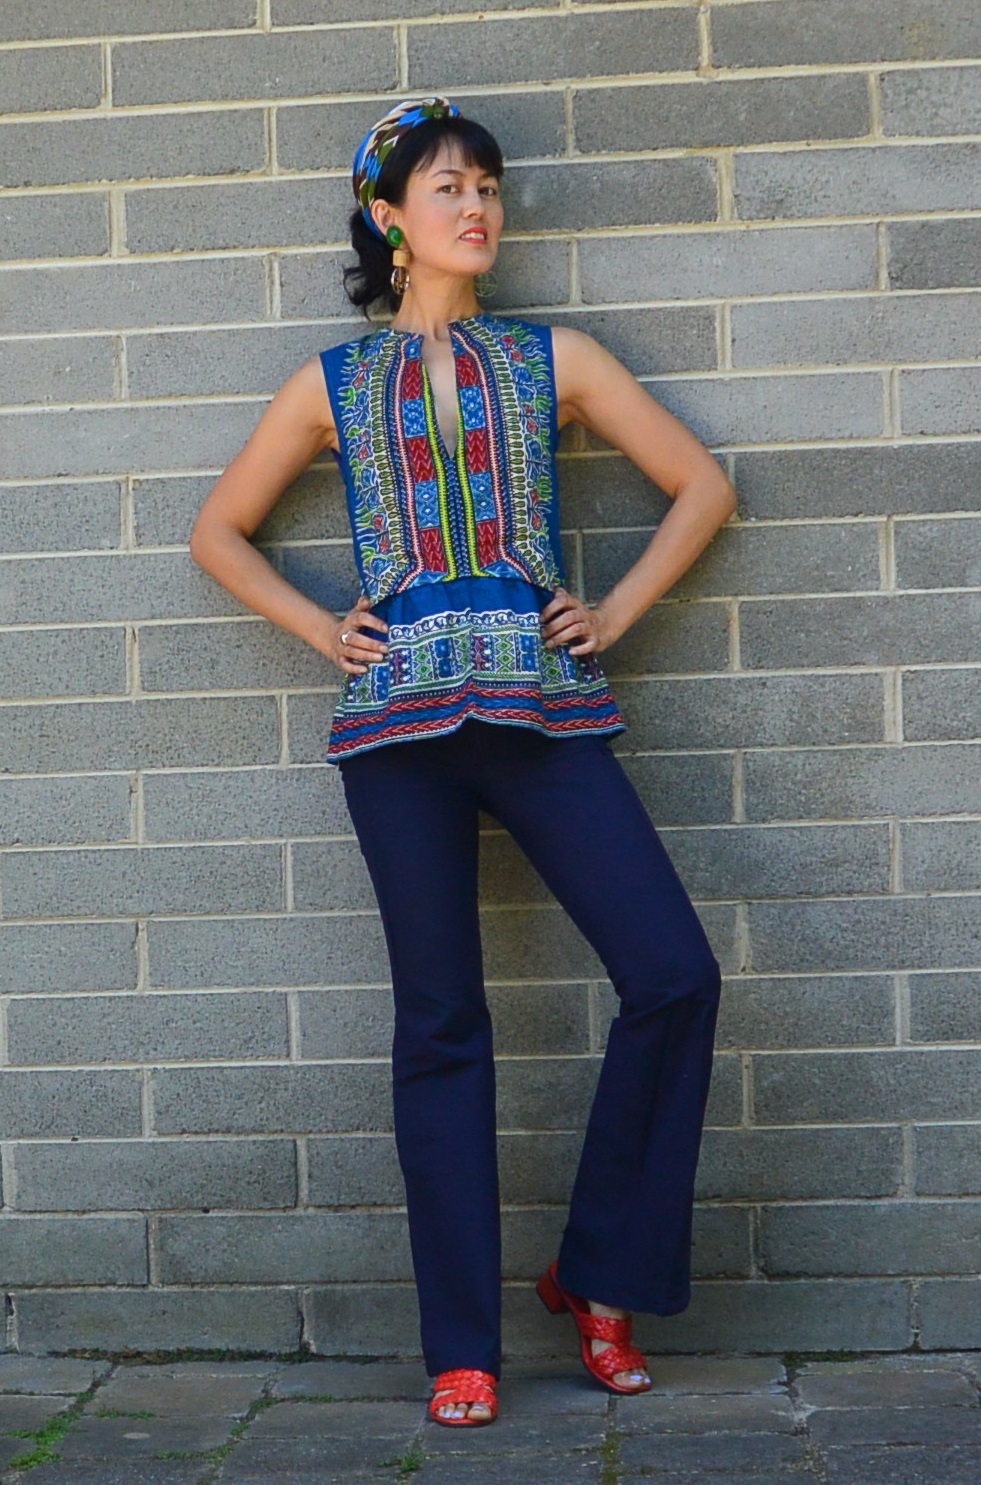
With the peplum attached. These pants are a bit tight around the waist and hips now but the peplum covers that up nicely!
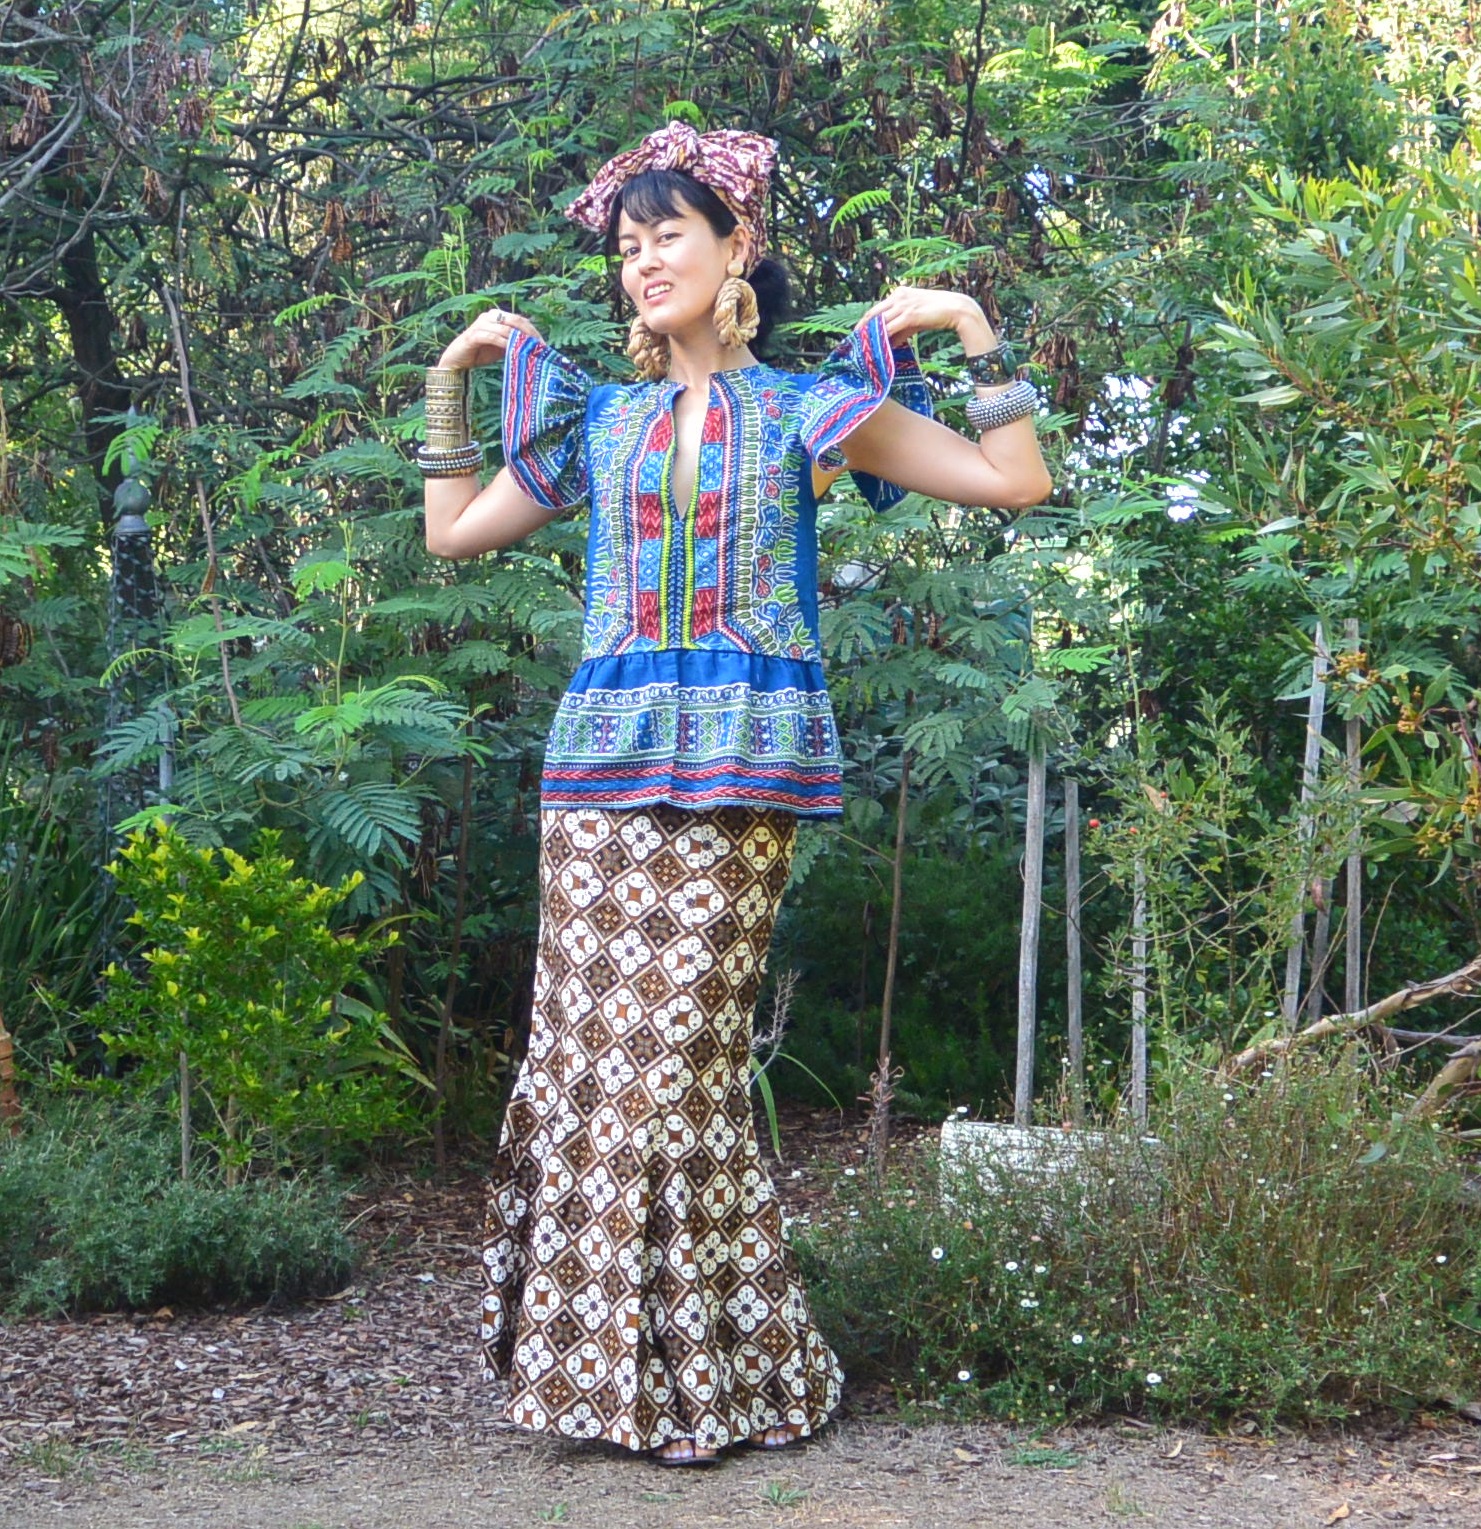
With EVERYTHING! Probably best for when you’re in a kind of out-there mood. Out-there in this particular case being out there in the backyard, but I’d happily wear this look out to lunch or a party in summer.
Not long after I finished this particular DIY project (back in February) I found out about the Slow Clothing Project and decided to submit it along with some background about my love of refashioning. My post appeared on Textile Beat as part of Fashion Revolution Week last week – if you’d like to read it, click here. Some of the garments featured online in the Slow Clothing Project will be on display later in the year, possibly this one included, so when I find out more, I’ll let you know. And if you’ve got a Slow Clothing Project of your own happening, leave a comment telling us all about it!
Wow! so creative. I wish I had your skill since there are lots of old clothes I have in stock which is hard to part with because they are of good fabric materials. Your blog makes me want to go register myself into a sewing school to learn basics.
I’m glad you like my makeover of your caftan! You’re right, it’s so hard to get rid of things if they are in good quality fabric. Don’t throw them away, next time I visit Tokyo I can help you remake your clothes!